Upload multiple files using the Universal GUI


Userlevel 7
Badge +11

There is a lot of demand from the Thinkwise Community for easy uploading of multiple files via the Universal GUI; see this idea for example.

For the Web GUI, @Harm Horstman developed a great solution that leverages a custom upload page in a preview component, but unfortunately this solution is less suitable for the Universal GUI as it bypasses Indicium and requires a separate application to be installed on the web server.

Fortunately, it is relatively easy to develop a similar component that uses the Indicium API to upload files and integrate it in the Universal GUI. In this blog post we'll show you how to do that.


Click to enlarge

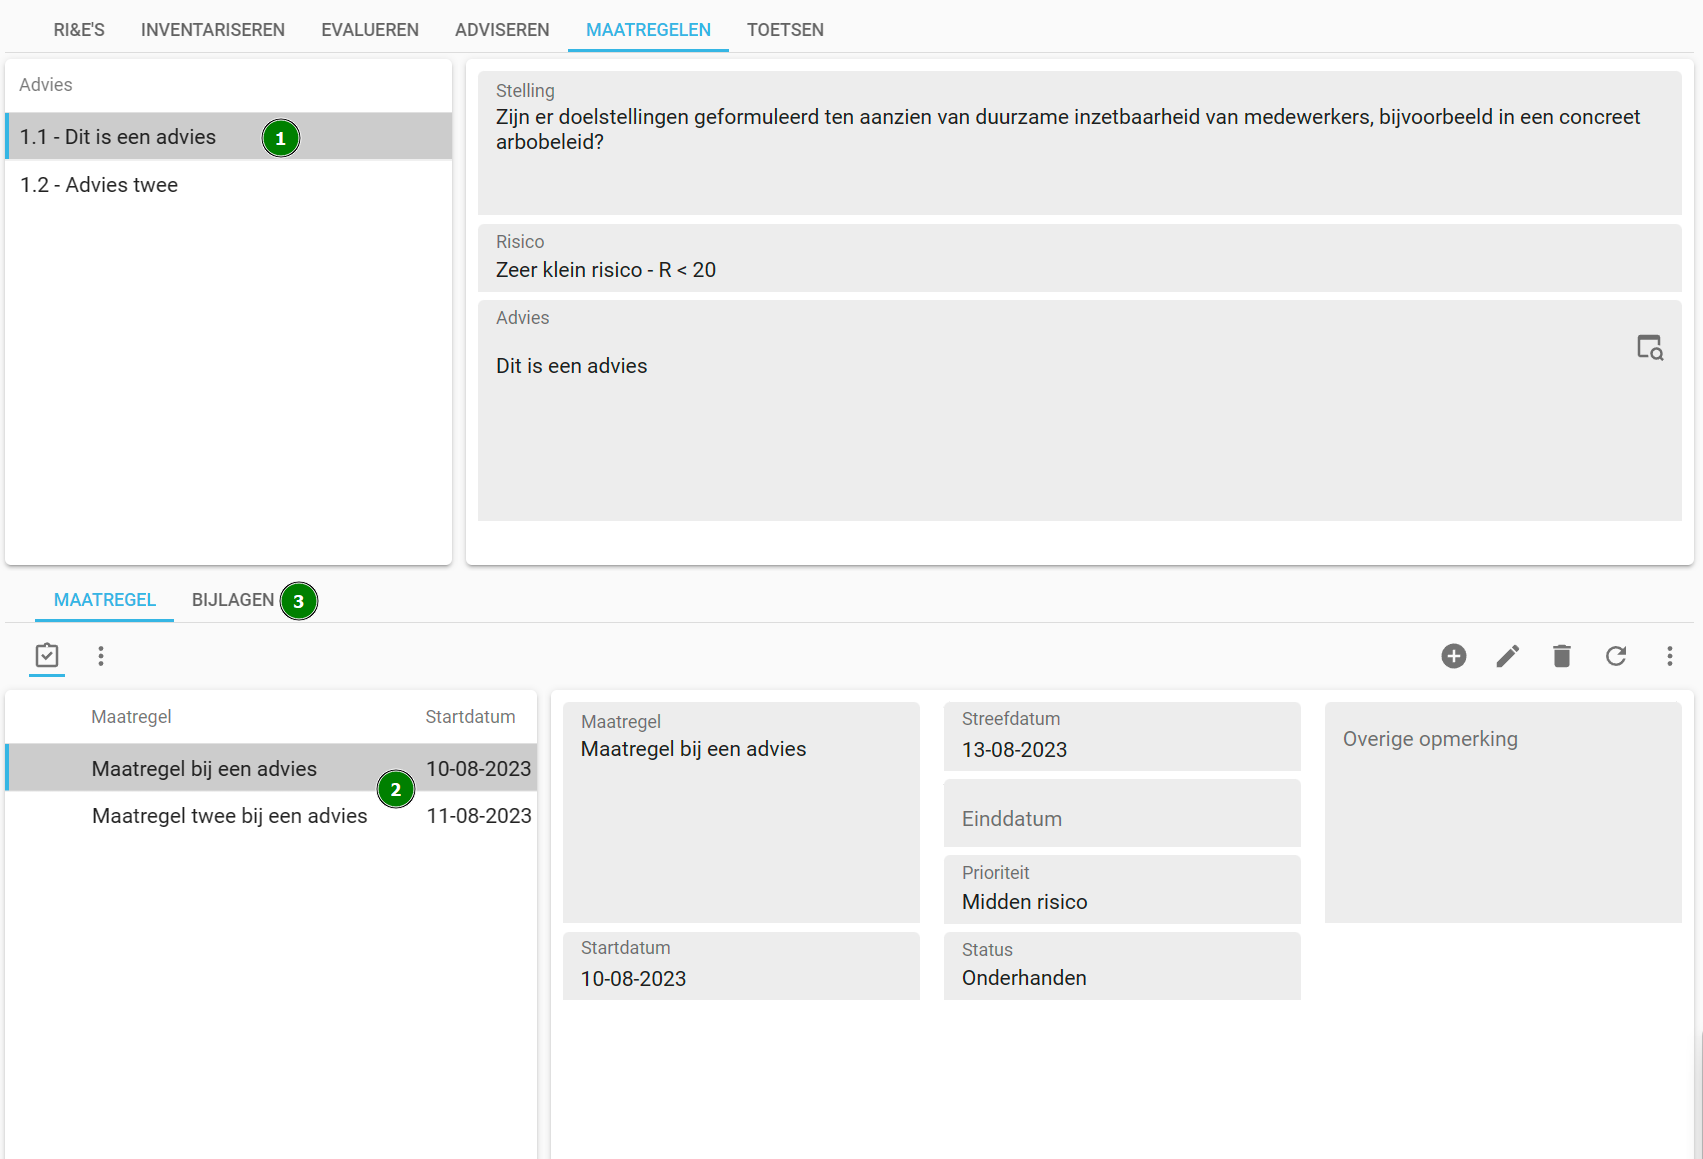
Configuring the preview component

To display a custom component in the Universal GUI, we use the preview component as described here. In this preview component, we will display a URL pointing to our custom HTML page that contains the upload functionality. 

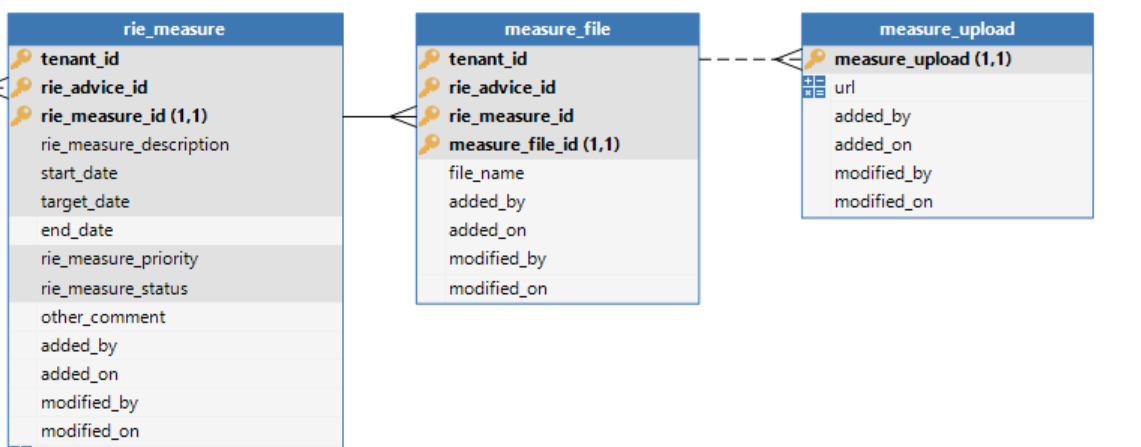
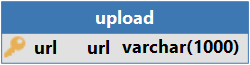
The first step is to model a screen containing the preview component. To do this, we create an upload table with a single field containing the URL to be displayed in the preview component.


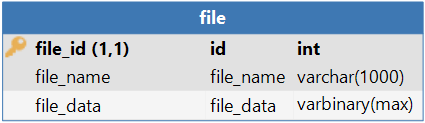
We alo create a file table to store the uploaded files. We'll use database storage, so the table contains a file_name field with an Upload control, and a file_data field to hold the file contents. More information about configuring database storage can be found here


We can now deploy the database. Once that is done, insert a record to the table to specify the location of the HTML page that we want to dispay in the preview component. This can be either an absolute or a relative location.


Before we start the application, we need to create a screen type with a preview component, assign this screen type to the upload table, and make sure the upload table is accessible through the menu.


Creating the upload page

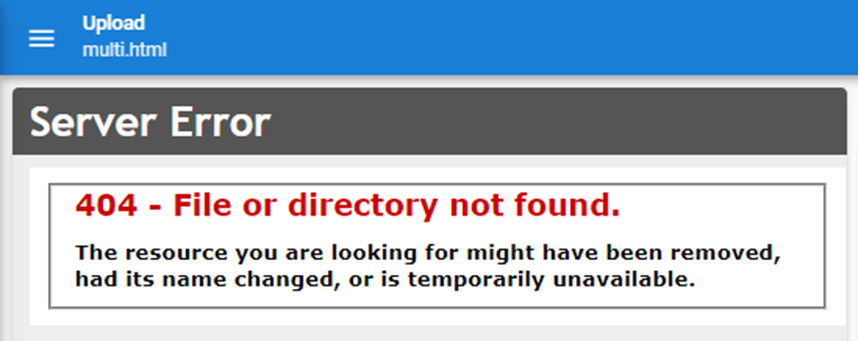
Upon starting the Universal GUI and opening the screen, an error message appears because we need to first create the HTML page to display.


The upload page consists of an HTML body (duh) and CSS to make it look pretty, and of course JavaScript to handle drag & drop events, uploading files to Indicium, and showing the progress of the upload.

We will focus on the actual uploading in this blog post, the other parts should be quite self-explanatory. 

The full source code is available in the attachment.


Indicium's file upload API is described here. To upload a file to Indicium, we need to send a POST request in the following format:

POST
/iam/appl/{table}
{
"col_1": col_value_1,
"col_2": "col_value_2",
"my_file_column": {
"FileName": "value_file_name",
"File": "value_base_64_binary_string"
}
}


To create the request body, we first need to encode the file to Base64 format using the FileReader.readAsDataURL method and remove the Base64 encoding string data:*/*;base64, from the result. 

function encodeFile(file) {
var reader = new FileReader();

reader. Onload = () => {
// Strip the Base64 encoding string from the result
var base64data = reader.result.split(',')[1];
// Proceed with the upload
uploadFile(file.name, base64data);
};

reader.readAsDataURL(file);
}


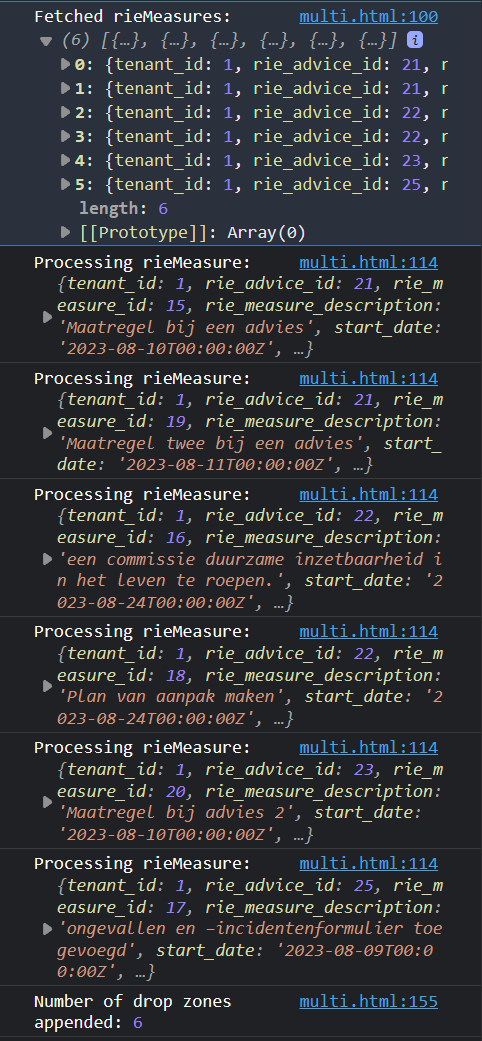
After encoding, we create the JSON body that matches the file table and API and send the request using an XMLHttpRequest

We don't have to worry about authentication and authorization; as long as the page is hosted on the same (sub)domain as the Universal GUI, it can securely access the authentication cookies of the logged in user.

function uploadFile(filename, data) {
// Create the request body
var payload = {
//'file_id': identity, readonly
'file_name': {
'FileName': filename,
'File': data
}
};

// Send the request
var xhr = new XMLHttpRequest();
xhr.open('POST', 'https://develop.thinkwise.app/indicium/sf/appIdOrAlias/file', true);
xhr.setRequestHeader('Content-Type', 'application/json');
xhr.send(JSON.stringify(payload));
}


And that's it already! 

After saving the file to the web server, just refresh the Universal GUI and the upload component will show. Of course, the functionality can be extended much further with additional features and options, but this should give you a good starting point.


<html>

<head>
<title>Thinkwise upload to Indicium</title>
<style>
body {
font-family: Arial, sans-serif;
}

#drop_zone {
border: 4px dashed #ccc;
border-radius: 10px;
width: 80%;
margin: 50px auto;
padding: 20px;
text-align: center;
}

#drop_zone p {
font-size: 24px;
color: #aaa;
}

#drop_zone.highlight {
border-color: rgb(25, 126, 214);
}

#file_input {
display: none;
}

progress {
display: block;
width: 80%;
margin: 20px auto;
height: 20px;
border: none;
border-radius: 10px;
background-color: #ddd;
}

progress::-webkit-progress-bar {
border-radius: 10px;
background-color: #ddd;
}

progress::-webkit-progress-value {
border-radius: 10px;
background-color: rgb(25, 126, 214);
}

progress::-moz-progress-bar {
border-radius: 10px;
background-color: rgb(25, 126, 214);
}
</style>
</head>

<body>
<div id='drop_zone'>
<p>Drop files here or click to select</p>
<input type='file' id='file_input' multiple>
</div>

<div id="progress"></div>

<script>
const dropZone = document.getElementById('drop_zone');
const fileInput = document.getElementById('file_input');

// Prevent default drag behaviors
['dragenter', 'dragover', 'dragleave', 'drop'].forEach(eventName => {
dropZone.addEventListener(eventName, preventDefaults, false)
document.body.addEventListener(eventName, preventDefaults, false)
});

// Highlight drop zone when item is dragged over
['dragenter', 'dragover'].forEach(eventName => {
dropZone.addEventListener(eventName, highlight, false);
});

// Unhighlight drop zone when item is dragged away
['dragleave', 'drop'].forEach(eventName => {
dropZone.addEventListener(eventName, unhighlight, false);
});

// Handle dropped files
dropZone.addEventListener('drop', handleDrop, false);

// Handle file input change
fileInput.addEventListener('change', handleSelect, false);

function preventDefaults(e) {
e.preventDefault()
e.stopPropagation()
}

function highlight(e) {
dropZone.classList.add('highlight');
}

function unhighlight(e) {
dropZone.classList.remove('highlight');
}

function handleDrop(e) {
var dt = e.dataTransfer;
var files = dt.files;
handleFiles(files);
}

function handleSelect(e) {
var files = e.target.files;
handleFiles(files);
}

function handleFiles(files) {
// Clear progress bars
document.getElementById('progress').replaceChildren();

[...files].forEach(file => {
// Create progress bar
const fileProgress = document.createElement('progress');
fileProgress.id = `file_${file.name}_progress`;
document.getElementById('progress').appendChild(fileProgress);

// Encode and upload file
encodeFile(file);
})
}

function encodeFile(file) {
var reader = new FileReader();

reader.onload = () => {
// Strip the Base64 encoding string from the result
var base64data = reader.result.split(',')[1];
// Proceed with the upload
uploadFile(file.name, base64data);
};

reader.readAsDataURL(file);
}

function uploadFile(filename, data) {
// Create the request body
var payload = {
'file_name': {
'FileName': filename,
'File': data
}
};

// Create the request
var xhr = new XMLHttpRequest();

xhr.onreadystatechange = () => {
if (xhr.readyState === 4) {
if (xhr.status === 201) {
console.log('File uploaded successfully!');
} else {
console.error('Error uploading file: ' + xhr.statusText);
}
}
};

xhr.upload.onprogress = event => {
if (event.lengthComputable) {
const fileProgress = document.getElementById(`file_${filename}_progress`);
const percent = (event.loaded / event.total);
fileProgress.value = percent;
console.log(percent);
}
}

// Send the request
xhr.open('POST', 'https://develop.thinkwise.app/indicium/sf/applIdOrAlias/file', true);
xhr.setRequestHeader('Content-Type', 'application/json');
xhr.send(JSON.stringify(payload));
}

// Open file dialog when drop zone is clicked
dropZone.addEventListener('click', function () {
fileInput.click();
});
</script>
</body>

</html>


24 replies

Userlevel 5
Badge +20

Hi @Jasper

Nice, only the download links are not working.


Userlevel 5
Badge +16

Thanks @Jasper ..  works well…  although I am lacking a bit the javascript skills to fine-tune. Here there is quite a lag between the progress-bar saying finished and the actual existence in the application (upload to indicium). 

Nevertheless happy with the example, I've integrated it.  Works way better then the separate form fields. 

Would this also work as a HTML field in a form? 

Userlevel 7
Badge +11

@Harm Horstman does the attachment download work?

Userlevel 5
Badge +20

@Jasper, Yes, now it does, thanks 👍🏻

Userlevel 7
Badge +11

@Freddy the uploaded file should be available almost immediately after the progress bar reaches 100%. Does it help if you replace the following lines?

const percent = (event.loaded / event.total);
fileProgress.value = percent;

with:

fileProgress.max = event.total;
fileProgress.value = event.loaded;


The HTML field in a form is stripped of all potentially dangerous HTML to prevent JavaScript injection, so unfortunately that doesn't work.

Userlevel 5
Badge +16

@Freddy the uploaded file should be available almost immediately after the progress bar reaches 100%. Does it help if you replace the following lines?

const percent = (event.loaded / event.total);
fileProgress.value = percent;

with:

fileProgress.max = event.total;
fileProgress.value = event.loaded;


The HTML field in a form is stripped of all potentially dangerous HTML to prevent JavaScript injection, so unfortunately that doesn't work.

@Jasper it is quite fast indeed..  problem is I'm using separate task to process the uploads.. so there is no refresh trigger..  Is it possible to have a task called by an API triggering a refresh in de GUI?

Userlevel 7
Badge +11

It's not yet possible to trigger a refresh (or more generally, a process flow) in the GUI from within a preview component, so I've used an auto refresh with change detection for the files subject in this demo.

However, system flows that start with an add row (or if you're using a task to upload the files, with execute task) are executed by Indicium. 

Badge

@Jasper we have created this setup for multi-file upload. We dynamically create this setup for multiple tables that have a specific tag. On one of the tables in which the files are uploaded we have an additional mandatory field, as such configured via a layout procedure. We do not want to specify the mandatory field in the multi-file upload POST call logic. Since this is done via ODATA Post call, we expect the import_mode to be 3, and edited the layout to not set the field on mandatory in that case. This does not work. We confirmed that the functionality works with the layout procedure disabled. 

if @layout_mode in (0, 1) and @import_mode <> 3 /* imported via ODATA POST call*/
begin
select @attachment_type_id_mand = 1 /* mand */
end

It seems that Indicium (2023.1.15) does not listen to the import mode variable. Is this a bug?

Userlevel 7
Badge +11

Hi @Richard Elderman,

The documentation here is incorrect as it has never worked this way before. We would like to provide the third import option, but this would be a breaking change so we can't just implement it without risk.

We'll come back to this.


Userlevel 6
Badge +10

@Jasper Thanks for your swift response! Based on your response I decided to test the following Layout logic, but that also fails on a 422 error. Is the whole import_mode variable not supported by Indicium yet?

if @layout_mode in (0, 1) and @import_mode = 0 
begin
select @attachment_type_id_mand = 1
end

This does work for the multi-file upload, but is not preferred, as we want the field to be mandatory on regular inserts:

if @layout_mode = 1
begin
select @attachment_type_id_mand = 1
end


Userlevel 6
Badge +4

Hello Arie,

The import_mode parameter is supported, but it is given the value 0. The reason that your second code sample works is not because you removed the import_mode=0 check, but because you removed the layout_mode=0 check.

There is currently no way to distinguish between a default or layout procedure triggered by inserting via the Universal GUI versus a POST call. As Jasper said, we will be looking into providing this option. It is important to note though that if we would implement this, any user with permissions could simply make a POST request to get around the mandatory constraint. This was our original reasoning for treating these two ways to do inserts the same way.

Is it not possible to supply an attachment_type value for the multi-file upload case?


Userlevel 6
Badge +10

FYI: we took this solution to our Production environment this week and our users love it! We took the solution provided by @Jasper as a starting point and tweaked it here and there to fullfill our needs (thanks for the support @Kevin Horst!).

Some remarks on our setup:

  • We use Dynamic model code to create the multi-file upload and attachment tables for Subjects with the applicable Tags. This makes it very easy to re-use this solution across our application.
  • We parameterized the upload URL in the upload page, so we can use a single HTML page for this component, while showing the upload page at different Subject detail tabs.
  • We improved the upload page javascript to provide feedback to the user on the status of the upload (e.g. orange = uploading / green = uploaded / red = error during upload). 
  • We also use the Auto-refresh and Change detection logic to refresh the Subject after upload
  • Note: in above example we use Conditional formatting to highlight that a user has to update the Attachment type after upload, since this is not something we want to set with a default value.

If you're interested in more technical details, please ask @Richard Elderman since he did the heavy lifting of this solution!

Userlevel 6
Badge +3

Maybe a silly question, but is there a reason this is set up via database storage? Or is this  just used for demo purposes?

Asking because I'd like to use Azure file share

Userlevel 7
Badge +23

Maybe a silly question, but is there a reason this is set up via database storage? Or is this is just used for demo purposes?

Asking because I'd like to use Azure file share

Probably just for demo purposes, you can indeed use Azure file storage. The API call to Indicium will stay the same.

Userlevel 6
Badge +3

I'm getting a 422 Unprocessable Entity code after uploading files. Doesn't matter if it's a jpg, pdf or whatever else. 

The payload seems ok to me:
 

{
"file_name": {
"FileName": "Human-Total-Care-200x200.png",
"File": "iVBORw0KGgoAAAANSUhEUgAAAMgAAADICAYAAACtWK6eAAAby0lEQVR42u2dd3wUZfrAJ21DSAwJySYsJFl7PysqpAChhPSEJBASMD27"
}
}

I've shortened the base64 value because it's huge. 

I'm using Azure File Storage to store the attachments. It's not an access issue.

I've uploaded the ‘multi.html’ file in the wwwroot folder of the Universal GUI and I made sure to change the url of the POST request to point in the right direction.

Anyone run into the same problem? Thanks :)

Userlevel 4
Badge +2

In most cases when we return a 422, there should be a TSFMessages header in the response.

That message is base64 encoded and can be decoded here: https://www.base64decode.org/
You can read more about this here: OData API | Thinkwise Documentation (thinkwisesoftware.com)

Can you check if the TSFMessages header is available?

Userlevel 6
Badge +3

Got it working. It was caused by two mandatory PK columns in the ‘file’ table that were added by the detail reference. They don't get filled by the POST request, and that's what caused the 422 error.
 

By removing them to test it out, the file(s) get uploaded. The thing is though is that I need those two PK's because the 'file’ table is a detail of another table because I want to files to uploaded for that specific row (measure_id) and for that specific tenant (tenant_id).

So, I have a measure table (different measure_id, tenant_id ) → file table as detail → upload table (upload mechanism)

How can I alter the POST request to do that?

Userlevel 6
Badge +4

Hello rbiram,

Please have a look at ‘Inserting a detail entity’ here. This will explain how you can have the parent context propagate to the detail during an insert, without having to specify those properties in the request body.

I hope this helps.

Userlevel 6
Badge +3

Helped, thanks :)

Userlevel 6
Badge +3

With the help of @Mark Jongeling and @Vincent Doppenberg I got the file upload to work (misconfiguration of a storage column in my table). But now I'm facing the real problem and that's uploading files with context in mind. 

Meaning that I have a table that can contain multiple rows. For each row a user needs to upload one or more files. I need the context (id) of that row to be passed on dynamically in the POST request. 

With my limited Javascript knowledge I've consulted my friend ChatGPT along with the Code Interpreter. We came quite a way in the right direction, but sadly it misunderstood me in the end (either lost context or better prompting was needed on my side). 

What happens now is the following:


1: A user is presented with some ‘Advice’ from a previous process.
2: A user can enter multiple measures he/she can take per advice given
3: A user can upload one or more files/attachments per measure(_id)

What I came up with alongside Mr. GPT is the following:


As you can see it appends drop zones for all existing measure_id's. Every drop zone works for the corresponding measure_id. It does this for each measure_id I navigate to, instead of showing one drop one for that particular measure_id. 

I've console.logged out the API response for the get request I'm doing before it generates a drop zone for each of the measure_id:


6 drop zones appended for each the measure_id that are fetched by the get call


@Jasper: could you maybe point me in the right direction of how I can do this in a way for it to get passed on the context I'm in?

I understand that this solution might not be developed in a way to be used in a situation like this, but I feel like I'm close. 

The updated multi.html file:

<!DOCTYPE html>
<html>

<head>
<title>Thinkwise upload to Indicium</title>
<style>
body {
font-family: Arial, sans-serif;
}

.rieMeasureDropZone {
border: 4px dashed #ccc;
border-radius: 10px;
width: 80%;
margin: 20px auto;
padding: 20px;
text-align: center;
}

.rieMeasureDropZone p {
font-size: 24px;
color: #aaa;
}

.rieMeasureDropZone.highlight {
border-color: rgb(25, 126, 214);
}

.file_input {
display: none;
}

progress {
display: block;
width: 80%;
margin: 20px auto;
height: 20px;
border: none;
border-radius: 10px;
background-color: #ddd;
}

progress::-webkit-progress-bar {
border-radius: 10px;
background-color: #ddd;
}

progress::-webkit-progress-value {
border-radius: 10px;
background-color: rgb(25, 126, 214);
}

progress::-moz-progress-bar {
border-radius: 10px;
background-color: rgb(25, 126, 214);
}
</style>
</head>

<body>
<div id="rie_measure_list">
<!-- Dynamically populated list of rie_measures will appear here with file drop zones -->
</div>

<div id="progress"></div>

<script>
// Utility functions for drag and drop
function preventDefaults(e) {
e.preventDefault();
e.stopPropagation();
}

function highlight(e) {
e.currentTarget.classList.add('highlight');
}

function unhighlight(e) {
e.currentTarget.classList.remove('highlight');
}

function handleDrop(e) {
var dt = e.dataTransfer;
var files = dt.files;
let rieMeasureId = e.currentTarget.dataset.rieMeasureId;
let tenantId = e.currentTarget.dataset.tenantId;
let rieAdviceId = e.currentTarget.dataset.rieAdviceId;

handleFiles(files, tenantId, rieAdviceId, rieMeasureId);
}

// Fetch all rie_measure rows
function fetchRieMeasures() {
var xhr = new XMLHttpRequest();
xhr.open('GET', 'https://site/indicium/iam/alias/rie_measure', true);
xhr.onreadystatechange = () => {
if (xhr.readyState === 4) {
if (xhr.status === 200) {
let rieMeasures = JSON.parse(xhr.responseText).value;
console.log("Fetched rieMeasures:", rieMeasures);
displayRieMeasures(rieMeasures);
} else {
console.error('Error fetching rie_measures: ' + xhr.statusText);
}
}
};
xhr.send();
}

// Display each rie_measure with its own file drop zone
function displayRieMeasures(rieMeasures) {
let container = document.getElementById('rie_measure_list');
rieMeasures.forEach(rieMeasure => {
console.log("Processing rieMeasure:", rieMeasure);
let dropZone = document.createElement('div');
dropZone.className = 'rieMeasureDropZone';
dropZone.dataset.rieMeasureId = rieMeasure.rie_measure_id;
dropZone.dataset.tenantId = rieMeasure.tenant_id;
dropZone.dataset.rieAdviceId = rieMeasure.rie_advice_id;

dropZone.innerHTML = `
<p>Drop bestanden voor maatregel: ${rieMeasure.rie_measure_id} hier of klik om te selecteren</p>
<input type='file' class='file_input' multiple>
`;

// Drag and drop event listeners
['dragenter', 'dragover', 'dragleave', 'drop'].forEach(eventName => {
dropZone.addEventListener(eventName, preventDefaults, false);
});
['dragenter', 'dragover'].forEach(eventName => {
dropZone.addEventListener(eventName, highlight, false);
});
['dragleave', 'drop'].forEach(eventName => {
dropZone.addEventListener(eventName, unhighlight, false);
});
dropZone.addEventListener('drop', handleDrop, false);

// Click event listener
dropZone.addEventListener('click', function() {
dropZone.querySelector('.file_input').click();
});

// Handle file selection
dropZone.querySelector('.file_input').addEventListener('change', function(e) {
let files = e.target.files;
let rieMeasureId = e.target.closest('.rieMeasureDropZone').dataset.rieMeasureId;
let tenantId = e.target.closest('.rieMeasureDropZone').dataset.tenantId;
let rieAdviceId = e.target.closest('.rieMeasureDropZone').dataset.rieAdviceId;

handleFiles(files, tenantId, rieAdviceId, rieMeasureId);
});

container.appendChild(dropZone);
});
console.log("Number of drop zones appended:", container.children.length);
}

function handleFiles(files, tenantId, rieAdviceId, rieMeasureId) {
// Clear progress bars
document.getElementById('progress').replaceChildren();

[...files].forEach(file => {
const fileProgress = document.createElement('progress');
fileProgress.id = `file_${file.name}_progress`;
document.getElementById('progress').appendChild(fileProgress);

// Encode and upload file
encodeFile(file, tenantId, rieAdviceId, rieMeasureId);
});
}

function encodeFile(file, tenantId, rieAdviceId, rieMeasureId) {
var reader = new FileReader();

reader.onload = () => {
var base64data = reader.result.split(',')[1];
uploadFile(file.name, base64data, tenantId, rieAdviceId, rieMeasureId);
};

reader.readAsDataURL(file);
}

function uploadFile(filename, data, tenantId, rieAdviceId, rieMeasureId) {
var payload = {
'file_name': {
'FileName': filename,
'File': data
}
};

var xhr = new XMLHttpRequest();

let url = `https://site/indicium/iam/alias/rie_measure(tenant_id=${tenantId},rie_advice_id=${rieAdviceId},rie_measure_id=${rieMeasureId})/detail_ref_rie_measure_measure_file`;
xhr.open('POST', url, true);
xhr.setRequestHeader('Content-Type', 'application/json');

xhr.onreadystatechange = () => {
if (xhr.readyState === 4) {
if (xhr.status === 201) {
console.log('File uploaded successfully!');
} else {
console.error('Error uploading file: ' + xhr.statusText);
}
}
};

xhr.upload.onprogress = event => {
if (event.lengthComputable) {
const fileProgress = document.getElementById(`file_${filename}_progress`);
const percent = (event.loaded / event.total);
fileProgress.value = percent;
console.log(percent);
}
}

xhr.send(JSON.stringify(payload));
}

// Call the function to start the process
fetchRieMeasures();
</script>
</body>

</html>


Thanks!

Userlevel 7
Badge +11

Hi @rbiram,

You can pass the context to the HTML file using a query string in the preview url.

The easiest way to do this is to use an expression field for the url, something like this:

'.../multi.html' 
+ '?tenant_id=' + cast(t1.tenant_id as varchar)
+ '&rie_advice_id=' + cast(t1.rie_advice_id as varchar)
+ '&rie_measure_id=' + cast(t1.rie_measure_id as varchar)

Then you can read those parameters in your HTML file to only retrieve the measures for the currently selected advice:

const params = new URLSearchParams(window.location.search);
const tenantId = params.get('tenant_id');
const rieAdviceId = params.get('rie_advice_id');
const rieMeasureId = params.get('rie_measure_id');

var xhr = new XMLHttpRequest();
xhr.open('GET', 'https://site/indicium/iam/alias/rie_advice(tenant_id=${tenantId},rie_advice_id=${rieAdviceId})/detail_ref_rie_advice_rie_measure', true);

Does this help?

Userlevel 6
Badge +3

Almost!

This is what my model looks like:
 

rie_measure is where all the measures are stored, measure_file is where the files get stored and that's the reference I use in the POST request to actually upload the files. Measure_upload is an empty GUI reference for the uploading mechanism. Herein I have the url stored as an expression to preview it.

From what I understand I should adjust the expression field to fill in the parameters for the query string. Using t1 in this case wouldn’t do anything, does it? Do I need to change up the model?

Excuse me for all the questions :)

Userlevel 7
Badge +11

Excuse me for all the questions :)

No problem at all, these challenges make our work fun right?

Where you put the url field really depends on where and how you want to show the upload component. If you want to be able to upload files for multiple measures of the selected advice (and it seems like you do from the JavaScript code), the rie_advice table would be a good option for it. You can then of course leave the measure_id from the query string.

If you only want to upload files for the selected measure, you can use the rie_measure table for the url. 

Userlevel 6
Badge +3

It works!

It clicked after reading:

Where you put the url field really depends on where and how you want to show the upload component.


Thanks, it's really appreciated :)

Reply