Blog

Switching from SSMS to Azure Data Studio - Tips & Tricks

  • 8 September 2023
  • 10 replies
  • 2215 views
Switching from SSMS to Azure Data Studio - Tips & Tricks
Userlevel 7
Badge +5

SQL Server Management Studio has been the backbone for writing queries and managing SQL Server databases for a long time now. I’ve been using SSMS for well over a decade.

A new kid on the block - Azure Data Studio - is gaining popularity. This IDE has been around for a couple of years now and is a close relative to Visual Studio Code. And with the possibility of plugging in extensions such as GitHub Copilot, I’ve recently completely switched to Azure Data Studio.

In this blog, I’ll highlight some of the features of Azure Data Studio and suggest some key binding changes which I did make the transition from SSMS to Azure Data Studio easier.


Familiarize yourself with F1

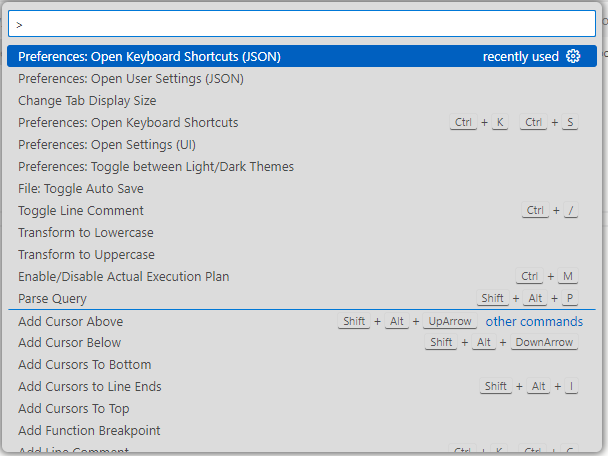
Not unlike Visual Studio Code, virtually all commands, actions and settings can be done in Azure Data Studio via the F1 menu. If you want to do something and you don’t see a button - always press F1.

The F1 menu of Azure Data Studio


Tab display size

This may be a personal preference - I always ensure tabs are back to their original 4-increments. In Azure Data Studio, press F1 and search for Change Tab Display Size. You can set to 4 here.


Object info (sp_help) via ALT-F1

By default, object info of the selected object is bound to Alt-F1 in SSMS and Alt-F2 in Azure Data Studio.

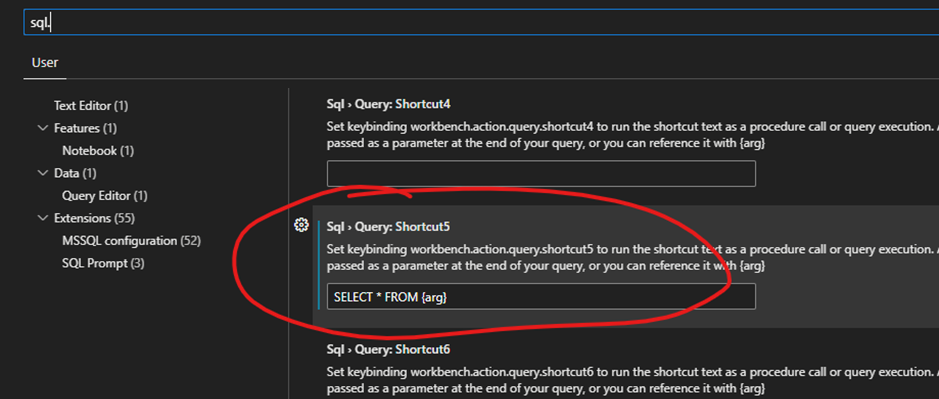
Press F1, search for ‘Preferences: Open Keyboard Shortcuts’. Search for the command ‘workbench.action.query.shortcut1’. Double-click the entry and hit Alt-F1 to set it to match SSMS.


Don’t accept autocomplete on Enter

The autocomplete in SSMS is a combo where a value is chosen with the key Tab. Using Enter has no effect on the autocompletion by default, unless the arrow keys are used to browse through the options.

In SSMS, using Enter will simply create a new line.

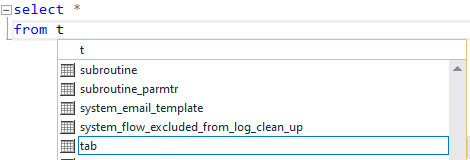
By default, in Azure Data Studio, a value is selected in the autocompletion and chosen when using either Enter or Tab.

In Azure Data Studio, using Enter will accept the suggestion.

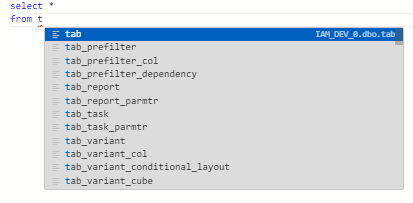
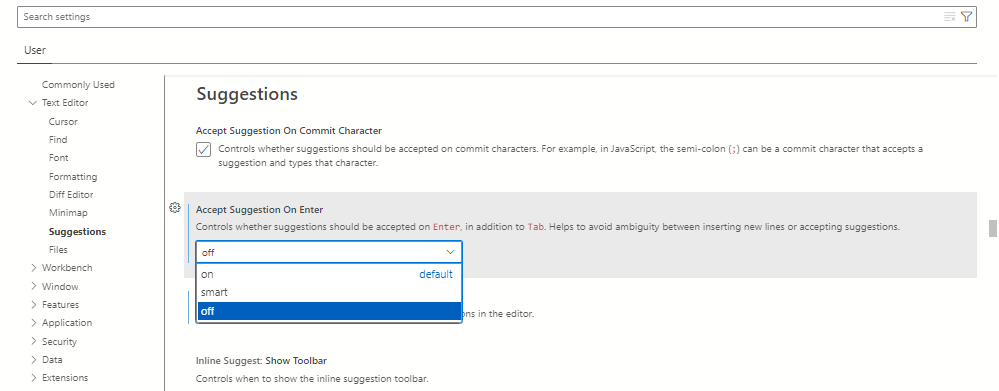
This can be quite frustrating when switching to Azure Data Studio. To change this behavior, press F1, search for Settings and turn off the ‘Accept suggestion on enter’ feature.

Turning off accept suggestions on enter

Alternatively, you can remove the Keyboard Shortcuts entry for the command ‘acceptSelectedSuggestion’ with Keybinding Enter.

You will not be able to choose a suggestion after selecting a suggestion via the Up and Down keys with Enter either anymore. You will have to use Tab.


Extra vertical cursors

In SSMS, you can use Alt-Shift-Up and Alt-Shift-Down to create extra cursors.

Extra vertical cursors

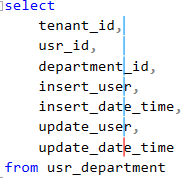
In Azure Data studio, by default this is done using Ctrl-Alt-Up and Ctrl-Alt-Down.

Using Alt-Shift-Up and Alt-Shift-Down will duplicate lines instead. Remove the entries for the commands ‘Copy Line Up’ and ‘Copy Line Down’.

You can then rebind the ‘Add Cursor Above’ and ‘Add Cursor Below’ commands to Alt-Shift-Up and Alt-Shift-Down to match SSMS.

Note that there are some differences. In SSMS, the cursors would simply introduce spaces when navigating in a line that was ended. In Azure Data Studio, the cursor will be at a different position per line instead.

Extra vertical cursors - without introducing spaces.


Extra cursors using the mouse

While the way extra cursors work takes some getting used to, this can also be quite powerful. For instance, you can use ALT-Click to introduce multiple cursors at various locations in the text to edit the text at the same time.

Adding t1 alias to multiple locations using multiple cursors


Extra cursors via Ctrl-D

Another way to create multiple cursors is in find-and-replace scenarios. Double-click or manually select a piece of text and use Ctrl-D once or multiple times to select more additional occurrences of this text in the document. All text can then be replaced at once.

1. The text user_id is double-clicked
2. Ctrl-D is hit twice to create cursors at additional occurrences and select them
3. New text can be entered at the locations.

Mastering this will make life a lot easier.


GitHub Copilot

Lastly, I want to note the option to use GitHub Copilot in Azure Data Studio. This subscription-based plugin will without a doubt significantly boost productivity of any developer.

GitHub Copilot suggesting a join statement

This code completion AI has turned Tab into the most used button on my keyboard. Read more about it here.


Closing

I hope this blog has been helpful for veterans of SSMS which are new users of Azure Data Studio. If you have any follow-up tips and tricks, suggestions or questions, I’d love to hear in the comments.

And yes, I only used light mode for this blog - dark mode is the best ;)

Happy coding!


10 replies

Anne, great blog. 

I found an extension SSMS Keymap for Azure Data Studio, which maps the shortcuts in Azure Data Studio to the ones in SQL Server Management Studio. This works fine for me! You can read more about this in:

https://bobpusateri.com/archive/2018/12/getting-ssms-keyboard-shortcuts-in-azure-data-studio/

Userlevel 5
Badge +5

A scary thought, @Anne Buit, making a switch from a tool we are all so familiar with. But I think switching to Azure Data Studio is a safe bet. It seems all new developments take place in VS Code and Azure Data Studio, so it makes sense to take the plunge.

Personally I really like how Azure Data Studio handles JSON, instead of returning (a part of) the JSON string when creating JSON, Azure Data Studio does all the markup and syntax highlighting for you. Also you get the full output instead of just a part of it.

JSON output


Userlevel 6
Badge +3

Thanks, there's some nice tips in here I didn't know about!

Here's another for auto-formatting code:

If you're searching for a way to auto-format your SQL-code according to the Thinkwise guidelines, there's an extension called ‘Redgate SQL prompt’ in which you can paste a ‘.formattingstyle’ file (JSON) that contains the formatting to your liking. 

See the following repository for more info:
https://github.com/incentro/thinkwise-redgate-sql-formatting-style

Change the .formattingstyle file to your liking.

Thanks to @Kevin Rosink for figuring this out and setting up the JSON file.

Userlevel 5
Badge +5


If you're searching for a way to auto-format your SQL-code according to the Thinkwise guidelines, there's an extension called ‘Redgate SQL prompt’ in which you can paste a ‘.formattingstyle’ file (JSON) that contains the formatting to your liking. 


Does Redgate also work with Azure Data Studio?

Userlevel 6
Badge +3

Yes, that's why I posted it in this topic 😅

Userlevel 5
You can set a custom shortcut for toggle Query Results, something I use a lot in SSMS.

(Ctrl + R is the default in SSMS btw)

Userlevel 3
Badge +1

Another extension i find rather useful when you are using azure data studio on multiple devices is the 'settings sync’ extension. This allows you to sync settings to your github account. On other devices you then install this extension and it will sync all your settings / extensions, so you don't have redo it all by hand.

Userlevel 7
Badge +23

After using it for a while I did install a couple extensions to make me more productive so I figured, why not share them here 😄:


Github Copilot (GitHub.copilot)

Obviously, it increased productivity by a mile. Recommended to all developers.


Extra SQL Script As (pacoweb.extra-sql-script-as)

Allows you to script any table as insert, update, delete or select. It can save you a couple seconds to minutes based on the table definition size.


Query History (Microsoft.query-history)

Adds a Query History view for viewing and running past executed queries.


Simple Data Scripter (seanprice.simple-data-scripter)

I haven't used it much yet, but whenever I would need to script table data this will certainly come in handy. It takes a SQL query, and transforms the result into a script that you can reuse.


Theme: Monokai Dimmed (vscode.theme-monokai-dimmed)

The default dark mode is quite nice, but I found this one to be more suited to my liking:

​​​​​​Default left / Monokai Dimmed right


Userlevel 5

Thanks, there's some nice tips in here I didn't know about!

Here's another for auto-formatting code:

If you're searching for a way to auto-format your SQL-code according to the Thinkwise guidelines, there's an extension called ‘Redgate SQL prompt’ in which you can paste a ‘.formattingstyle’ file (JSON) that contains the formatting to your liking. 

See the following repository for more info:
https://github.com/incentro/thinkwise-redgate-sql-formatting-style

Change the .formattingstyle file to your liking.

Thanks to @Kevin Rosink for figuring this out and setting up the JSON file.

Thank you for posting this also with the guide for installing, very usefull!

I have created an updated JSON file which is a bit more in line with our Guidelines

{
"metadata": {
"id": "97cd959c-08c1-4510-9a39-99bf6b606fac",
"name": "Thinkwise Software"
},
"whitespace": {
"newLines": {
"preserveExistingEmptyLinesAfterBatchSeparator": false
}
},
"lists": {
"alignItemsAcrossClauses": false,
"alignAliases": true,
"placeCommasBeforeItems": true,
"addSpaceAfterComma": false
},
"parentheses": {
"parenthesisStyle": "expandedSimple",
"collapseShortParenthesisContents": true,
"collapseParenthesesShorterThan": 35
},
"casing": {
"reservedKeywords": "lowercase",
"builtInFunctions": "lowercase",
"builtInDataTypes": "lowercase",
"globalVariables": "lowercase",
"useObjectDefinitionCase": true
},
"dml": {
"collapseShortStatements": true,
"collapseStatementsShorterThan": 35,
"collapseShortSubqueries": true,
"collapseSubqueriesShorterThan": 78
},
"ddl": {
"parenthesisStyle": "expandedSimple",
"alignDataTypesAndConstraints": true,
"placeFirstProcedureParameterOnNewLine": "never",
"collapseShortStatements": true,
"collapseStatementsShorterThan": 55
},
"controlFlow": {
"collapseStatementsShorterThan": 78
},
"cte": {
"parenthesisStyle": "expandedSimple",
"placeColumnsOnNewLine": true,
"columnAlignment": "indented"
},
"variables": {
"placeAssignedValueOnNewLineIfLongerThanMaxLineLength": false
},
"joinStatements": {
"join": {
"keywordAlignment": "toTable",
"indentJoinTable": false
},
"on": {
"keywordAlignment": "rightAlignedToInner"
}
},
"insertStatements": {
"columns": {
"parenthesisStyle": "expandedSimple",
"indentContents": false
},
"values": {
"parenthesisStyle": "expandedSimple",
"placeSubsequentValuesOnNewLines": "always"
}
},
"caseExpressions": {
"placeExpressionOnNewLine": false,
"whenAlignment": "toFirstItem",
"collapseCaseExpressionsShorterThan": 55
},
"operators": {
"comparison": {
"align": true
},
"andOr": {
"alignment": "beforeFirstListItem"
},
"between": {
"placeOnNewLine": false
},
"in": {
"placeFirstValueOnNewLine": "never"
}
}
}


Badge +2

Similar to the keyboard shortcut ALT+F1 for sp_help, you can employ a shortcut to execute a "select * from [table]" query.

  1. Navigate to "Open User Settings."
  2. Search for an unused shortcut. In this case “shortcut5”.
  3. Add the select query: "select * from {arg}" or "select top 100 * from {arg}"


  4. Navigate to Keyboard Shortcuts.
  5. Search for shortcut5 and add your preferred keybinding.
  6. Select the table name in the query designer and press your keybinding

    Credits to @Mark for helping figure out how this works
     

Reply