Update: the documentation is now available at https://docs.thinkwisesoftware.com/docs/deployment/container_deployment_overview
You might have noticed, there is a new menu item in TCP called Thinkwise Containers. Through this menu item it is possible to request login tokens required for downloading Thinkwise container images from the Thinkwise Container Registry. These container images can be used to deploy the Universal GUI and the Indicium Application Tier of the Thinkwise Platform in a new and easy way.
But what exactly are containers and container images, how do you use them, and what are the benefits of using container images?
What Are Container Images
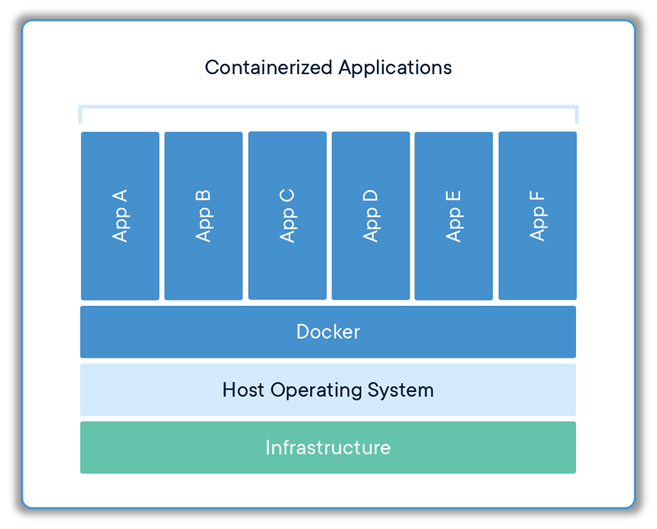
A container image is an application together with all the required dependencies wrapped together into a single image, which basically is a compressed archive. The application that runs from a container image is called a container.
Compared to a virtual machine, a container only contains the required dependencies to run the application or service and is not bloated with other files. This makes containers very small in size and boot up almost instantly. This results in very quick deployments or updates, by simply replacing the old container.
For more information, Docker Inc. made a blogpost about what a container is and what the benefits are: https://www.docker.com/resources/what-container/
The Thinkwise Container Registry
Container images for the Thinkwise Platform are published in the Thinkwise Container Registry, which is available at registry.thinkwisesoftware.com.
The registry contains images for the Indicium Application Tier and the Universal GUI. Soon we will move the Thinkwise AutoML container image to this registry as well.
| Image name | Location |
|---|---|
| Indicium Application Tier | registry.thinkwisesoftware.com/public/indicium |
| Universal GUI | registry.thinkwisesoftware.com/public/universal |
Different versions of each image are available, which are indicated by so-called tags.
| Tag | Description |
|---|---|
latest | The most recent image |
2022, 2023 | The most recent image of the specified year |
2022.2, 2023.1 | The most recent image of the specified release |
2022.2.17, 2023.1.10 | Specific version |
The container images are tagged with the same version number as the releases in TCP. Any future releases will be tagged accordingly.
In production environments, you would want to pin a specific version number, to prevent unwanted changes from happening during the day and have more control over when a new version is made available.
Features of the Container Images
Indicium Container Image
The container can be configured with both environment variables and secrets to offer easy upgrades between versions without the need to manually edit the appsettings.json file.
For example, the database host can be configured with the SQL_SERVER variable and the database with the SQL_DATABASE variable.
For sensitive values, you can use secrets. For example, the username and password to connect with the database can be passed to the container with a secret.
By default, the container will look for secrets with the names SQL_USERNAME, SQL_PASSWORD and REDIS_CONNECTION_STRING (both in upper- and lowercase).
Full documentation is available at https://docs.thinkwisesoftware.com/docs/deployment/container_registry_indicium
Universal
The container can be configured with environment variables to offer easy upgrades between versions without the need to manually edit the config.json file.
For example, the Meta server URL for Universal can be set to localhost by running the container with the parameter -e SERVICE_URL=https://localhost/iam/iam.
Full documentation is available at https://docs.thinkwisesoftware.com/docs/deployment/container_registry_universal
Tokens in TCP
Before you can pull (or download) container images from the Thinkwise Container Registry, you need to authenticate to the registry with valid credentials. These can be obtained in TCP.
Requesting a Token
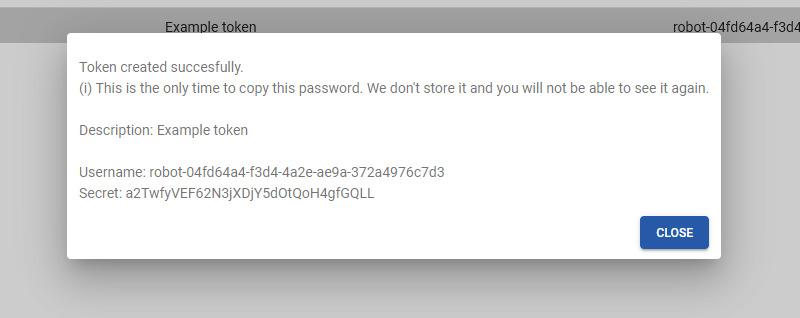
A token can be requested by clicking 'Request token' in the menu 'Thinkwise Containers', make sure to give it a clear description. When you click on EXECUTE, TCP will show a pop-up containing the credentials to log in.
If you plan to follow the examples in this blogpost, request a token now and note down these credentials.
A generated token is visible for the employees of your company, so colleagues can revoke your token if needed. Keep this in mind when you give the token a description. It is always possible to edit the description of a token.
Some examples you could use the credentials for are:
- Locally on the machine, like Docker Desktop
- In the cloud on Azure for App Services or Container Instances
- A Kubernetes cluster on the local machine, hosted on-premises or in the cloud
It is not recommended to use the same credentials at multiple places. A best practice is to generate new credentials with a clear description for each machine or cloud instance you want to use. But to keep things simpler in this blogpost, we will reuse the previously generated credentials for a few examples.
Revoking the Token
When you no longer require the token, or it is compromised, it can be revoked by pressing the button 'Revoke token'. This will delete the token, the machine using the credentials of this token will no longer be able to authenticate.
If you plan to follow the examples, do not revoke the token yet.
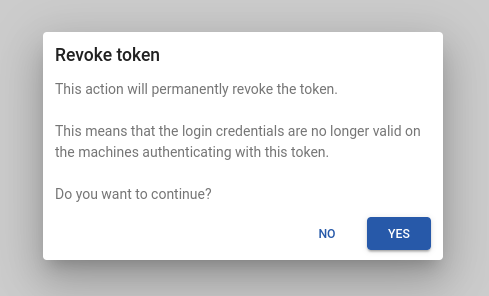
If a token is deleted on accident, a new token can always be requested. Make sure to update the credentials on the machine the token is used for.
Platform Deployment Examples
These examples will guide you through two deployment examples. A local deployment with Docker Desktop and a cloud deployment on Microsoft Azure with Kubernetes.
Prerequisites
- A database server containing an Intelligent Application Manager. This can be in the cloud or local, as long as it can be accessed from the cloud and/or local and have credentials to log in to the databases. For more information on how to install this, follow the guided platform deployment instructions for Install an Intelligent Application Manager. A complete guide on how to install the Intelligent Application Manager and the Software Factory is out of scope for this blogpost.
If the database server is hosted in the cloud, make sure to create exceptions for your IP address and/or cloud related services.
Recommendations
- An IDE like Visual Studio Code
- Being familiar with Docker and/or Kubernetes
Locally with Docker
Docker provides a way to run containers locally on a machine, whether you are on Windows, macOS, or a Linux distribution.
These instructions will set up a local platform deployment using the Indicium Application Tier and the Universal GUI. To route the inbound traffic to the correct applications, a service with the container image traefik is used. Traefik uses the labels applied to the services to route traffic to the correct service, in this case it is path based. Traefik will also redirect any traffic from http to https with a self-signed certificate.
Prerequisites
Logging in to the registry
Before Docker can pull the images, it needs to log in to the Thinkwise Container Registry. This can be done with the following command:
docker login registry.thinkwisesoftware.com
It will ask for a username and password, paste the username and secret in here like the example below:
$ docker login registry.thinkwisesoftware.com
Username: robot-04fd64a4-f3d4-4a2e-ae9a-372a4976c7d3
Password:
Login Succeeded
Make sure to enter the Username and Password from your own requested token.
Steps
- Create a directory with the name Thinkwise-Platform-Containers
- Open this directory in the preferred IDE
- Create a file with the name docker-compose.yaml and add the following:
---
version: "3.8"
services:
  proxy:
    image: traefik
    ports:
      - 80:80
      - 443:443
    command:
      - "--providers.docker=true"
      - "--providers.docker.exposedbydefault=false"
      - "--entrypoints.web.address=:80"
      - "--entrypoints.websecure.address=:443"
      - "--entrypoints.web.http.redirections.entrypoint.to=websecure"
      - "--entrypoints.web.http.redirections.entrypoint.scheme=https"
    volumes:
      - "/var/run/docker.sock:/var/run/docker.sock"

  universal:
    image: registry.thinkwisesoftware.com/public/universal:${TAG}
    environment:
      - SERVICE_URL=https://localhost/indicium/iam/iam
    labels:
      - "traefik.enable=true"
      - "traefik.http.routers.frontend.rule=Host(`localhost`)"
      - "traefik.http.routers.frontend.tls=true"

  indicium:
    image: registry.thinkwisesoftware.com/public/indicium:${TAG}
    environment:
      - SQL_SERVER=${SQL_SERVER}
      - SQL_DATABASE=${SQL_DATABASE}
      - SQL_USERNAME=${SQL_USERNAME}
      - SQL_PASSWORD=${SQL_PASSWORD}
      - ENABLE_REVERSE_PROXY=true
      - ALLOWED_HEADERS=All
      - TRUSTED_NETWORKS=0.0.0.0/0
      - EXTERNAL_PATH_BASE=/indicium
    labels:
      - "traefik.enable=true"
      - "traefik.http.routers.backend.rule=(Host(`localhost`) && PathPrefix(`/indicium`))"
      - "traefik.http.middlewares.backend.stripprefix.prefixes=/indicium"
      - "traefik.http.routers.backend.middlewares=backend"
      - "traefik.http.routers.backend.tls=true"
- Create a file with the name .env (the dot in front of the file is important), with the following, and enter the correct values of your database server:
TAG=2022.2.17

# Hostname of the database server
SQL_SERVER=

# Database to use
SQL_DATABASE=IAM

# Username to access the database,
SQL_USERNAME=

# Password of username to access the database
SQL_PASSWORD=
- Save the file
- Type the command
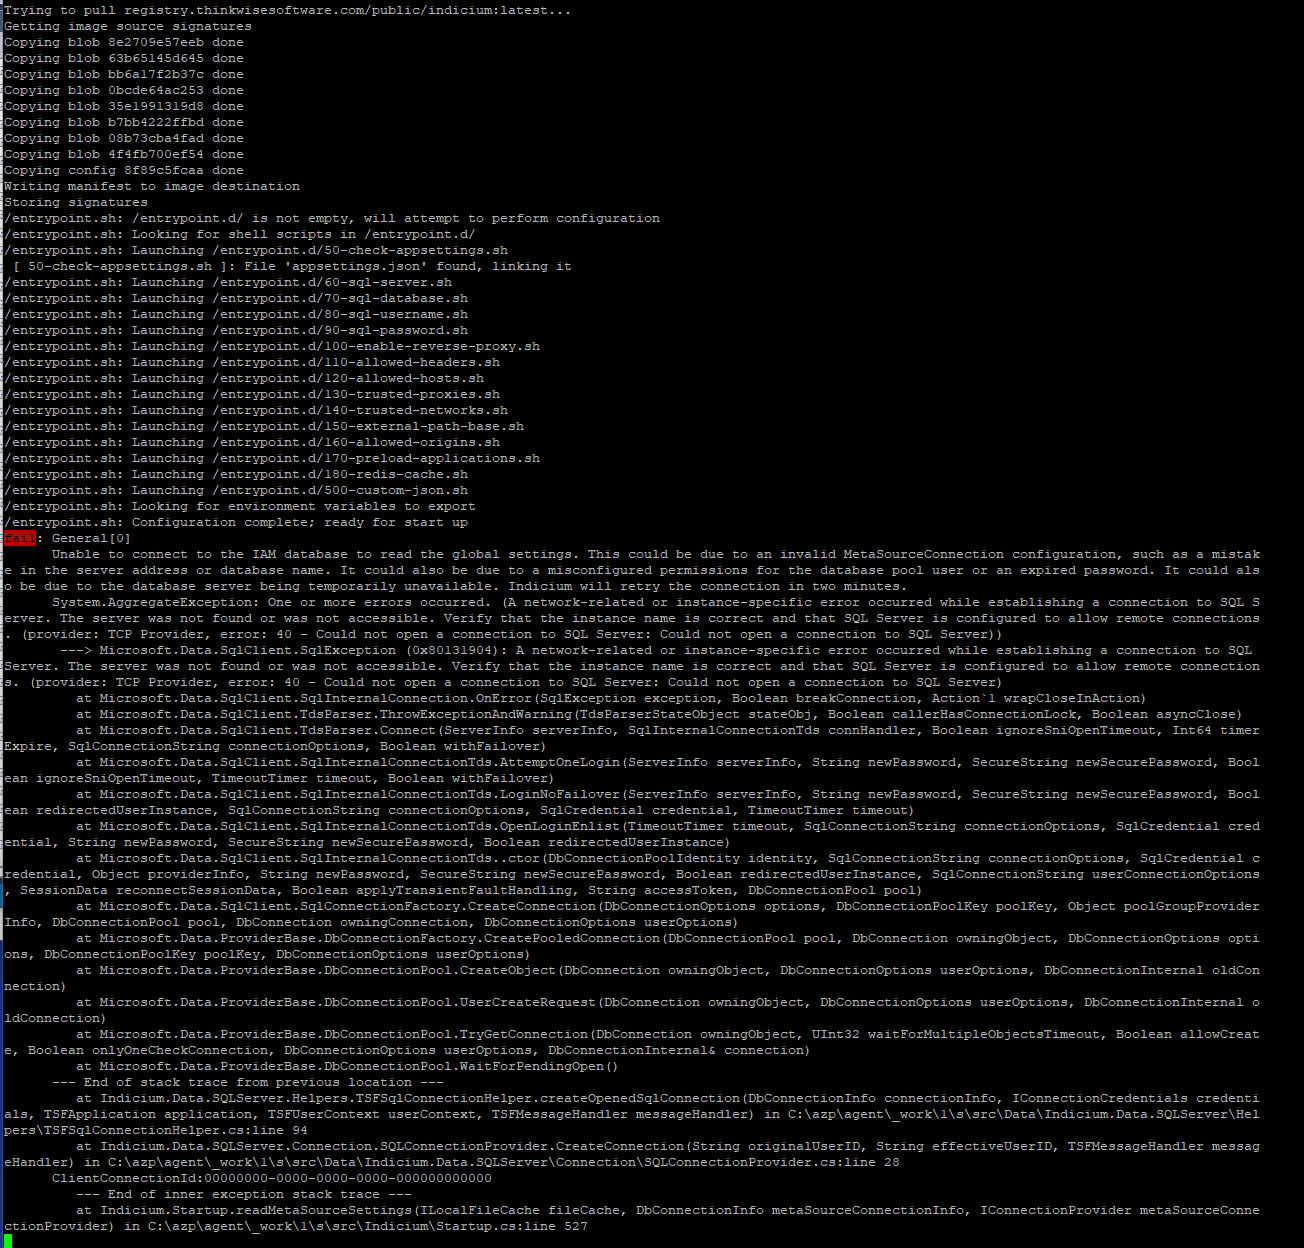
docker compose up -d(remove-dto put the command in the foreground) and wait for the container images to be pulled and all the defined services to be started. Docker will load the variables from the .env file. In this case, the tag 2022.2.17 is specified
In Visual Studio Code, the integrated terminal can be toggled by pressing Ctrl + ` (backtick on the same key as ~).
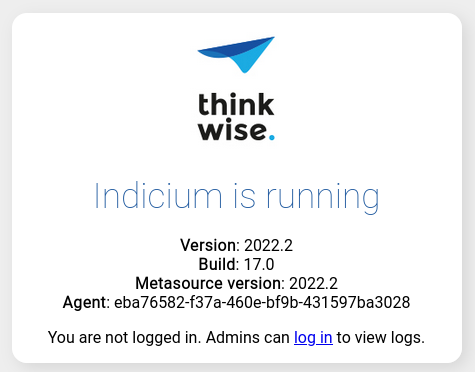
Within a minute, the Universal GUI and Indicium Application Tier should be available on https://localhost and https://localhost/indicium with a self-signed certificate. This self-signed certificate can be trusted. The same credentials used for the database server in the .env file can be used to log in to the Universal GUI.
Applying an update
These steps will update the Indicium Application Tier and Universal GUI from version 2022.2.17 to 2023.1.10:
- Open the .env file again in the preferred editor
- Modify value of TAG from 2022.2.17 to 2023.1.10
- Save the file
- Execute the command
docker compose up -d
A new version of the Universal GUI and Indicium Application Tier are now accessible on localhost.
Clean up
To clean up the Docker environment:
- Stop and remove the created containers and Docker network:
docker compose down
- Remove the example credentials from Docker:
docker logout registry.thinkwisesoftware.com
Do not forget to revoke the created token in TCP if you have not done so yet and are not planning to follow another example from this blogpost.
In an Azure Kubernetes Service Cluster
For production or in larger scale environments it is also possible to run containers through a container orchestrator tool like Kubernetes.
These instructions will set up a platform deployment in a Kubernetes Cluster on Azure using the Universal GUI and Indicium Application Tier. To route the inbound traffic to the correct services, an Ingress Controller from NGINX is used. NGINX will redirect all traffic from http to https and uses a self-signed certificate. For Indicium to authenticate to the IAM database, a secret will be created which is exposed inside the container of Indicium. Both deployments contain two health checks for starting and availability.
Note that a service in Kubernetes is not the same as a service in Docker.
Prerequisites
- An Azure Subscription
- A Storage Account for the Azure Cloud Shell
The used subscription will be charged by Microsoft for using an Azure Kubernetes Service as long as the cluster runs. For more information about costs, see Azure Calculator.
Steps
- Download Thinkwise-Platform-K8s.zip
- Open the Azure Cloud Shell in a new tab, make sure you select the Bash shell in the prompt or top left of the page.
- Create a new Resource Group with an Azure Kubernetes Service cluster and retrieve the credentials to use the Kubernetes CLI in the Azure Cloud Shell:
RG_NAME=thinkwise-k8s-demo
AKS_NAME=$(whoami)-aks
LOCATION=westeurope

az group create \
	--location $LOCATION \
	--resource-group $RG_NAME

az aks create \
    --resource-group $RG_NAME \
    --name $AKS_NAME \
    --generate-ssh-keys

az aks get-credentials \
	--resource-group $RG_NAME \
--name $AKS_NAME - Install a basic NGINX Ingress Controller to the Kubernetes cluster with Helm:
INGRESS_NAMESPACE=ingress-basic

helm repo add ingress-nginx https://kubernetes.github.io/ingress-nginx
helm repo update

helm install ingress-nginx ingress-nginx/ingress-nginx \
  --create-namespace \
  --namespace $INGRESS_NAMESPACE \
  --set controller.service.annotations."service\.beta\.kubernetes\.io/azure-load-balancer-health-probe-request-path"=/healthz
- Create a new namespace to use for the Thinkwise Platform and set it as the active namespace:
TWP_NAMESPACE=twp-example
kubectl create namespace $TWP_NAMESPACE
kubectl config set-context --current --namespace $TWP_NAMESPACE
A namespace in Kubernetes is similar to a resource group in Azure.
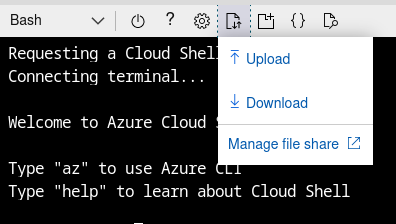
- Upload the zip to the Cloud Shell with the Upload-button:
- Extract the zip and open the folder in a web editor on the Cloud Shell:
unzip Thinkwise-Platform-K8s.zip
cd Thinkwise-Platform-K8s
code .
- Filter out the public IP address of the NGINX Ingress Controller and add it to the deployment and ingress manifests:
PUBLIC_IP=$(kubectl get service --namespace $INGRESS_NAMESPACE ingress-nginx-controller -o jsonpath={.status.loadBalancer.ingress[].ip})

sed -i "s/\[public-ip\]/$PUBLIC_IP/g" deployments/* ingress/*
-
Open the file indicium-configuration.yaml in the web editor, modify the value of SQL_SERVER to match the hostname or IP address of the prepared database server that contains the IAM database, then save the file with Ctrl+S
-
Create a secret for Indicium to connect with the database server:
read -rp "Enter the database username: " DB_USERNAME
read -srp "Enter the database password: " DB_PASSWORD && echo -e "\n"

kubectl create secret generic database-credentials \
    --from-literal=SQL_USERNAME="$DB_USERNAME" \
    --from-literal=SQL_PASSWORD="$DB_PASSWORD"
Secrets are a way to securely store values in Kubernetes
- Create a secret in the current namespace to pull the container images with the name thinkwise-registry:
read -rp "Enter the username: " REGISTRY_USERNAME
read -srp "Enter the secret: " REGISTRY_SECRET && echo -e "\n"

kubectl create secret docker-registry thinkwise-registry \
	--docker-server registry.thinkwisesoftware.com \
	--docker-username "$REGISTRY_USERNAME" \
	--docker-password "$REGISTRY_SECRET"
- Apply the configuration in the current and subdirectories to the Kubernetes cluster, then print the address to the Universal GUI:
kubectl apply -R -f .
kubectl wait deployment/indicium --for=condition=Available
printf "\nThe Universal GUI is now available on:\\nhttps://$PUBLIC_IP.nip.io/\n\n"
The browser will warn you about a self-signed certificate, this can be ignored. Use the same credentials used for the database to log in to the Universal GUI.
Applying an update
These steps will update the Universal GUI and Indicium Application Tier from version 2022.2.17 to 2023.1.10 on the Azure Kubernetes Service cluster
- In the deployments directory, modify the tag of the container image from 2022.2.17 to 2023.1.10 of both files and save the changes with Ctrl+S
- Apply the new configuration to the cluster by executing the following command in the root of the Thinkwise-K8s-Platform directory:
kubectl apply -R -f .
kubectl rollout status deployments
In around 30 seconds, a new version of the Universal GUI and Indicium Application Tier are now accessible on the same address as before (you might need to refresh the page first).
Clean up
To clean up the Azure Kubernetes environment:
- Delete the namespace containing the secrets, deployments, and configuration from Kubernetes:
TWP_NAMESPACE=twp-example
kubectl delete namespace $TWP_NAMESPACE
- Delete the resource group in Azure containing the cluster
RG_NAME=thinkwise-k8s-demo
AKS_NAME=$(whoami)-aks
LOCATION=westeurope
az group delete --resource-group $RG_NAME
Do not forget to revoke the created token in TCP if you have not done so yet and are not planning on following another example from this blogpost.
Wrapping up
Container images are a great solution for developers and system administrators. The full configuration on how to run each image can be defined in code, which provides a simple and easy way to deploy and upgrade components of the Thinkwise Platform. In addition, this process can be adopted into Continuous Delivery to automate the upgrades of the Indicium Application Tier and the Universal GUI.
Disable checkingPremium suggestionsDisable checkingPremium suggestionsDisable checkingPremium suggestions