

The Thinkwise platform offers a comprehensive suite of built-in features that cover most application development needs. However, there are occasions when you need to extend your application with functionality that falls outside the platform's standard offerings. With version 2025.3, Thinkwise introduced a more structured approach to implementing custom components, opening up new possibilities for enriching your applications.
Custom components enable you to integrate specialized views and tools that align perfectly with your business requirements. For example implementing a calendar view for activity management, embedding business process modelers for workflow visualization, or displaying interactive 3D product models for your catalogue. These additions can transform a functional application into one that precisely matches your operational needs.
This blog builds upon our initial guide on custom component set up in Thinkwise applications, which you can find here:
What You'll Learn
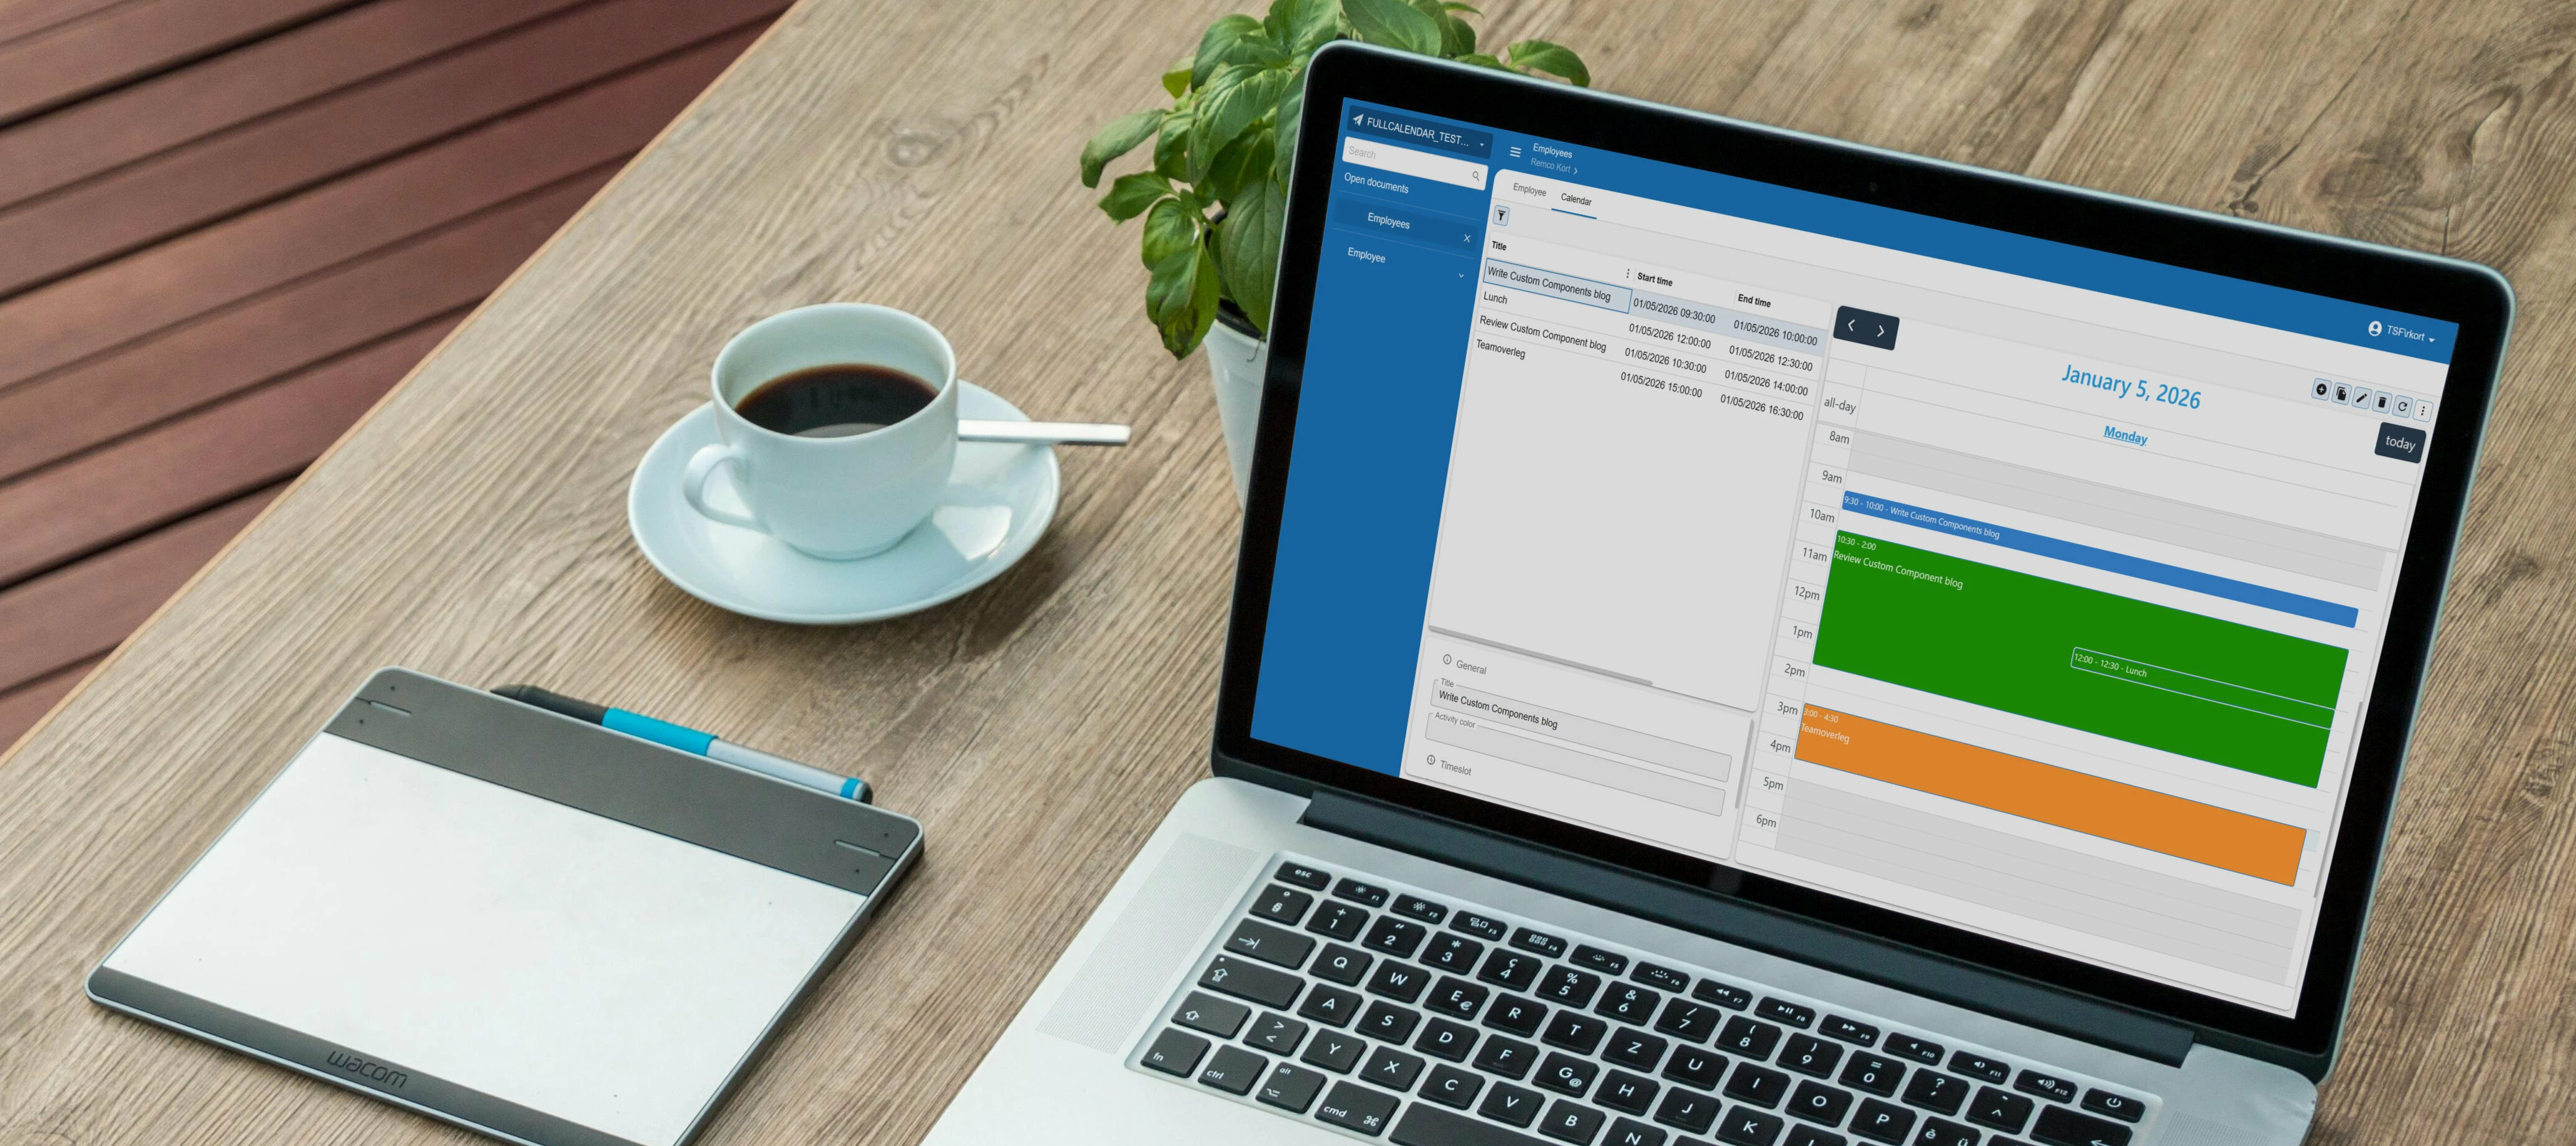
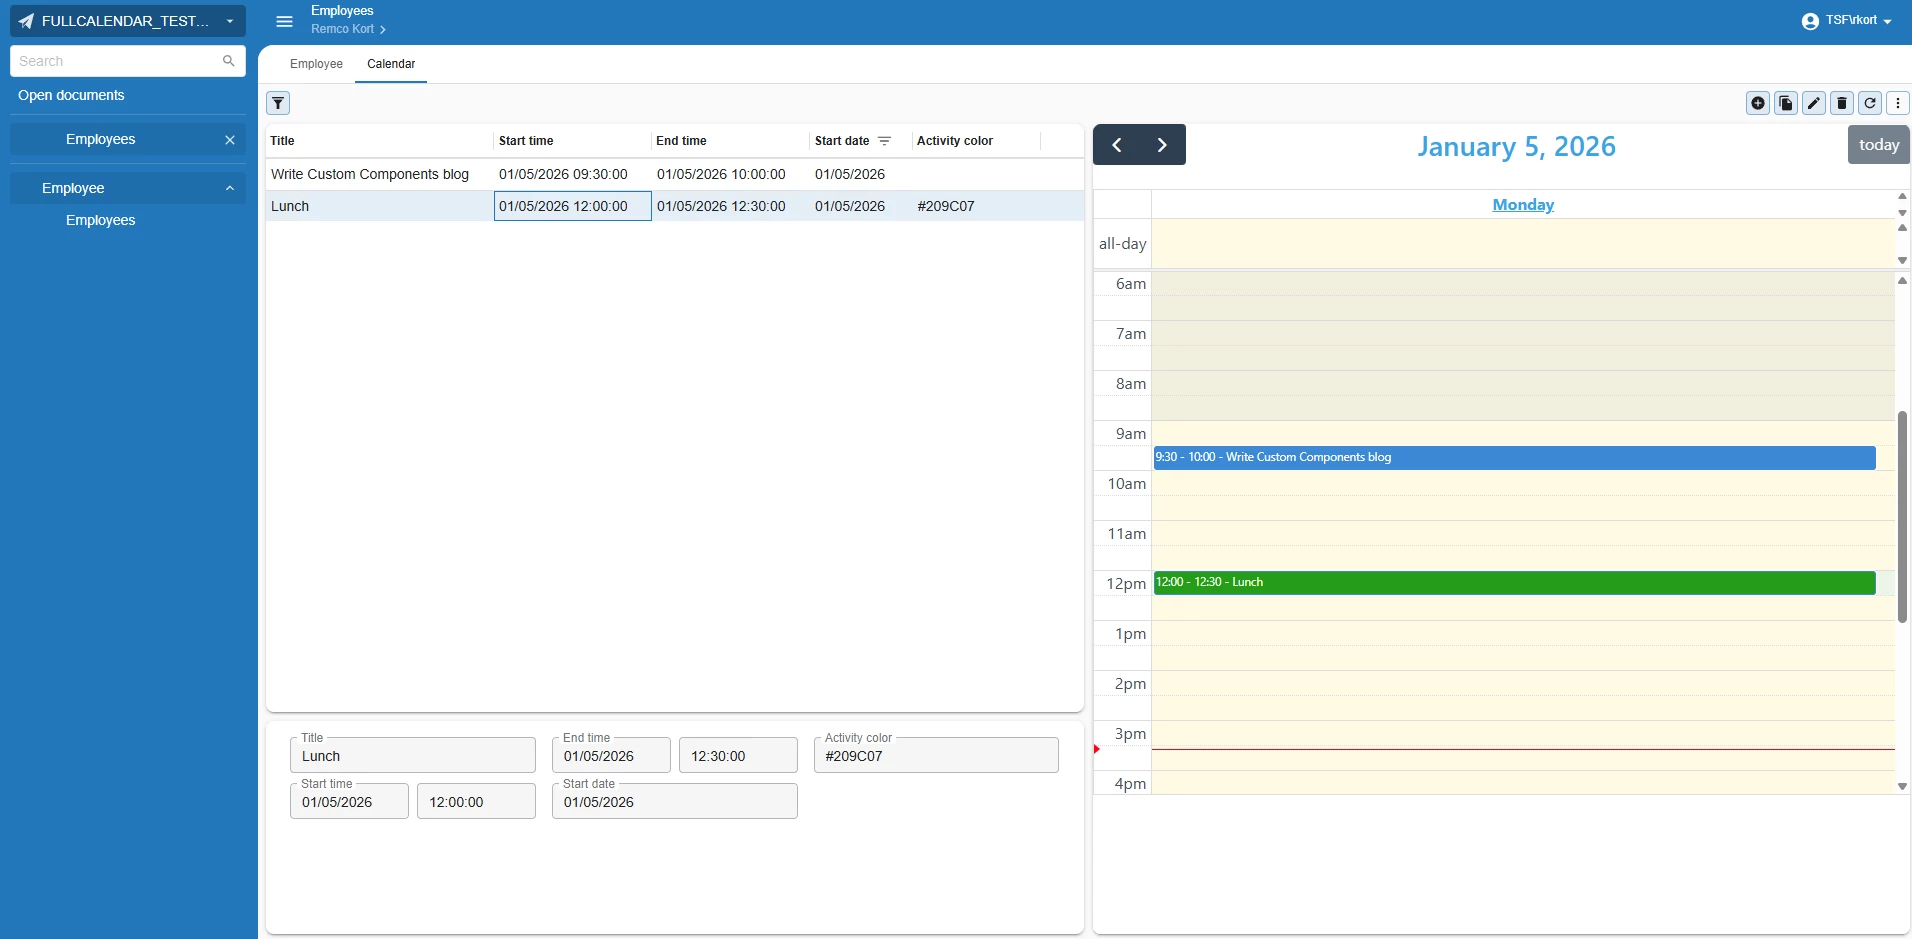
In this blog we'll walk you through a practical implementation of a custom calendar component. This example demonstrates how to create an Outlook-style daily activity view that integrates seamlessly with your Thinkwise application. All necessary files will be available for download, providing you with a solid foundation that you can adapt to your specific requirements.
A Word of Warning
Before proceeding, it's essential to understand the implications of using custom components. Thinkwise does not provide official support for custom implementations. You assume full responsibility for maintenance, updates, and troubleshooting. Should Thinkwise migrate to a new UI technology in the future, there is no guarantee that your custom component will remain functional. Any required adaptations or fixes will be your responsibility as the developer, not Thinkwise's.
Choosing Your Component
The first step is selecting the right component for your needs. Since Universal UI is built on React, we strongly recommend choosing components or libraries designed to work within the React ecosystem. This ensures better compatibility and reduces integration challenges.
For straightforward implementations, plain JavaScript may suffice. However, more complex custom components benefit significantly from using established libraries such as React itself or TypeScript, which provide better structure, type safety, and maintainability.
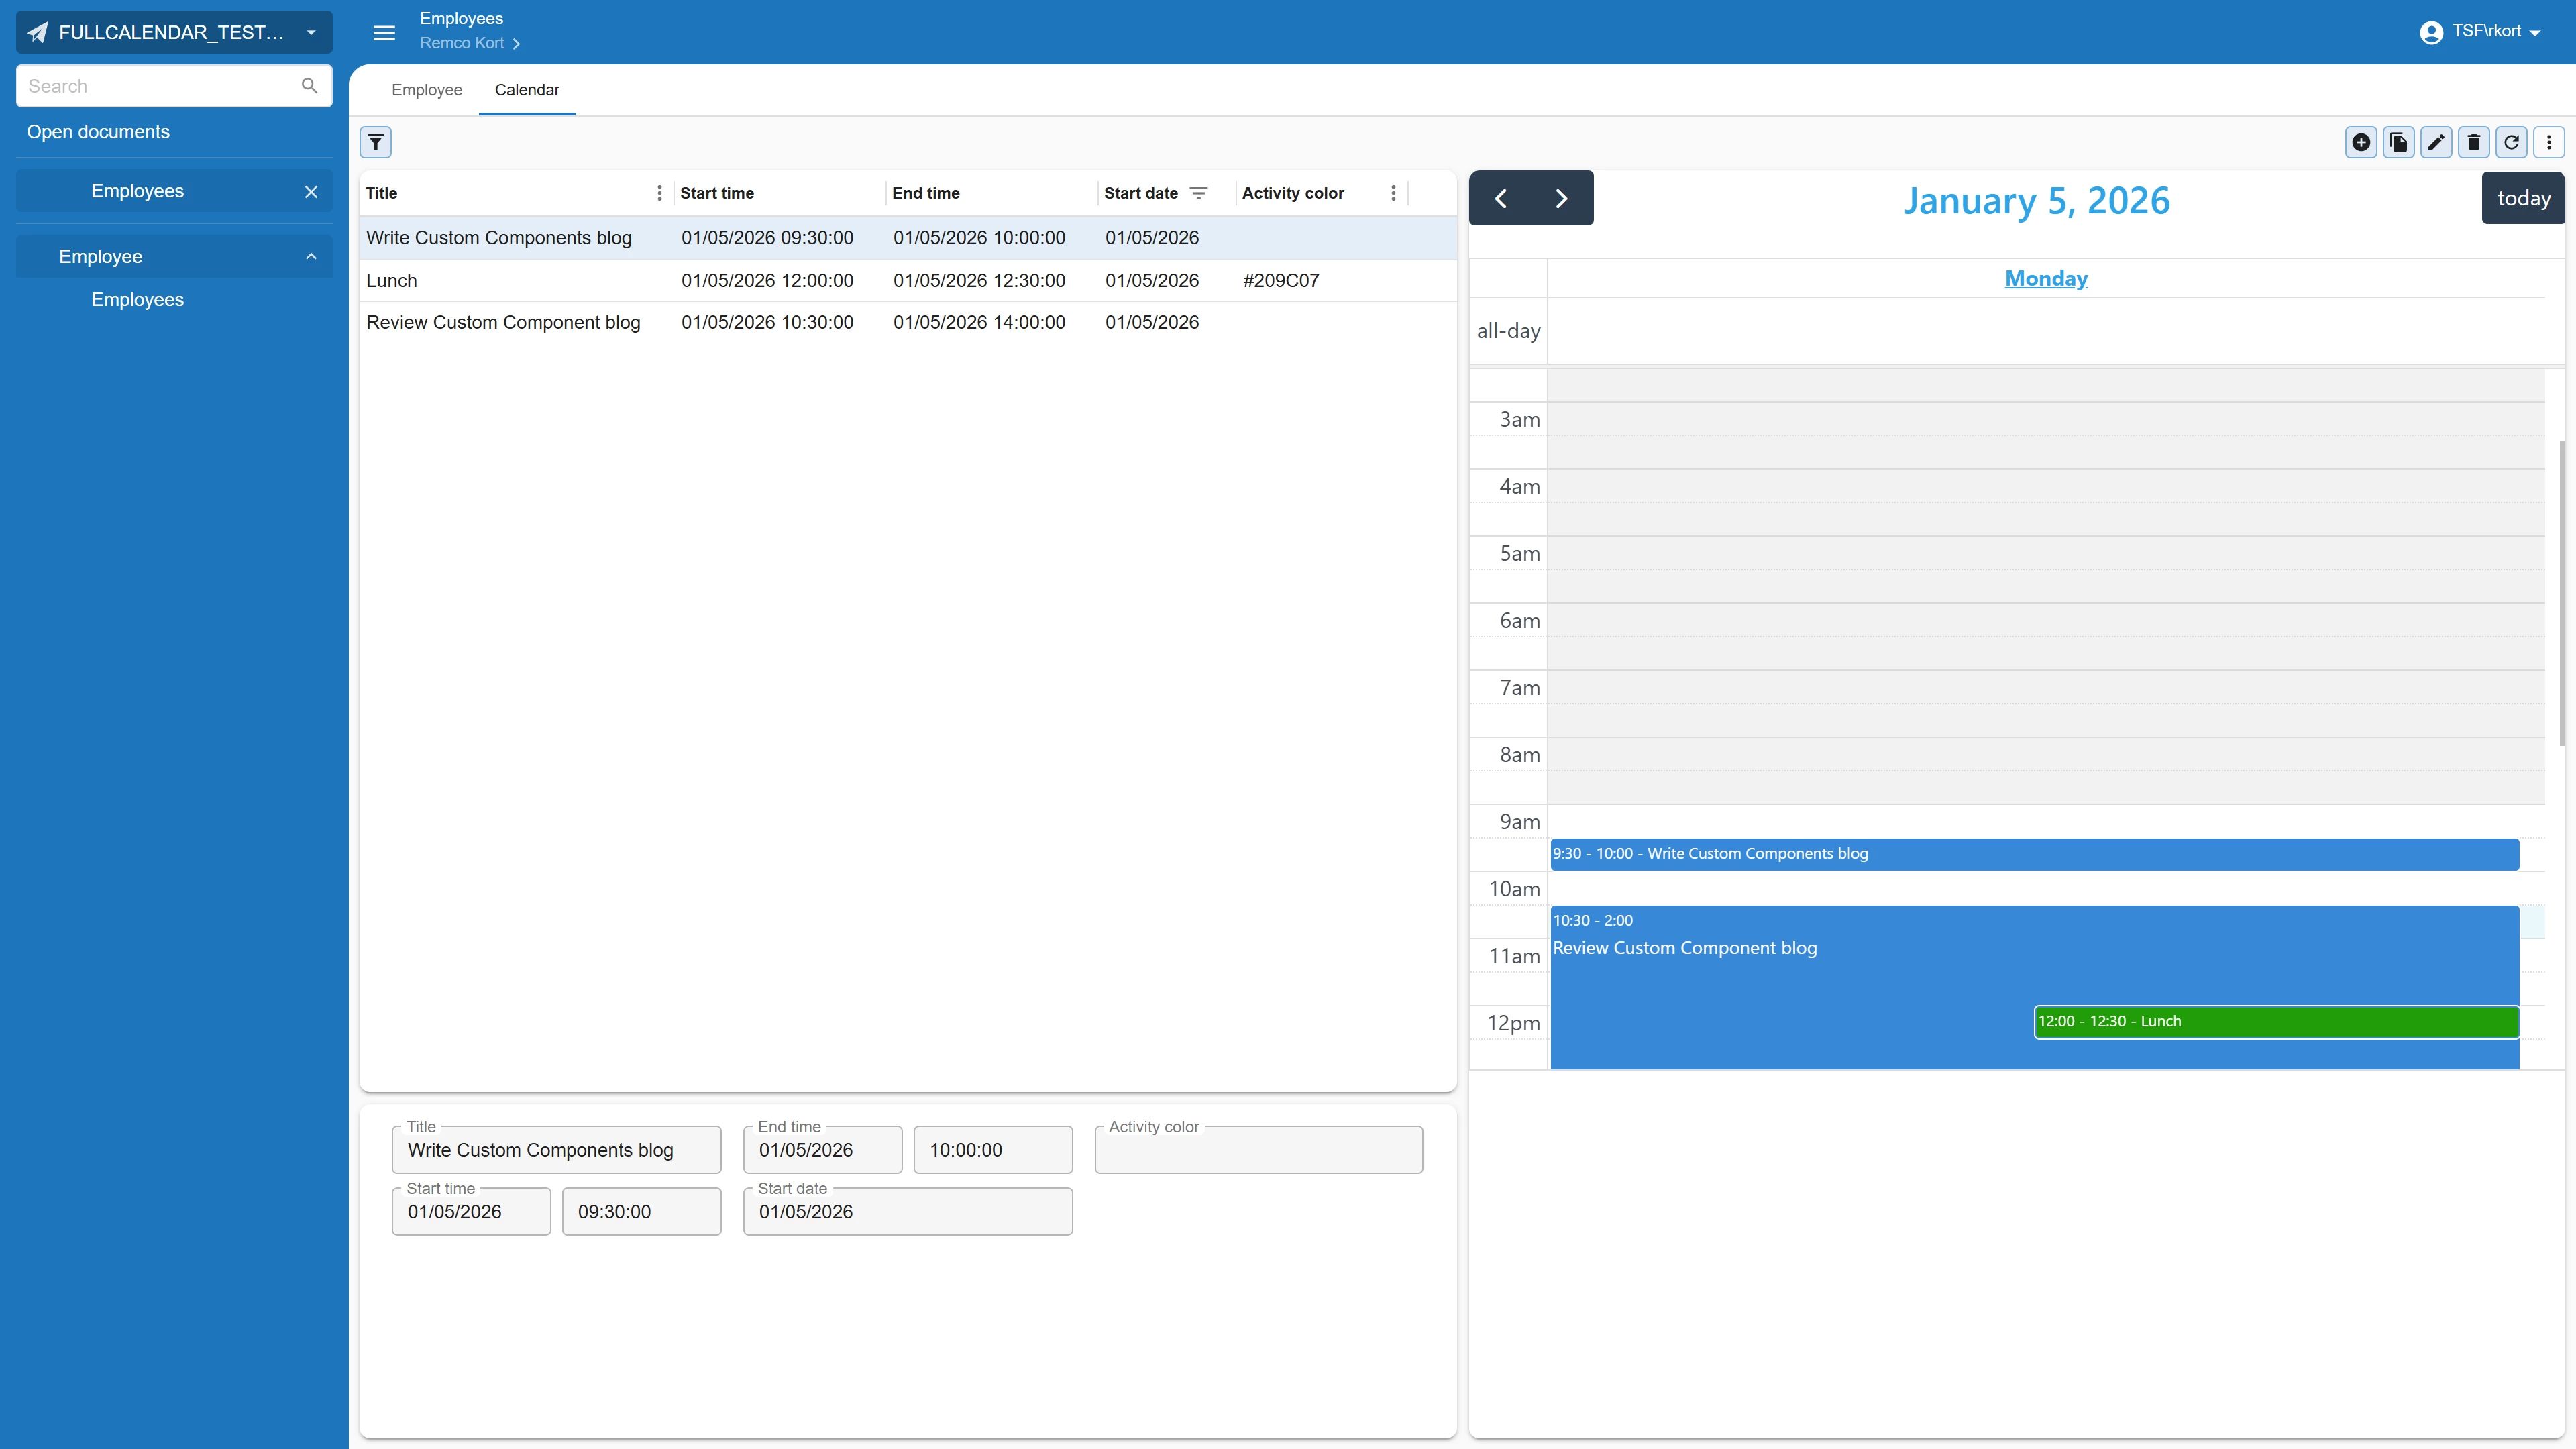
For this blog, we'll implement a calendar component that displays users' daily activities in an intuitive, Outlook-inspired interface. This type of view is particularly valuable for organizations that need to give individual users a clear overview of scheduled activities, deadlines, and appointments within their Thinkwise application.
If you want to show activities for multiple people or resources, you should use our integrated Scheduler.
We've selected the FullCalendar component for this implementation. This choice offers several advantages. First, it's the same component that Universal uses for its built-in Scheduler functionality, which means it will naturally integrate with the Universal UI's look and feel. Your users won't experience any jarring visual inconsistencies. Second, for our specific use case, FullCalendar can be used under its free license tier, making it a cost-effective solution. The component is well-documented, actively maintained, and offers extensive customization options. For detailed information about licensing and capabilities, visit: https://fullcalendar.io/
Initial setup
Download the files included with this blog post. These files include the styling and the JavaScript code to interact with the Universal UI.
We also need to download the most recent version of FullCalendar and add it to our custom component.
- Download FullCalendar (https://github.com/fullcalendar/fullcalendar/releases)
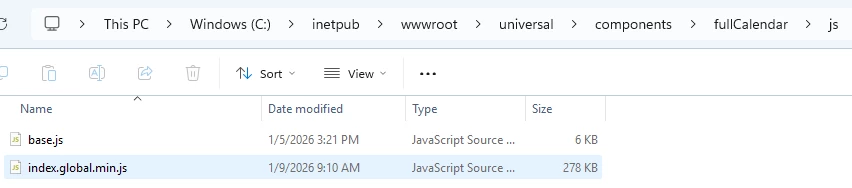
- In the ‘dist’ folder of FullCalendar you will find the file ‘index.global.min.js’, copy it to the ‘js’ folder of our custom component.

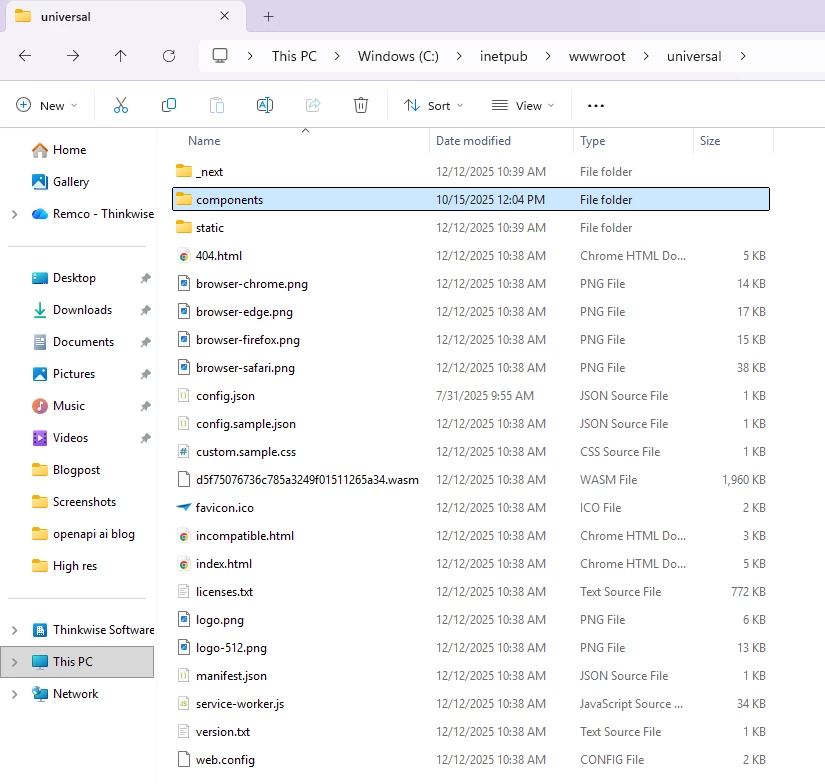
Go to the root folder of your Universal UI and paste all the custom component files.
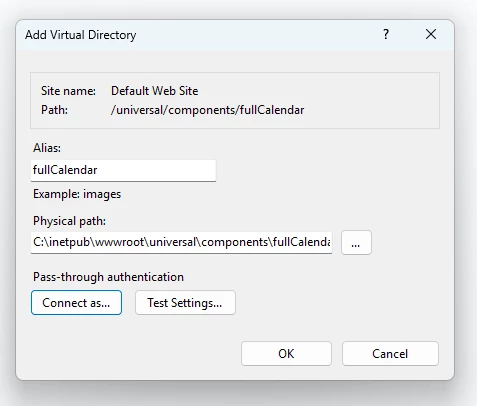
Setup a virtual directory in IIS
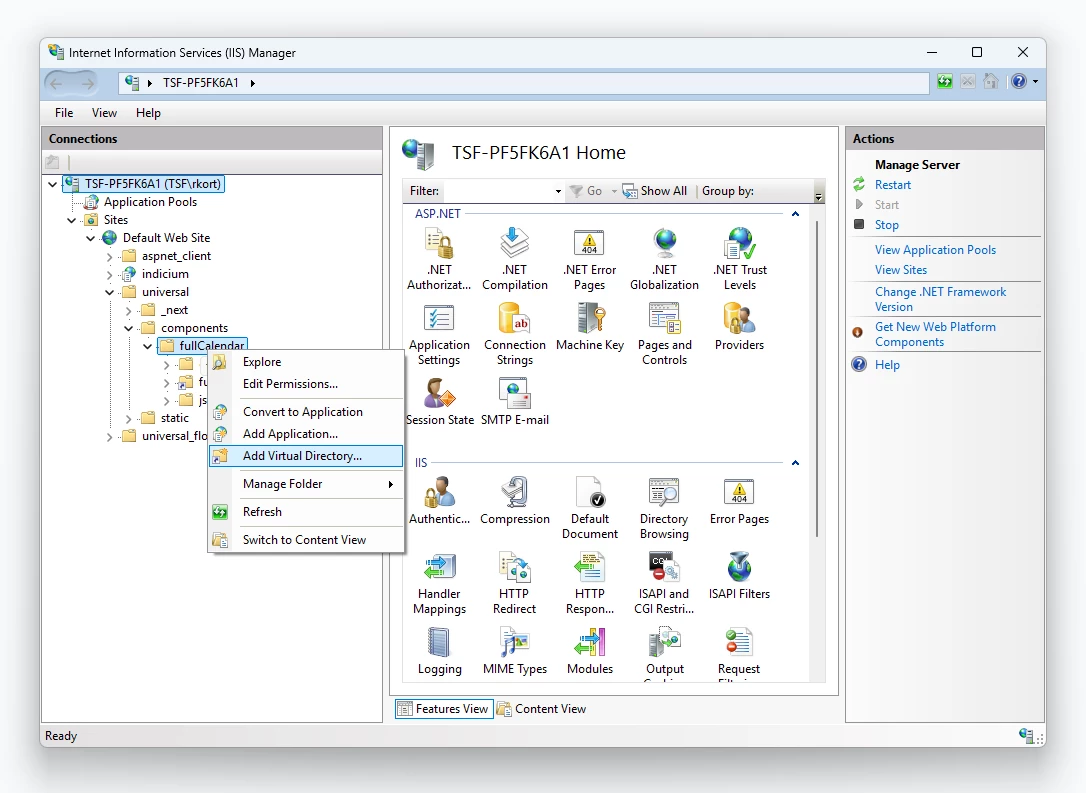
Next, we need to create a virtual directory in IIS for our custom component.
- Open IIS
- Browse to the component folder
- Right click and select ‘Add virtual directory’
- Enter an alias and select the physical path to the custom component
Click ‘OK’ to create the virtual directory
Software Factory setup
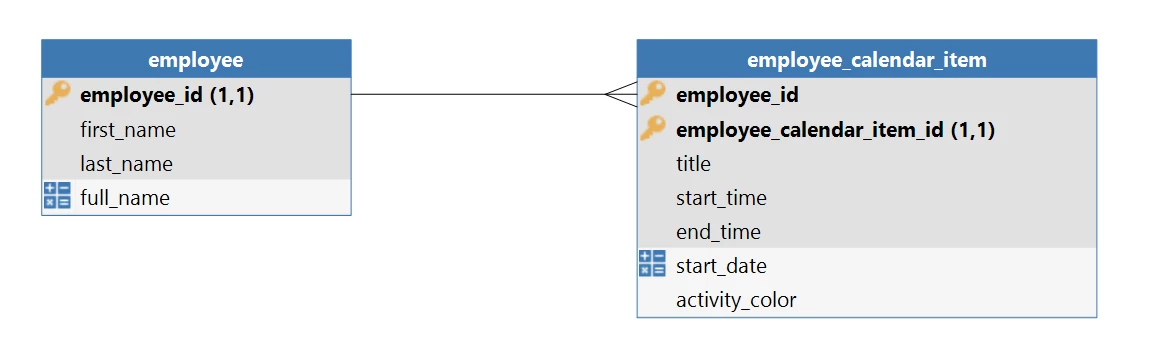
For this demo I have prepared an application that has an ‘employee’ and ‘employee_calendar_item’ table. The ‘employee’ table contains information about an employee and the ‘employee_calendar_item’ table contains all calendar events and their associated data.
The custom Component will be assigned to the employee_calendar_item table.
Import the model included with this blog into your Software Factory and run a full creation to create the application database.
Subject setup
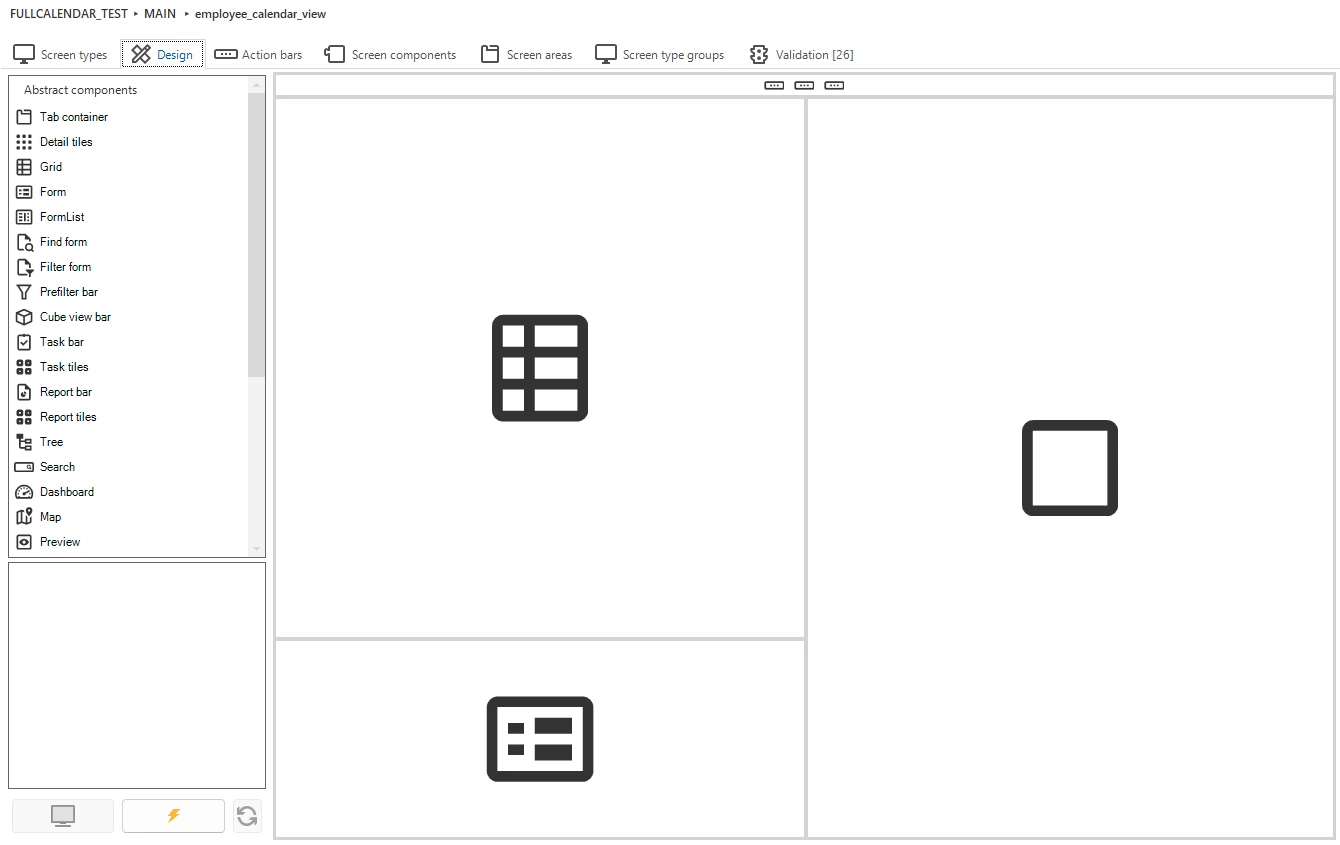
Screen type
We need to create a new screen type with a custom component in it. In this example we also want to display a grid/form next to it, so we create the following screen type:
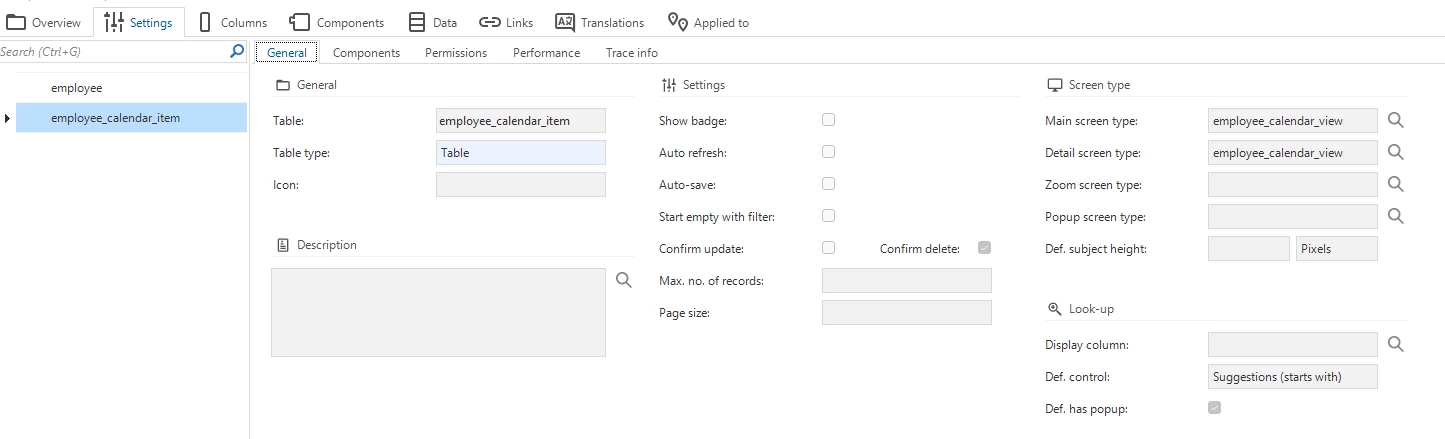
We then assign this screen type to our subject and we provide the folder where our custom component is saved. This is a relative URL that starts in your Universal root folder.
- Open the subject screen
- Select the subject ‘employee_calendar_item’
- Set the main and detail screen type to our new screen type
- Go to the custom component settings and fill the custom component location. This is a relative location URL starting in the Universal root folder.

Setting up communication between the component and the Universal UI
The next step is enabling communication between our custom component and the Universal UI. The Universal UI will send us an information message with useful information and a dataset from the subject.
To do this we add an event listener that once the load event has been triggered will send a post message of type ‘initComponent’ to the Universal UI. For more information about information messages see our custom component set up blog.
//We need to wait for the load event before we can post a message to Universal
window.addEventListener("load", (event) => {
  //We trigger the initComponent event so that we will get the initContext event.
  window.parent?.postMessage({
    type: 'initComponent'
  }, '*');
});
This will return an information message, in our case it looks like:
{
  "InitializationInfo": {
    "Application": 185,
    "ApplicationUrl": "http://localhost/indicium/sf/185",
    "MetaURL": "http://localhost/indicium/iam/sf",
    "Entity": "employee_calendar_item"
  },
  "State": "regular",
  "Theme": "dark",
  "EntityQueryPath": "http://localhost/indicium/sf/185/employee(employee_id=1)/detail_ref_employee_employee_calendar_item",
  "DataSetLocation": "http://localhost/indicium/sf/185/employee(employee_id=1)/detail_ref_employee_employee_calendar_item?$skip=0&$top=100",
  "DataRowLocation": "http://localhost/indicium/sf/185/employee_calendar_item(employee_id=1,employee_calendar_item_id=1)",
  "DataRow": {
    "employee_id": 1,
    "employee_calendar_item_id": 1,
    "title": "Test 1",
    "start_time": "2025-10-15T14:00:00",
    "end_time": "2025-10-15T15:00:00"
  },
  "DataSet": [
    {
      "employee_id": 1,
      "employee_calendar_item_id": 1,
      "title": "Test 1",
      "start_time": "2025-10-15T14:00:00",
      "end_time": "2025-10-15T15:00:00",
      "activity_color": "#6cf542"
    },
    {
      "employee_id": 1,
      "employee_calendar_item_id": 2,
      "title": "Test 2",
      "start_time": "2025-10-15T14:30:00",
      "end_time": "2025-10-15T16:00:00",
      "activity_color": "#f54e42"
    }
  ],
  "EventType": "initContext"
}
The information message delivers a dataset containing all data currently loaded by your subject. In our implementation, the subject loads all activities for the selected employee on the chosen date, and this complete set of records becomes available within the dataset. This is useful because it provides immediate access to all the data you would typically see in a grid view, reducing the need for additional Indicium API calls.
Once you have this dataset from the information message, you can extract it into an array and pass it directly to FullCalendar. The component then renders all calendar activities from the dataset.
//get the dataset from the message and store it in an array of events for FullCalendar
    const events = event.data.DataSet.map(item => ({
      id: item.employee_calendar_item_id,
      title: item.title,
      start: item.start_time,
      end: item.end_time,
      backgroundColor: item.activity_color || undefined
    }));
Triggering application logic with process flows
Custom components frequently need to initiate application logic within your Thinkwise environment. You can achieve this by starting process flows through POST messages. Additionally, process flows with input parameters enable you to send information from your custom component back into your Thinkwise application.
Our calendar has three interactions that trigger application logic. These cover opening existing calendar activities, creating new calendar activities, and filtering the dataset when users navigate to different days within the custom component. Let's examine each of these interactions in detail.
Opening Calendar Activity
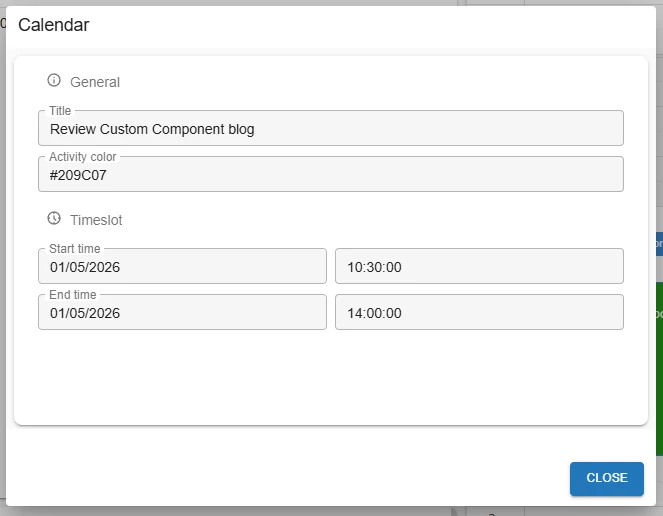
FullCalendar provides native support for detecting when users click on an event. We leverage this built-in functionality to trigger a process flow that opens a modal popup. This popup displays the selected event in a form view, giving users immediate access to event details. The interaction feels natural and responsive, as the click action follows familiar desktop application conventions that users already understand from tools like Outlook.
We add the following Javascript to our custom component implementation:
eventClick: function (info) {

        window.parent.postMessage({
          type: 'startProcessFlow',
          processFlowId: 'open_employee_calendar_item',
          dataParams: {
            'employee_calendar_item_id': info.event.id
          }
        }, '*');
      }
This will trigger the following process flow to be executed:
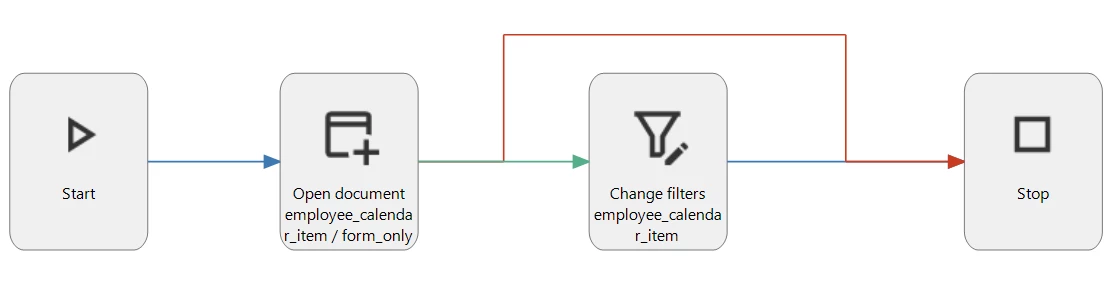
This process flow will open a modal popup with a filter on the selected event. The subject has a screen type that only shows a form:
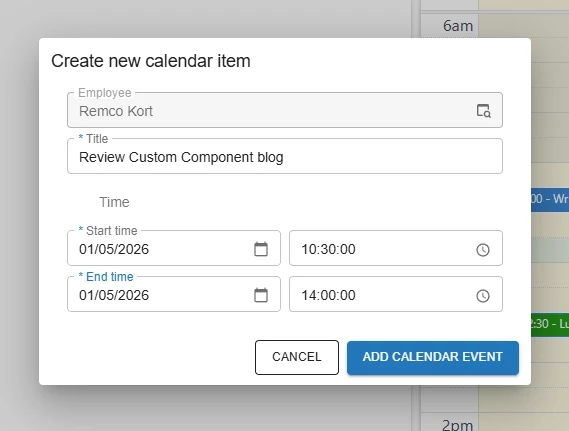
Creating New Calendar Activities
When users click on an empty time slot, we want to initiate a task that adds a new activity to the employee's calendar. The system should automatically populate the start datetime field with the time corresponding to the clicked slot, streamlining the activity creation process. To implement this behavior, we add the following code to our JavaScript file:
dateClick: function (info) {

        window.parent.postMessage({
          type: 'startProcessFlow',
          processFlowId: 'add_employee_calendar_item',
          dataParams: {
            'employee_id': employeeId,
            'start_time': info.dateStr
          }
        }, '*');
      }
This code will trigger the following Process Flow:
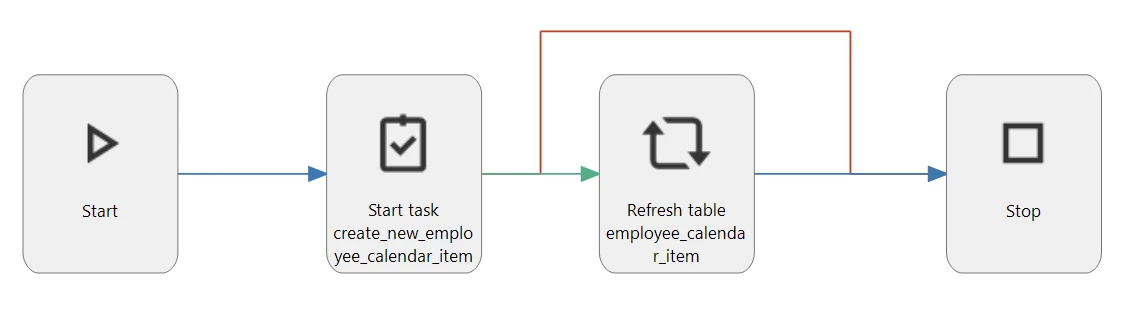
This will open a task and fill the start time with the time provided by the custom component. After successfully executing the task, it will refresh the screen to make sure the custom component will display the event we just added.
Filtering Data by Selected Date
To optimize performance and limit the volume of data being loaded, we implement filtering that displays only the events relevant to the day currently selected in the custom component. This is accomplished by triggering a process flow whenever the user changes the selected date. This approach ensures quick response times, even when dealing with employees who have extensive calendar histories:
datesSet: function (info) {
        window.parent.postMessage({
          type: 'startProcessFlow',
          processFlowId: 'full_calendar_filter_dataset',
          dataParams: {
            'start_time': info.start
          }
        }, '*');
      }
    });
This will trigger the following Process Flow and provide it with the date selected by the user:

The process flow takes the selected date and applies a filter to the subject, ensuring that only the relevant data for that specific day is retrieved from the database. This filtering strategy is crucial for maintaining consistent performance over time. Without such filtering, your component's performance would gradually degrade as the calendar accumulates more events, eventually leading to noticeably slower loading times and a diminished user experience.
Best practices
Now that we've walked through the calendar component implementation, here are several important considerations to keep in mind when developing your own custom components:
Performance and Data Volume
The size of your dataset directly impacts the performance of requests. Larger information messages result in slower response times, which can degrade the user experience. By keeping your message payloads lean, you ensure quick, responsive performance that meets user expectations. Do this by only retrieving the necessary data in your subject.
Accessing Additional Data
The information message structure is intentionally compact. When your custom component requires access to model metadata or data from other subjects beyond what's included in the information message, call the Indicium APIs directly within your component. This approach keeps the information message lean while giving you the flexibility to retrieve supplementary information as needed.
Data Security and Privacy
Indicium and Universal have been developed with modern data security standards at their core. When processing data within your custom component, you must uphold these same standards. Ensure that any data handling, storage, or transmission within your component follows security best practices.
Leverage Native Thinkwise Functionality
We strongly recommend maximizing the use of existing Thinkwise functionality rather than recreating it within your custom components. Avoid building custom grids or form components because these already exist within the platform. Instead, use process flows to trigger native Thinkwise functionality. This approach ensures your custom component integrates seamlessly with your Thinkwise application, maintains consistency across the user interface, and reduces the maintenance burden associated with duplicating functionality that the platform already provides.