

At the Thinkwise Developer Event 2025 I gave a technical session about how to get creative with cardlists using HTML. This accompanying blog is a short summary with practical pointers and code to get you started on creating your own HTML cardlists.
What is a cardlist?
The Cardlist is a screen component with the following characteristics:
- 1 Column, no horizontal scrollbar, full width
- Variable ride height
- Fields on top of each other
- Responsive
- Read Only
- No Header
- Only for Universal GUI
Cardlists are ideal for:
- Small device screens, like mobile phones and barcode scanners
- Navigation
- Mini dashboards
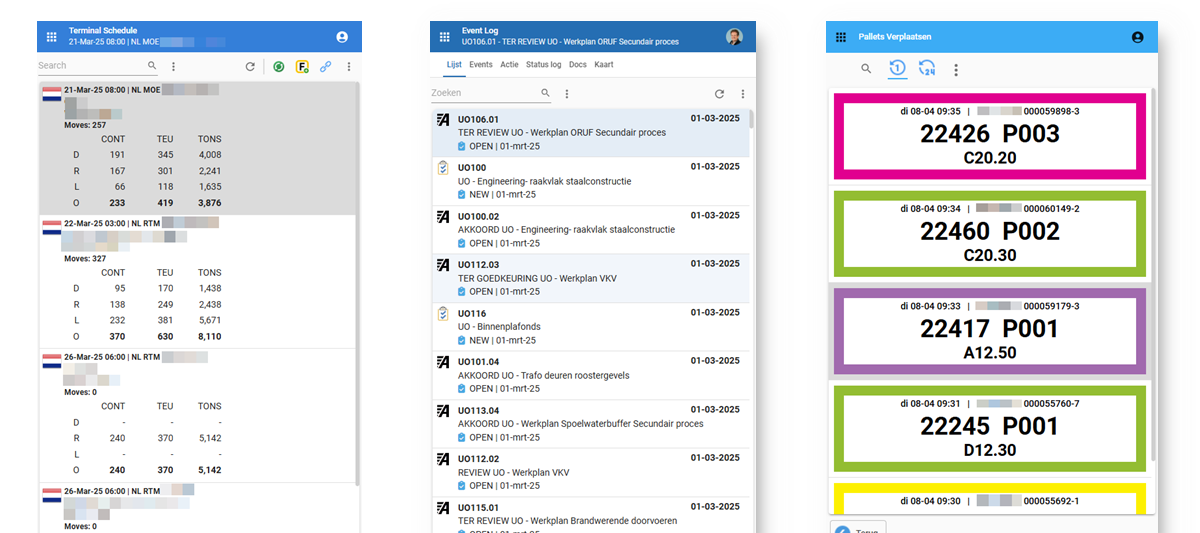
Sometimes the result of a standard implementation within the Software Factory may produce a result that is not quite how you would like it. The fields are displayed below each other and it is possible to display 1 icon or thumbnail of an image.
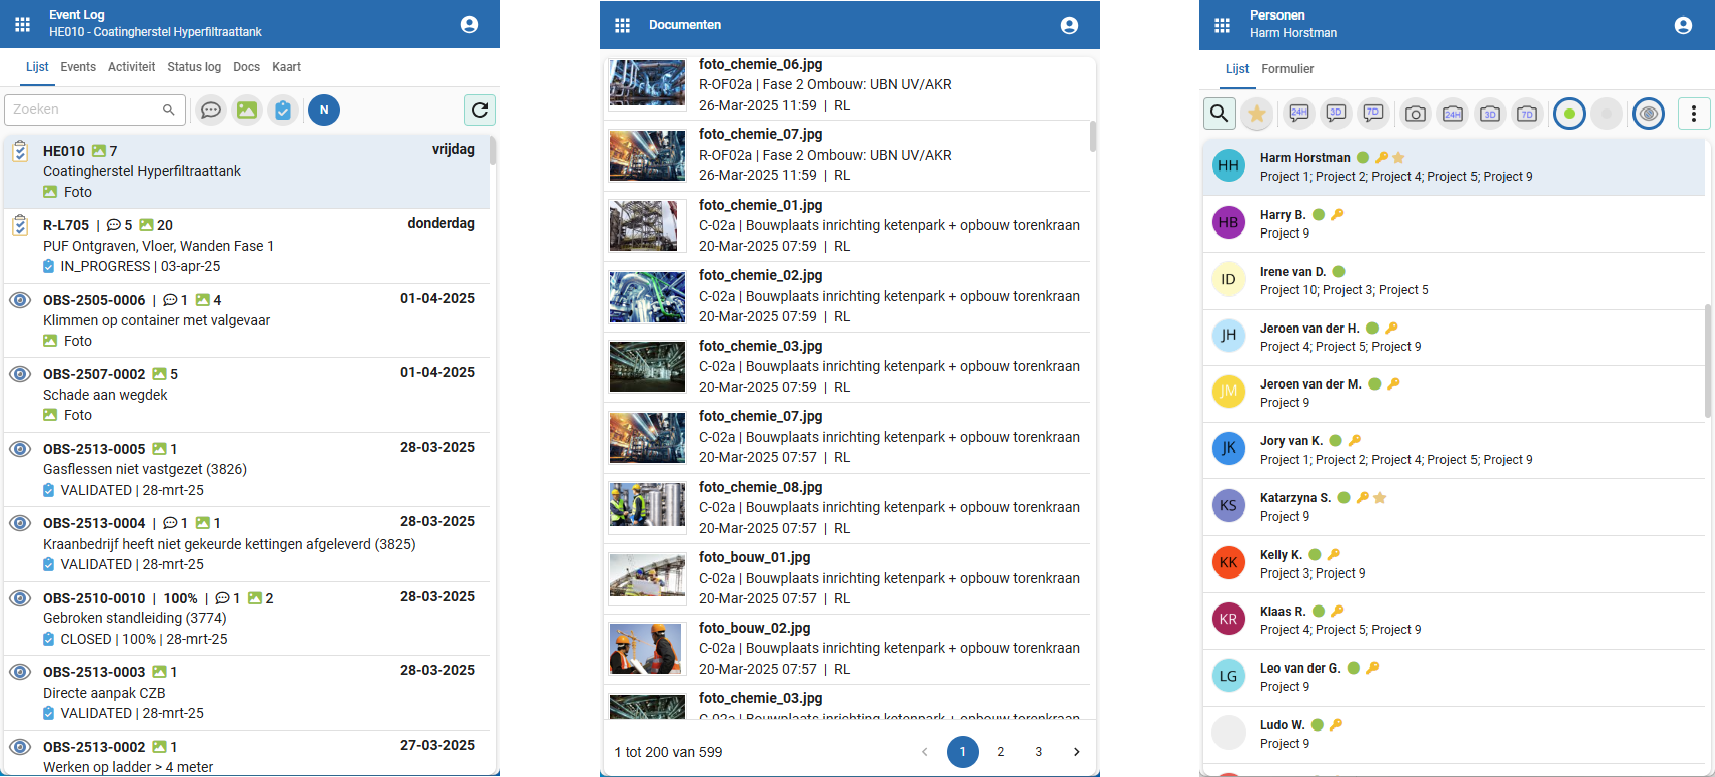
Example:
With the 4 Tweaks below you can easily give your Card List a completely different look and feel. Soon you will find out that it is quite simple to create Card Lists that make your end users happier than ever.
For inspiration:

Tweak 1 – HTML Card List
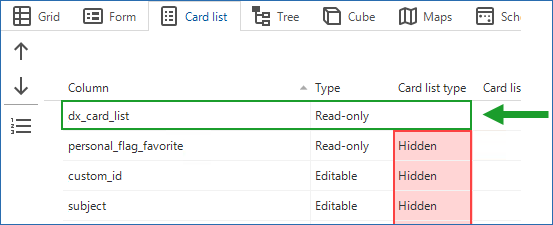
In this tweak we are replacing all the previously visible fields with one visible expression field that contains all of our HTML. This will give us full control over the styling of the Cardlist. Make sure you add a field to your table or view, linked to a domain of the type NVARCHAR(MAX) and control type HTML, example:
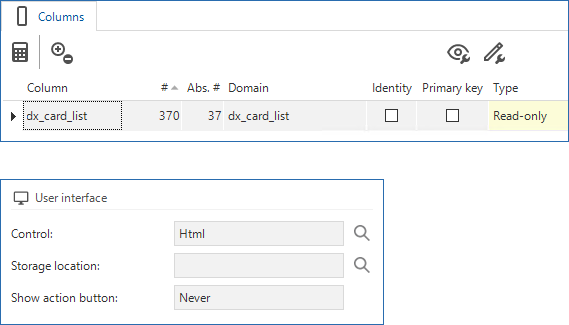
Set this field as the only visible field, optional together with an icon or image field
Now compose an expression based on multiple fields, using some simple HTML elements for the desired alignment, example:
SELECT act_guid
     , dx_cardlist = '<div><strong>' + act_custom_id + '</strong></div>'
                   + '<div>' + act_subject + '</div>'
                   + '<div>' + pr.org_name + ' - ' + xp.prs_full_name_01 + '</div>'
                   + '<div><i>Plan:'
                   + ISNULL(FORMAT(act_planned_start_date_time, 'dd-MMM-yy', 'nl-nl'), '?? -??? -??') + ' - '
                   + ISNULL(FORMAT(act_planned_finish_date_time, 'dd-MMM-yy', 'nl-nl'), '?? -??? -??')
                   + '</i></div>'
FROM activity a
LEFT JOIN organisational_entity ro
  ON ro.org_guid = a.act_responsible_org_guid
LEFT JOIN person xp
  ON xp.prs_guid = a.act_initiator_prs_guid
LEFT JOIN person rp ON rp.prs_guid = a.act_responsible_prs_guid
JOIN organisational_entity pr
  ON pr.org_guid = a.act_belongs_to_project_org_guid
Tweak 2 – Improved icon display with custom.css
Sometimes the icon in the cardlist can be to big or too small or maybe we would like it to be round. We can use some custom.css to accomplish this. An example of how you can change the display of icons in the cardlist:
/* -- CARD LIST -- */
.cardlist-icon {
  width: 30px !important;
  height: 30px !important;
  min-width: 25px !important;
  min-height: 25px !important;
  margin-right: 4px !important;
}

.cardlist-icon svg { width: 70% !important;  height: 70% !important;  margin-left: 4px;  margin-top: 4px;
}

/* AVATARS */
[data-testid*="avatar"] .cardlist-icon, [data-testid*="avatar"] .image-placeholder {
  width: 32px !important;
  height: 32px !important;
  margin-right: 12px !important;
  visibility: visible !important;
  background-color: #EEEEEE;
  border: 1px solid #EEEEEE;
  border radius: 50%;
  align-self: self-start;
  overflow: hidden;
}

/* IMAGES / DOCUMENTS */
[data-testid*="document"] .cardlist-icon {
  width: 75px !important;
  max-height: 50px !important;
  min-width: 50px !important;
  min-height: 50px !important;
  margin: auto !important;
  margin-right: 12px !important;
  visibility: visible !important;
  background-color: white;
  padding: 1px !important;
  border: 1px solid #ddd;
}

[data-testid*="document"] .image-placeholder {
  width: 75px !important;
  height: 50px !important;
  margin: auto !important;
  margin-right: 12px!important;
  border: 1px solid #ddd;
  background-color: white;
}
For more information about data test ID’s: see the Thinkwise documentation
Please note! For this to work, 3 screen types are needed with a card list as the main component. For avatars, the word 'avatar' should be in the name of the screen type and for images/documents the word 'document'. So for example: card_list, card_list_avatar and card_list_document
Tweak 3 – Add Icon Library to your application
Sometimes an image says more than a lot of words, so it can be useful to use icons in Card Lists. This is easily achieved by adding an icon library to the application. Fontawesome is an extension for CSS, which can be easily added to the Universal GUI.
For example fontawesome in 3 easy steps
- Download: https://fontawesome.com/download ...
- Add (virtual) as a virtual folder in IIS
- Create a referral in custom.css
- Once this is done, icons can easily be used in expression fields
Find the icon you want on https://fontawesome.com's website, copy the code and add it to your expression field:

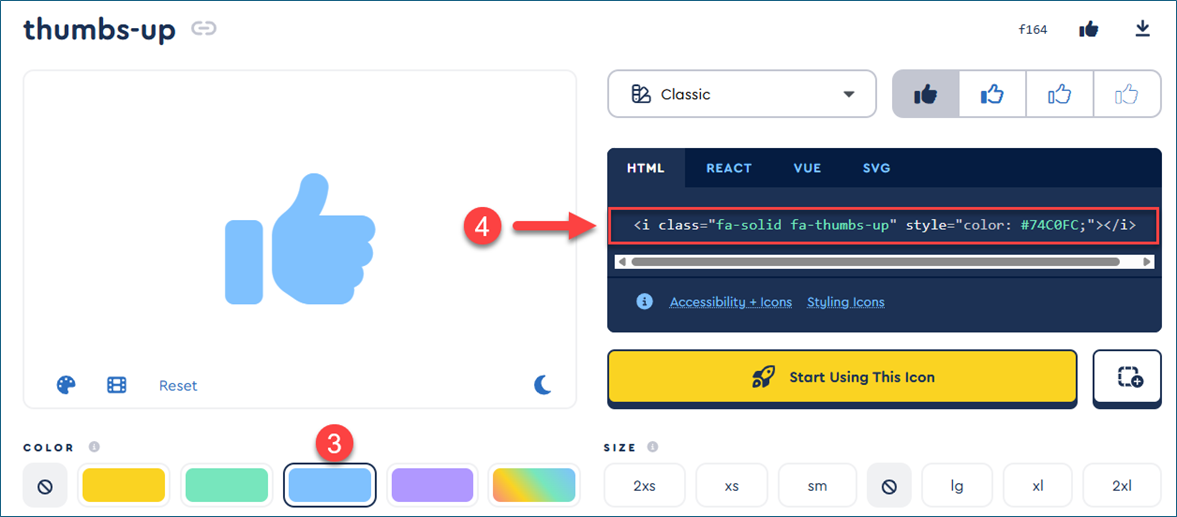
Example:
act_dx_cardlist = '<div style="font-size:1.5em;" ><strong>' + act_custom_id + '</strong> <i class="fa-solid fa-thumbs-up" style="color:#00FF00;" ></i></div>'
+ '<div>' + act_subject + '</div>'
+ '<div>' + pr.org_name + ' - ' + xp.prs_full_name_01 + '</div>'
+ '<div><i>Plan: '
+ ISNULL(FORMAT(act_planned_start_date_time, 'dd-MMM-yy', 'nl-nl'), '?? -??? -??') + ' - '
+ ISNULL(FORMAT(act_planned_finish_date_time, 'dd-MMM-yy', 'nl-nl'), '?? -??? -??')
+ '</i></div>'
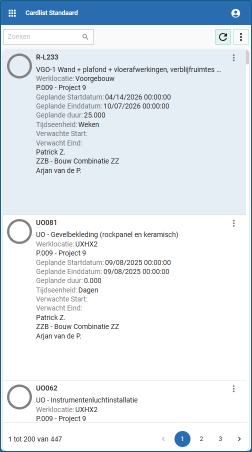
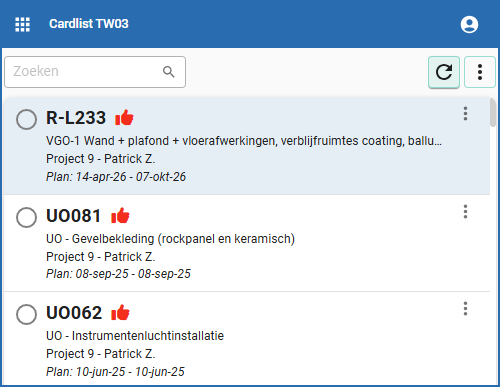
That produces a result like this:
Tweak 4 – Make use of AI
Even without much knowledge of HTML and CSS, platforms such as CO-Pilot, ChatGPT and Gemini allow you to fabricate nice layouts, with a minimum of effort.
Ask a question like the one below. Start with "I need an HTML div with... " and end with ""... All styling inline". It often produces an output that is directly applicable, example:
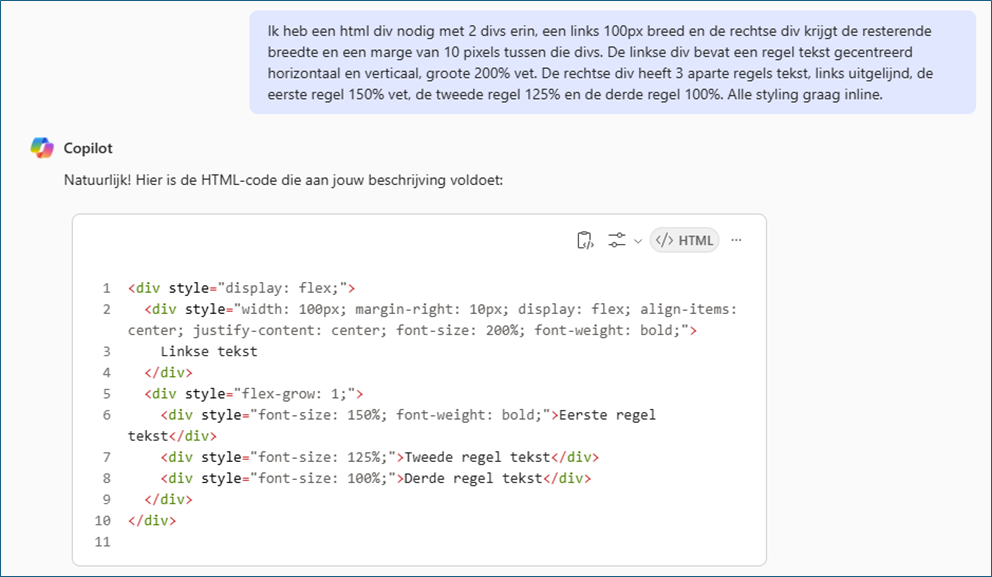
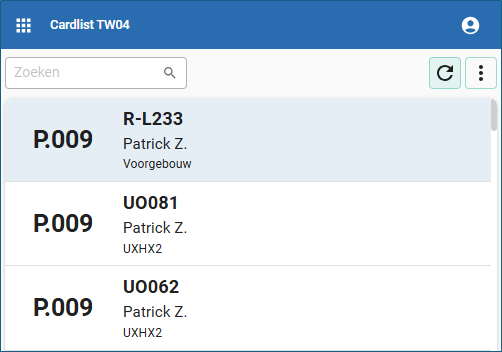
The output, you can copy and paste into the query of your view or expression field, and replace the placeholders with column names, for example:
dx_cardlist = '<div style="display: flex;" >'

            + ' <div style="width: 100px; margin-right: 10px; display: flex; align-items: center; justify-content: center; font-size: 200%; font-weight: bold;" >'

            + ' ' + act_roject_code + ''

            + ' </div>'

            + ' <div style="flex-grow: 1;" >'

            + ' <div style="font-size: 150%; font-weight: bold;" >' + act_custom_id + '</div>'

            + ' <div style="font-size: 125%;" >' + act_resp_full_name_01 + '</div>'

            + '<div style="font-size: 100%;" >' + act_wrl_name +'</div>'

            + ' </div>'

            + '</div>'
The result:
Have fun!