Planning lies at the heart of every successful organization. Whether you're allocating resources, managing personnel, or scheduling production, having the right tools in place can make all the difference. With the release of Thinkwise Platform 2025.2, we’re excited to introduce a powerful set of enhancements to our Scheduler component—designed to help you plan faster than ever.
This update brings hierarchical resource grouping, external drag & drop, and the ability to apply conditional layouts to both resources and time cells. These features give you much more flexibility and control over your Scheduler.
In this blog, I’ll guide you through the essentials of setting up a Scheduler in Thinkwise, exploring each new feature along the way. This blog is the first part in a series on using the Scheduler. This first part is focused on setting up the scheduler. The second part focuses on interacting with the scheduler, and can be found here:
Scheduler setup guide
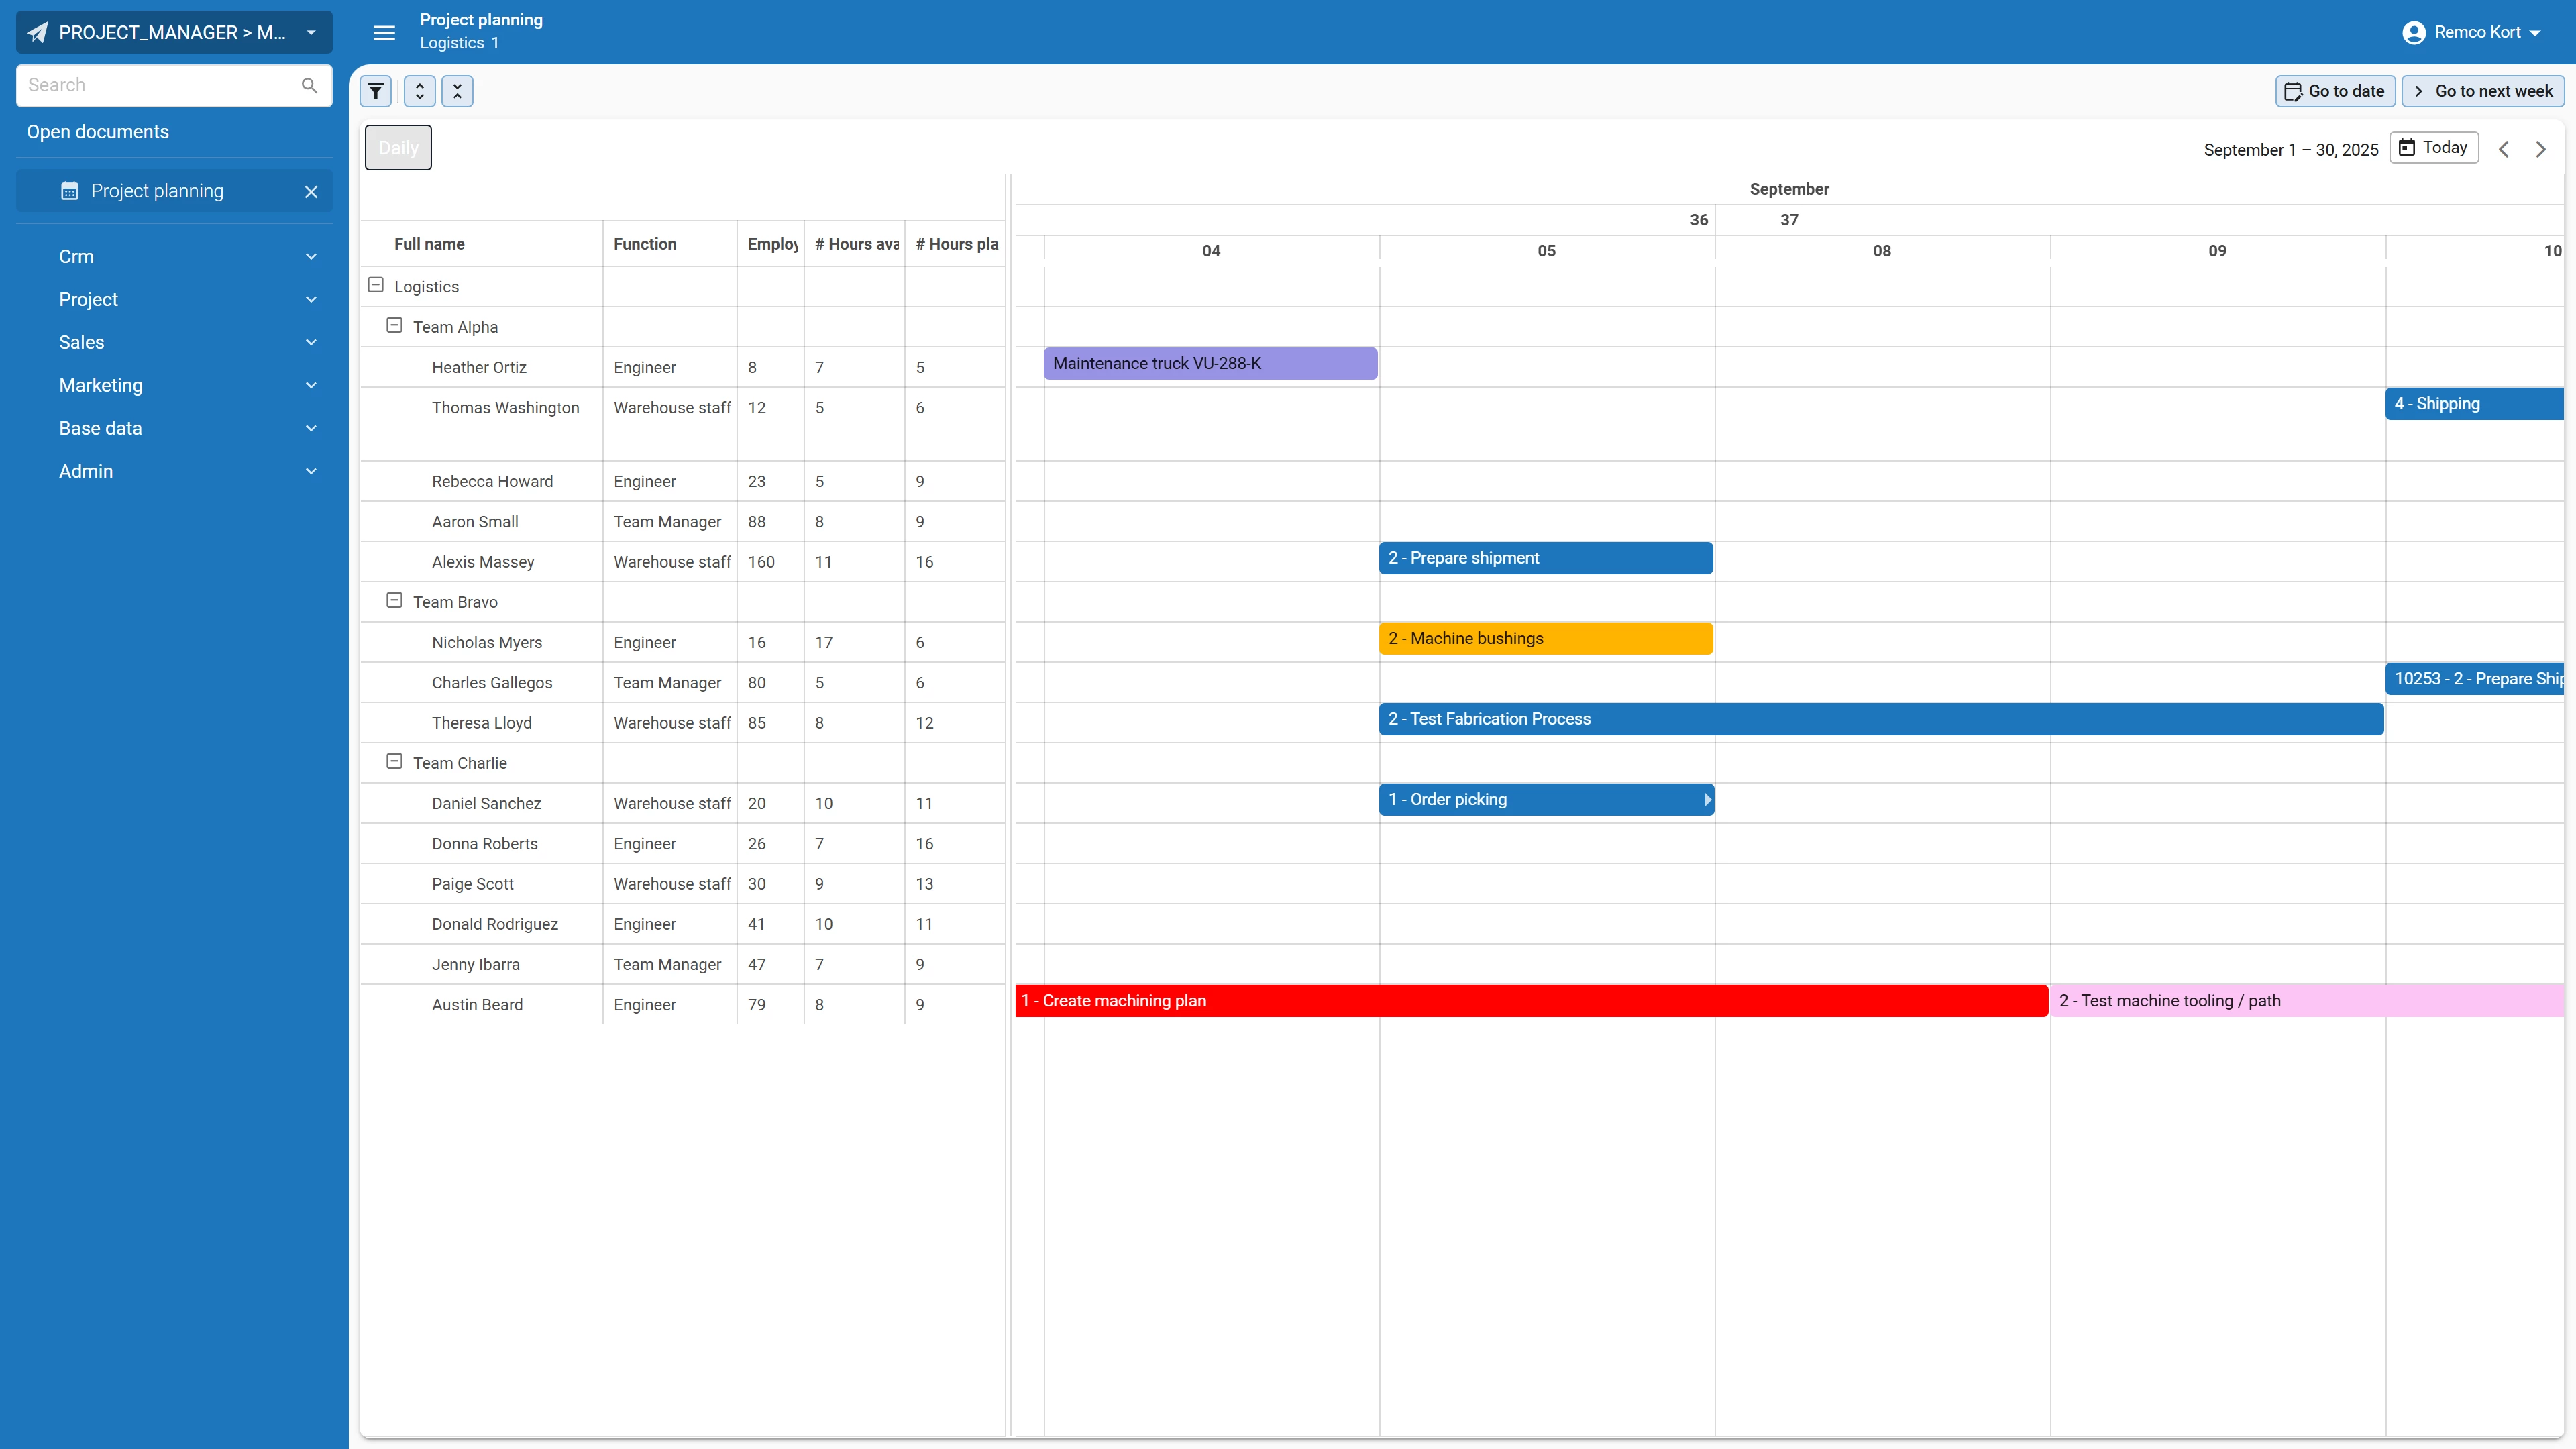
In this blog, we’ll create a project planning Scheduler. It will help us manage project tasks assigned to employees on a daily basis. I’ve already set up a basic application with the following data model:

Create the scheduler view
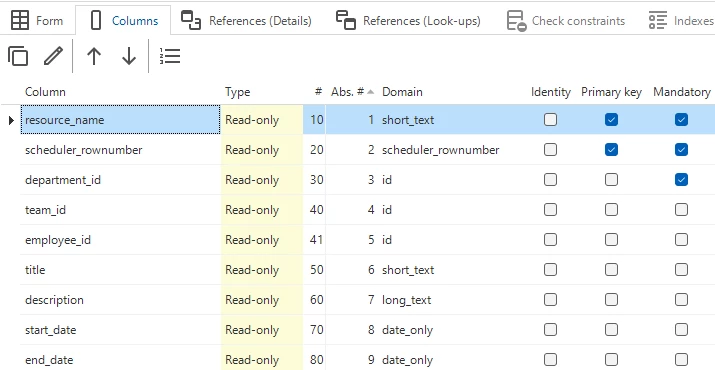
We start by creating the view that forms the foundation of the Scheduler. At a minimum, it requires four columns: ‘resource’, ‘activity_name’, ‘start_date’, and ‘end_date’. You’ll typically need additional columns for referencing related data or ensuring row uniqueness. In our example, I’ve added a ‘scheduler_rownumber’ column to ensure every row is unique.
Create the scheduler
Once the view is ready, open the Scheduler screen.
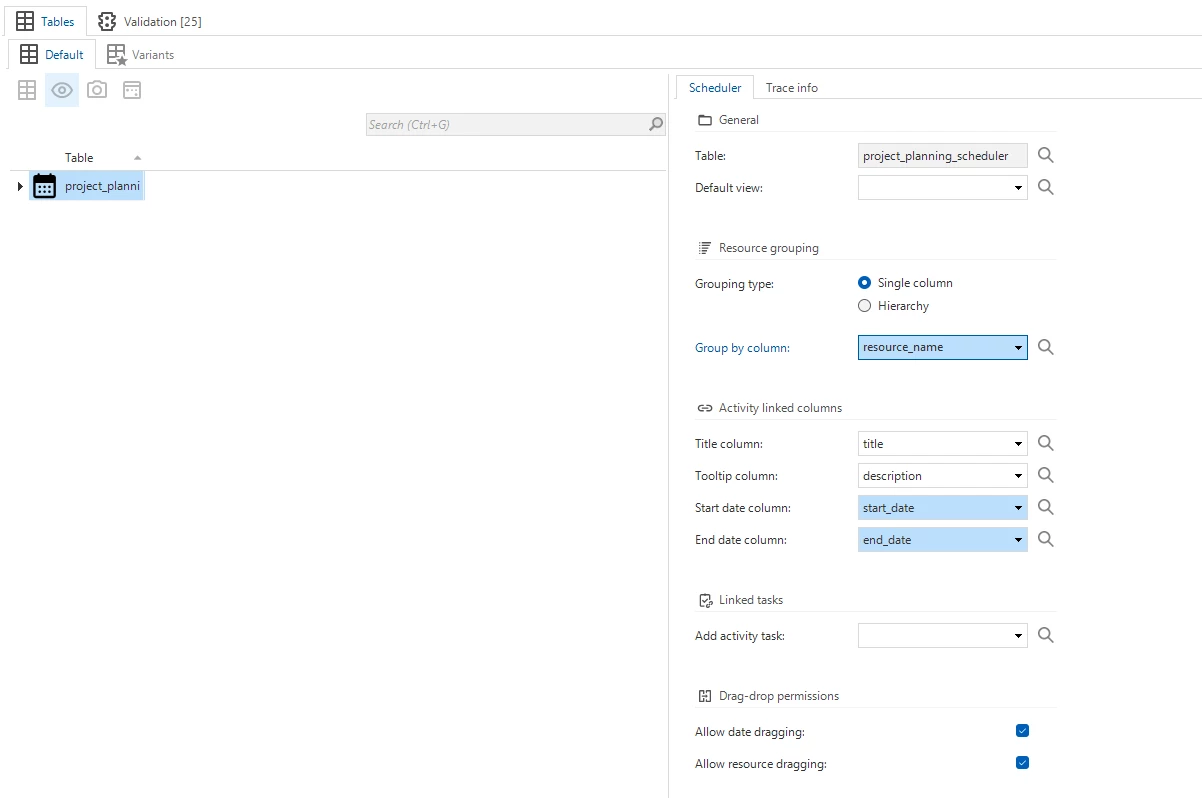
Select the view subject and click Add to create the base Scheduler. Set the ‘group by column’ to your resource, the title column to ‘activity_title’, and assign the Start date column and End date column accordingly.
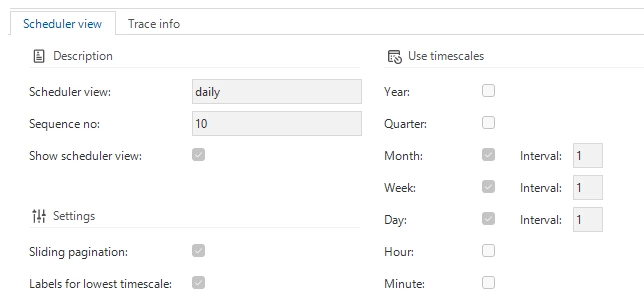
Add a scheduler view with a timescale setup to show months, weeks and days:
Screentype configuration
To display the Scheduler, you’ll need a screen type that includes a Scheduler component. Create a new screen type, add only the Scheduler component to it, and assign it to your view as both the main and detail screen.
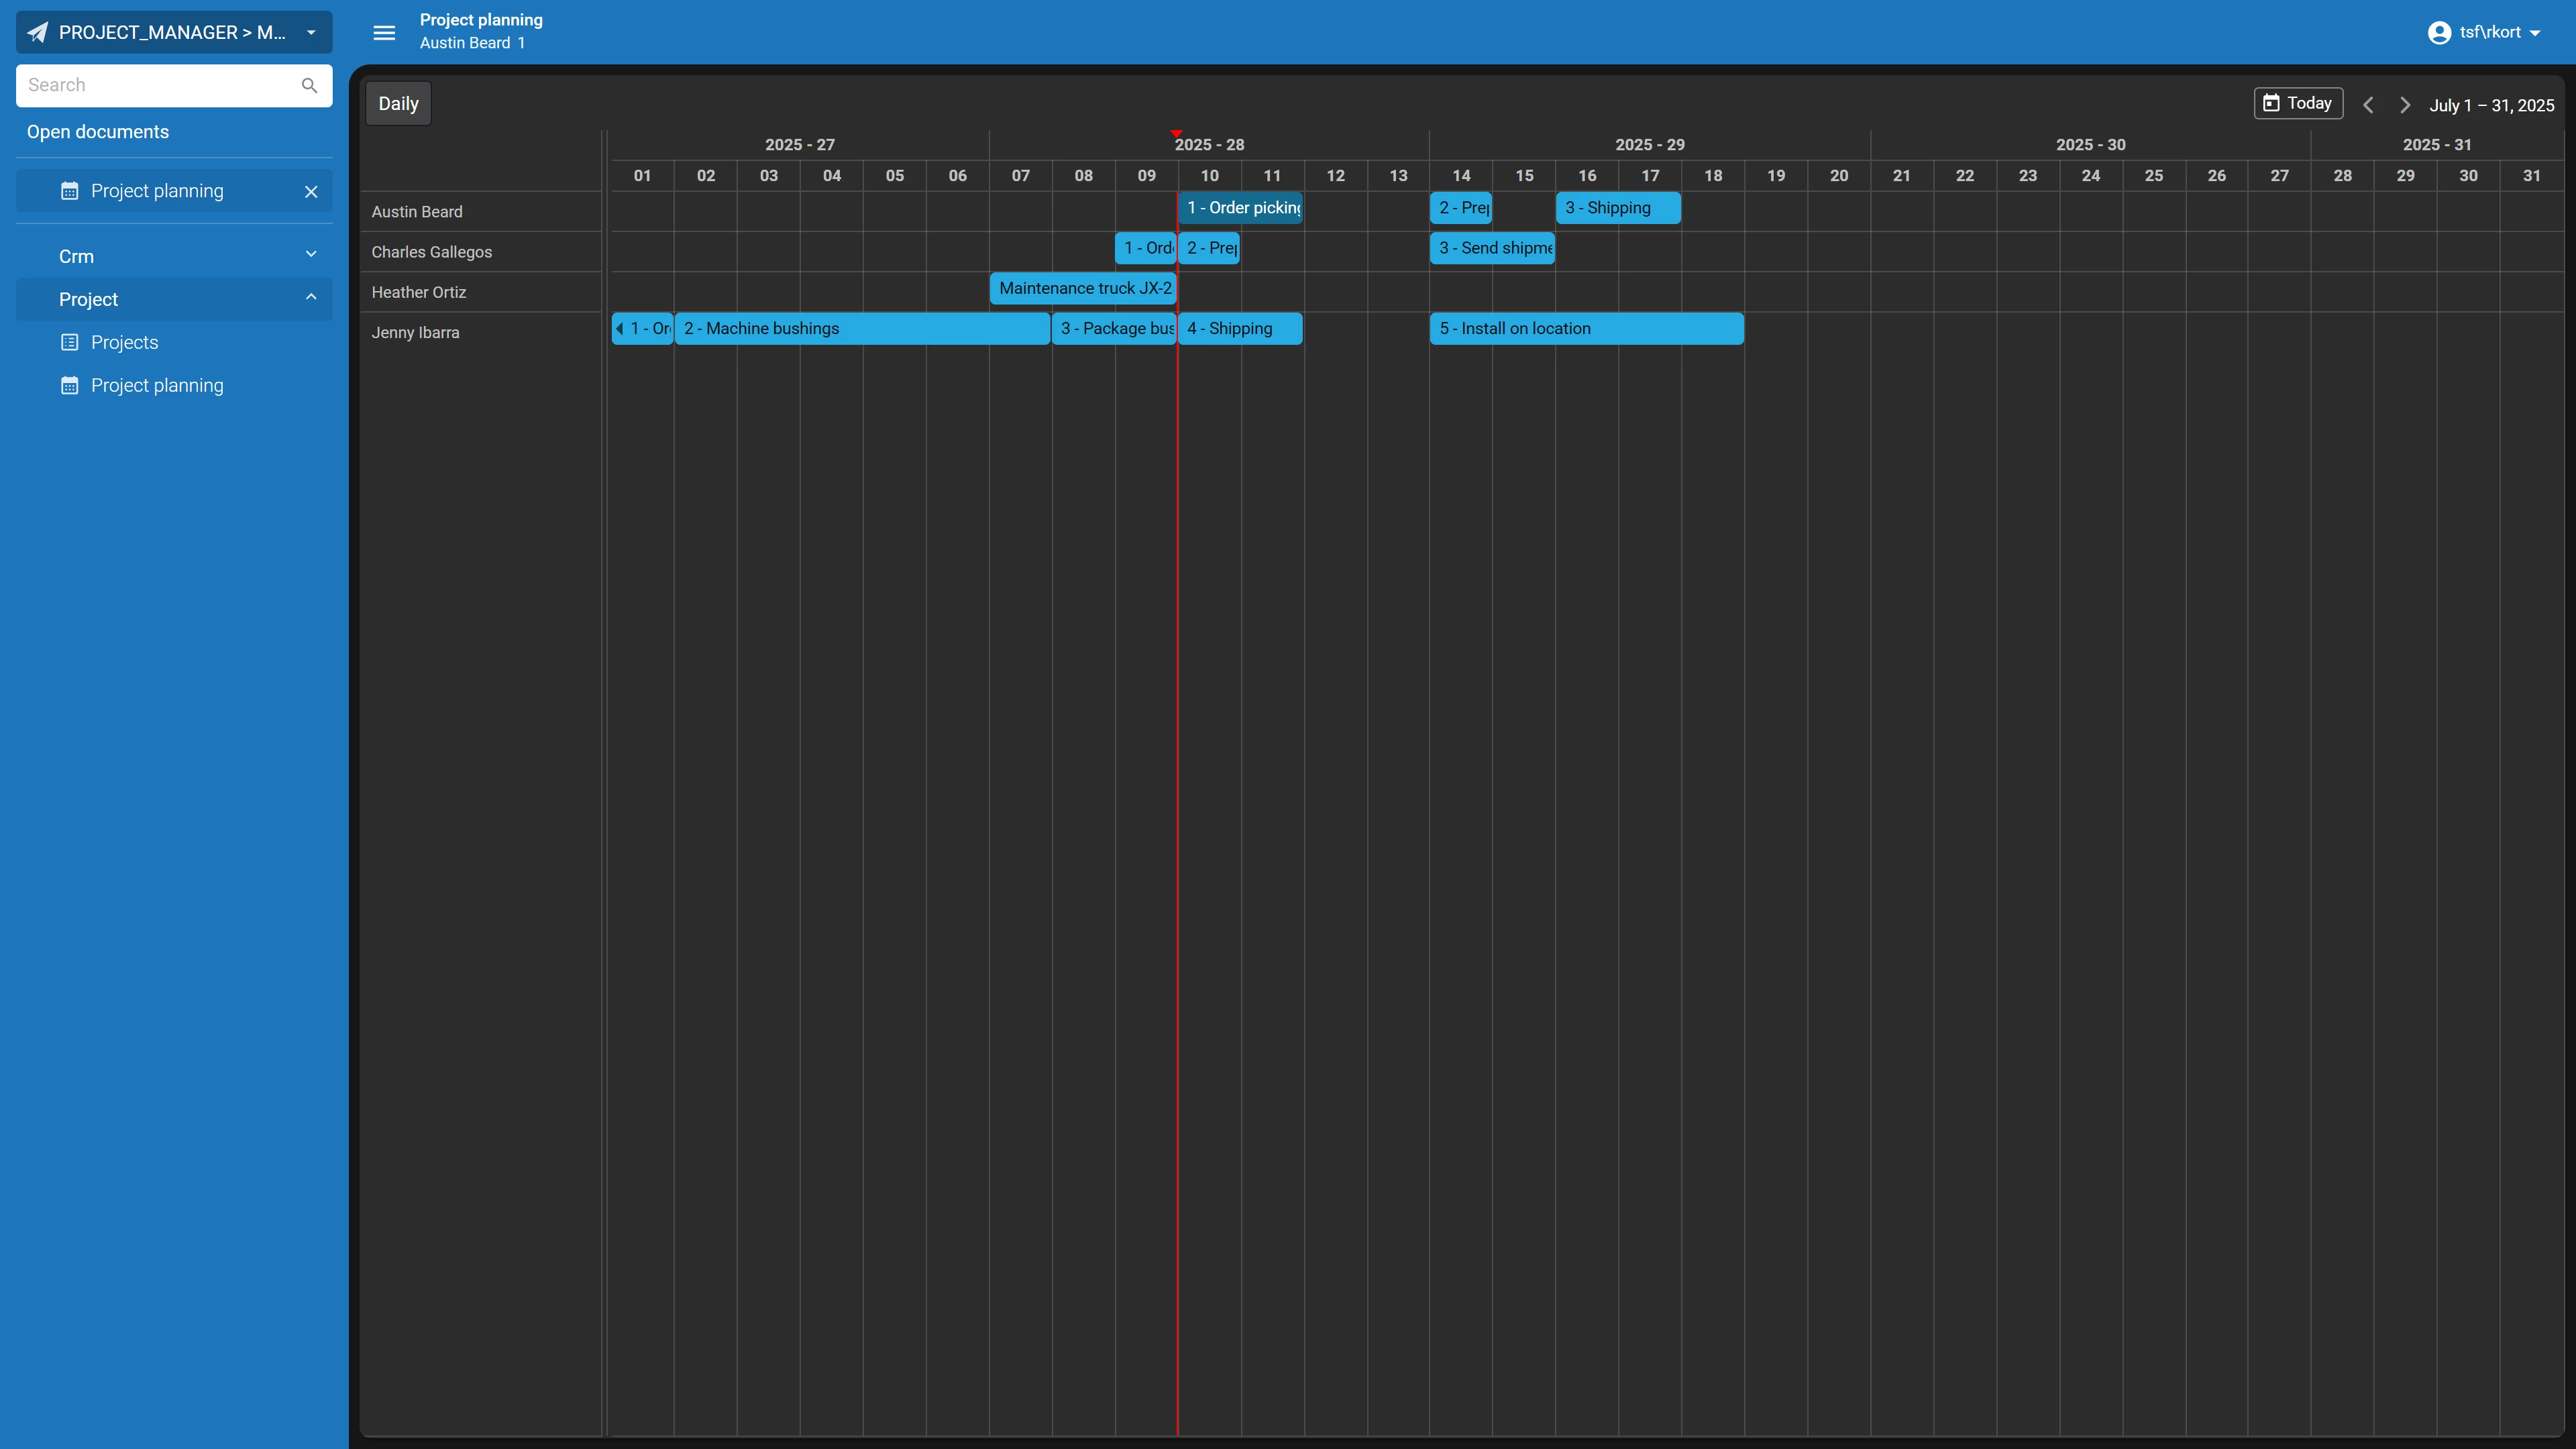
Our basic scheduler will now look like this:
Pagination
Universal UI uses pagination to load data only when it is needed. When setting up a Scheduler, you should disable pagination to make sure that all data is loaded into the component.
To do this, go to your subject and set the ‘Max no. of records’ and ‘Page size’ fields to 0.
Resource Grouping
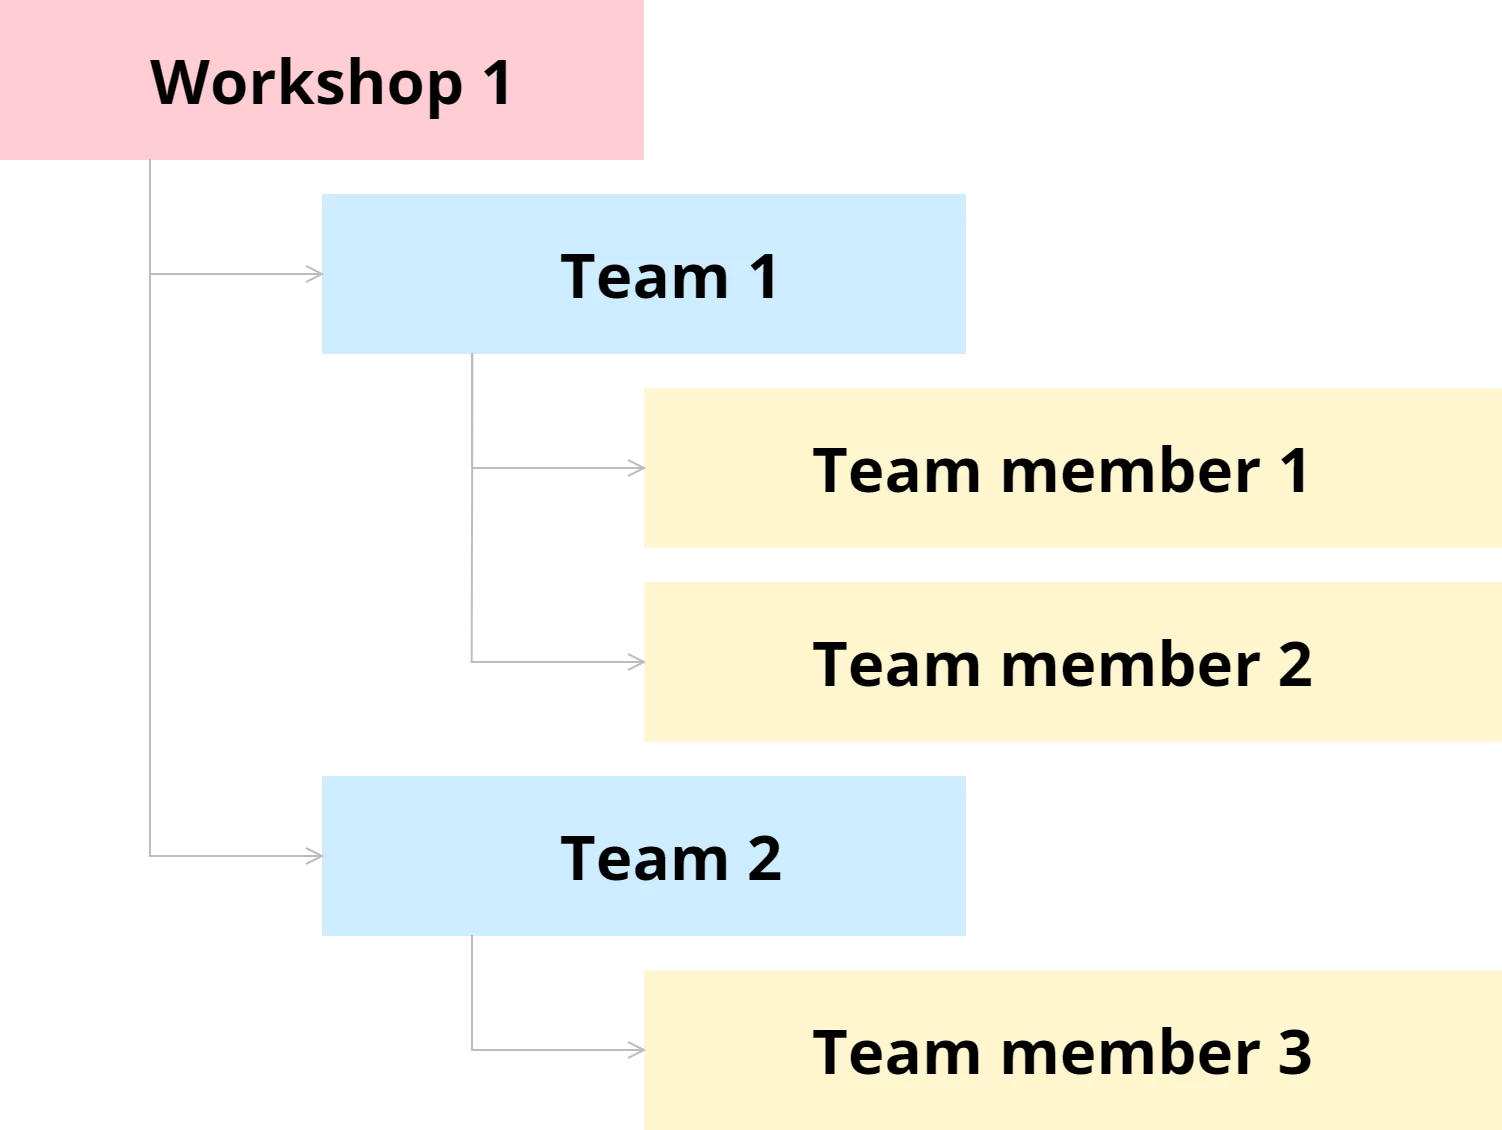
Hierarchical resource grouping allows you to display resources in a tree structure. For instance, if you have workshops with various teams, you can group them accordingly. This way, users can first select a workshop, then a team, and view activities only for its members.
To enable hierarchical grouping, add a resource_parent column to your Scheduler view. This column stores the name of the parent resource. Each parent must also exist as a resource; otherwise, the tree won't render properly.
Example of data that will create a valid tree:
| Resource | Parent |
| Warehouse 1 |
|
| Team 1 | Warehouse 1 |
| Team 2 | Warehouse 1 |
| Team member 1 | Team 1 |
| Team member 2 | Team 1 |
| Team member 3 | Team 2 |
Example of data that will create an invalid tree (missing parent as a resource):
| Resource name | Resource parent |
| Team 1 | Warehouse 1 |
| Team member 1 | Team 1 |
| Team member 2 | Team 1 |
| Team member 3 | Team 2 |
Setting up Hierarchical Resource Grouping
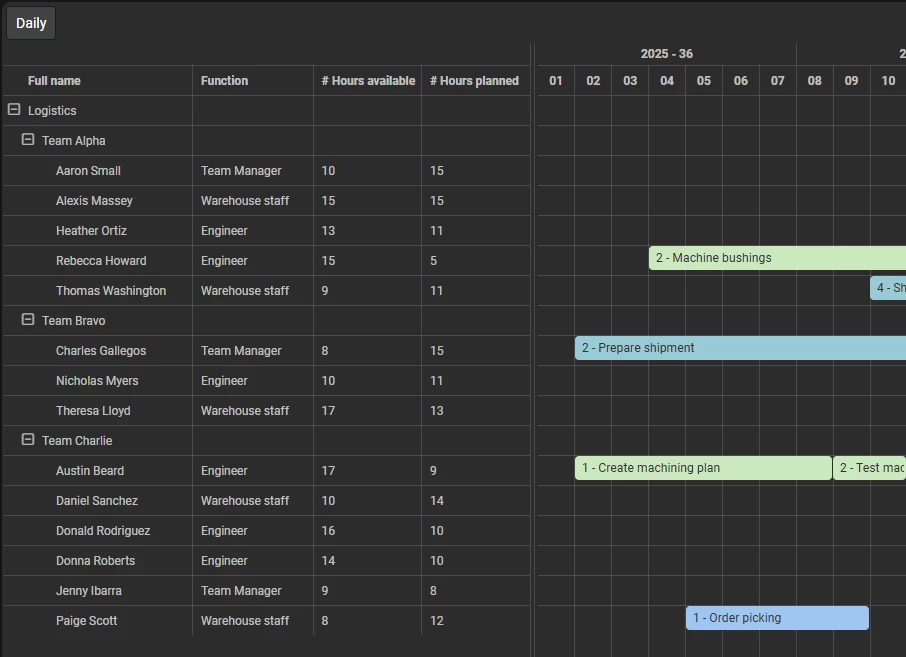
In our example we have departments, these departments have teams, and teams then have employees. We add the column ‘parent_resource’ to our scheduler view. I have added all departments, teams and employees to the output of our scheduler view, which now looks like this:
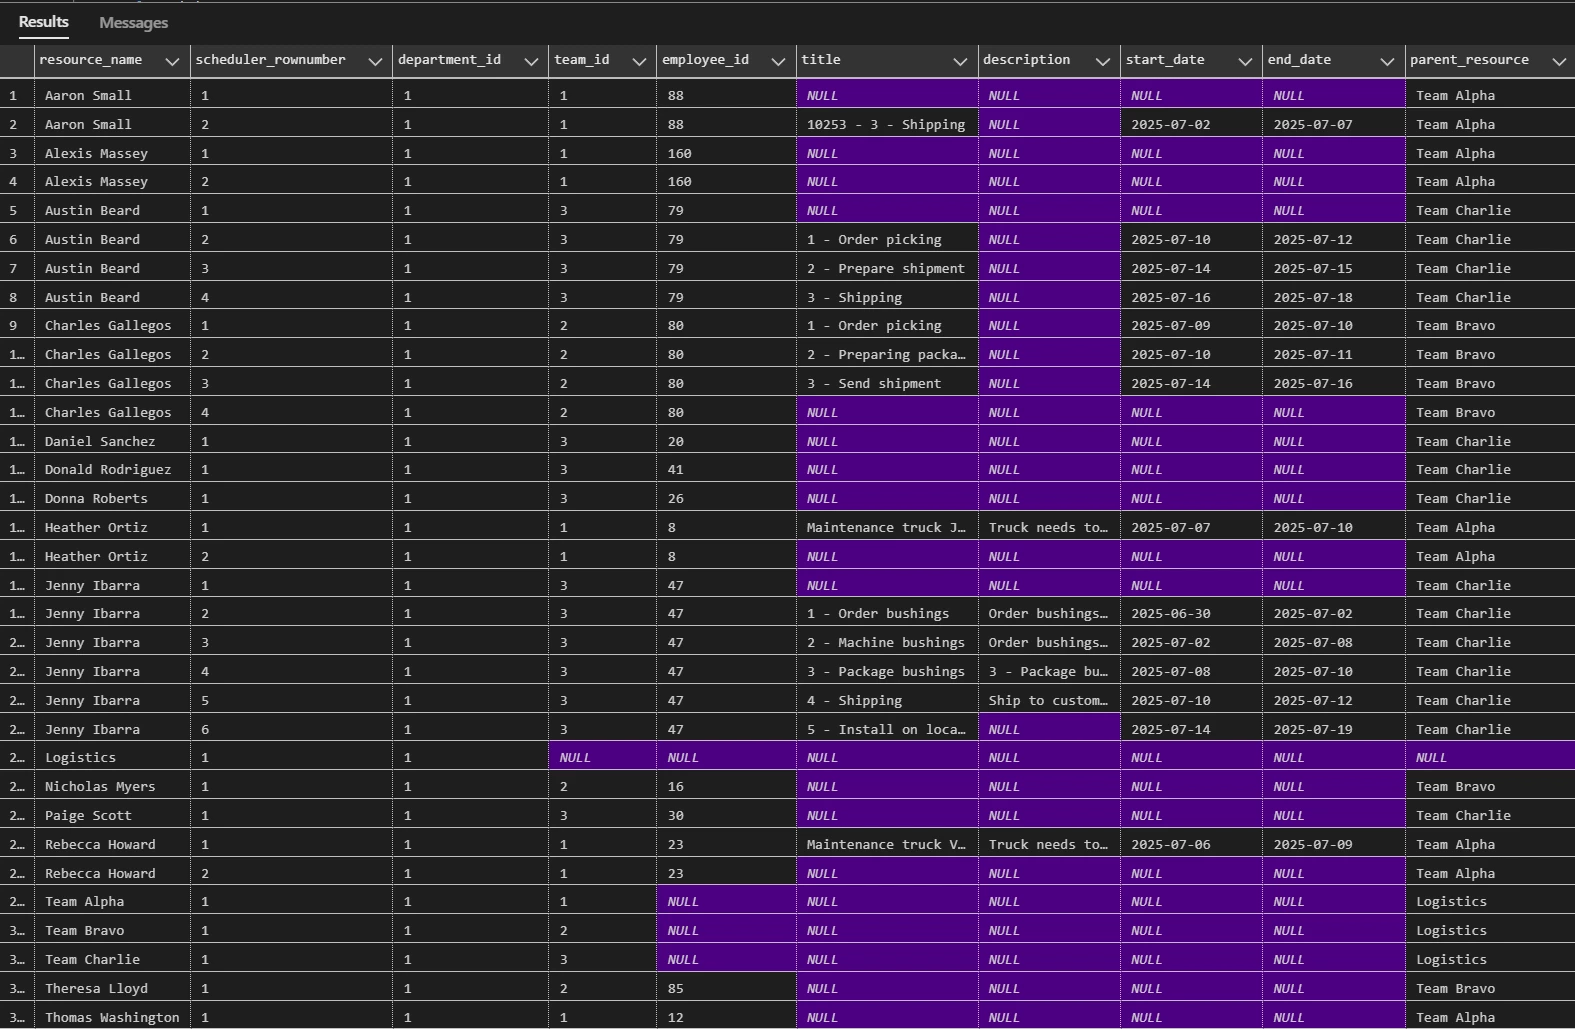
As you can see every parent in the tree also has its own resource. The departments have no parent because they are the highest level of the tree.
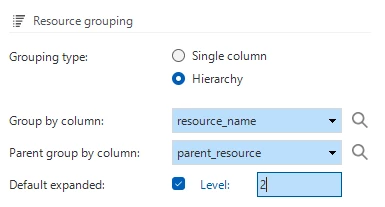
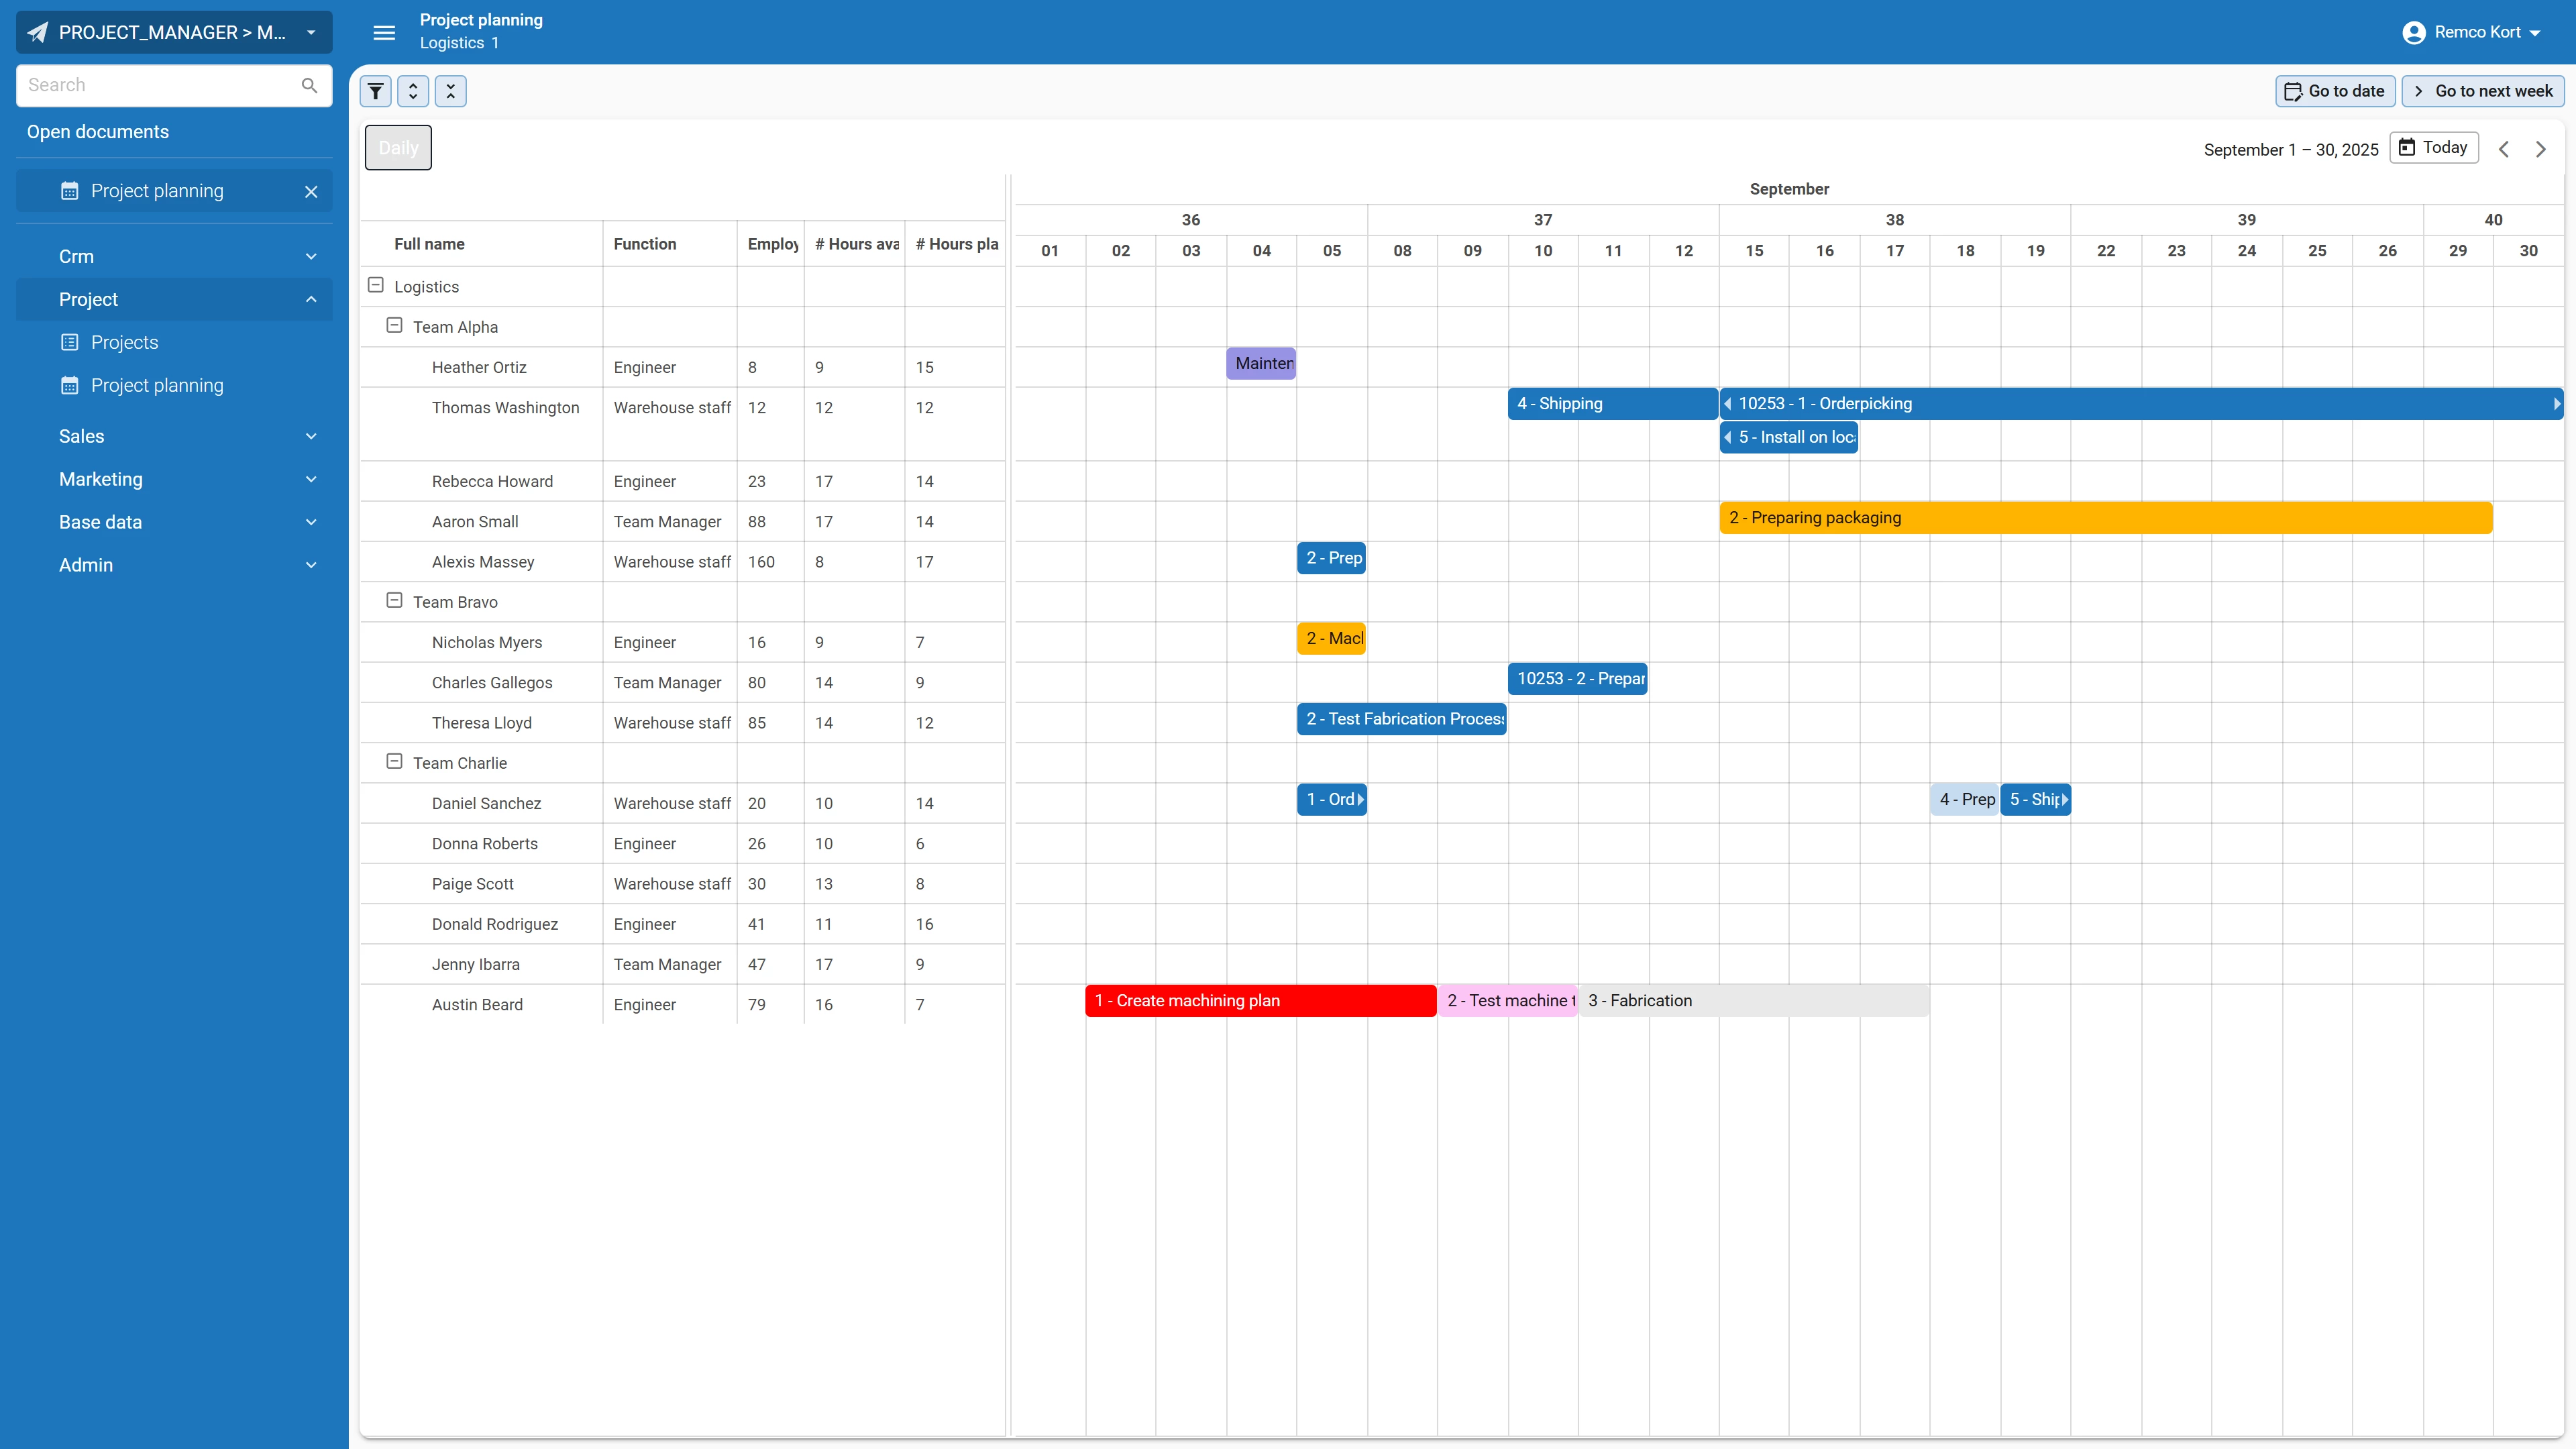
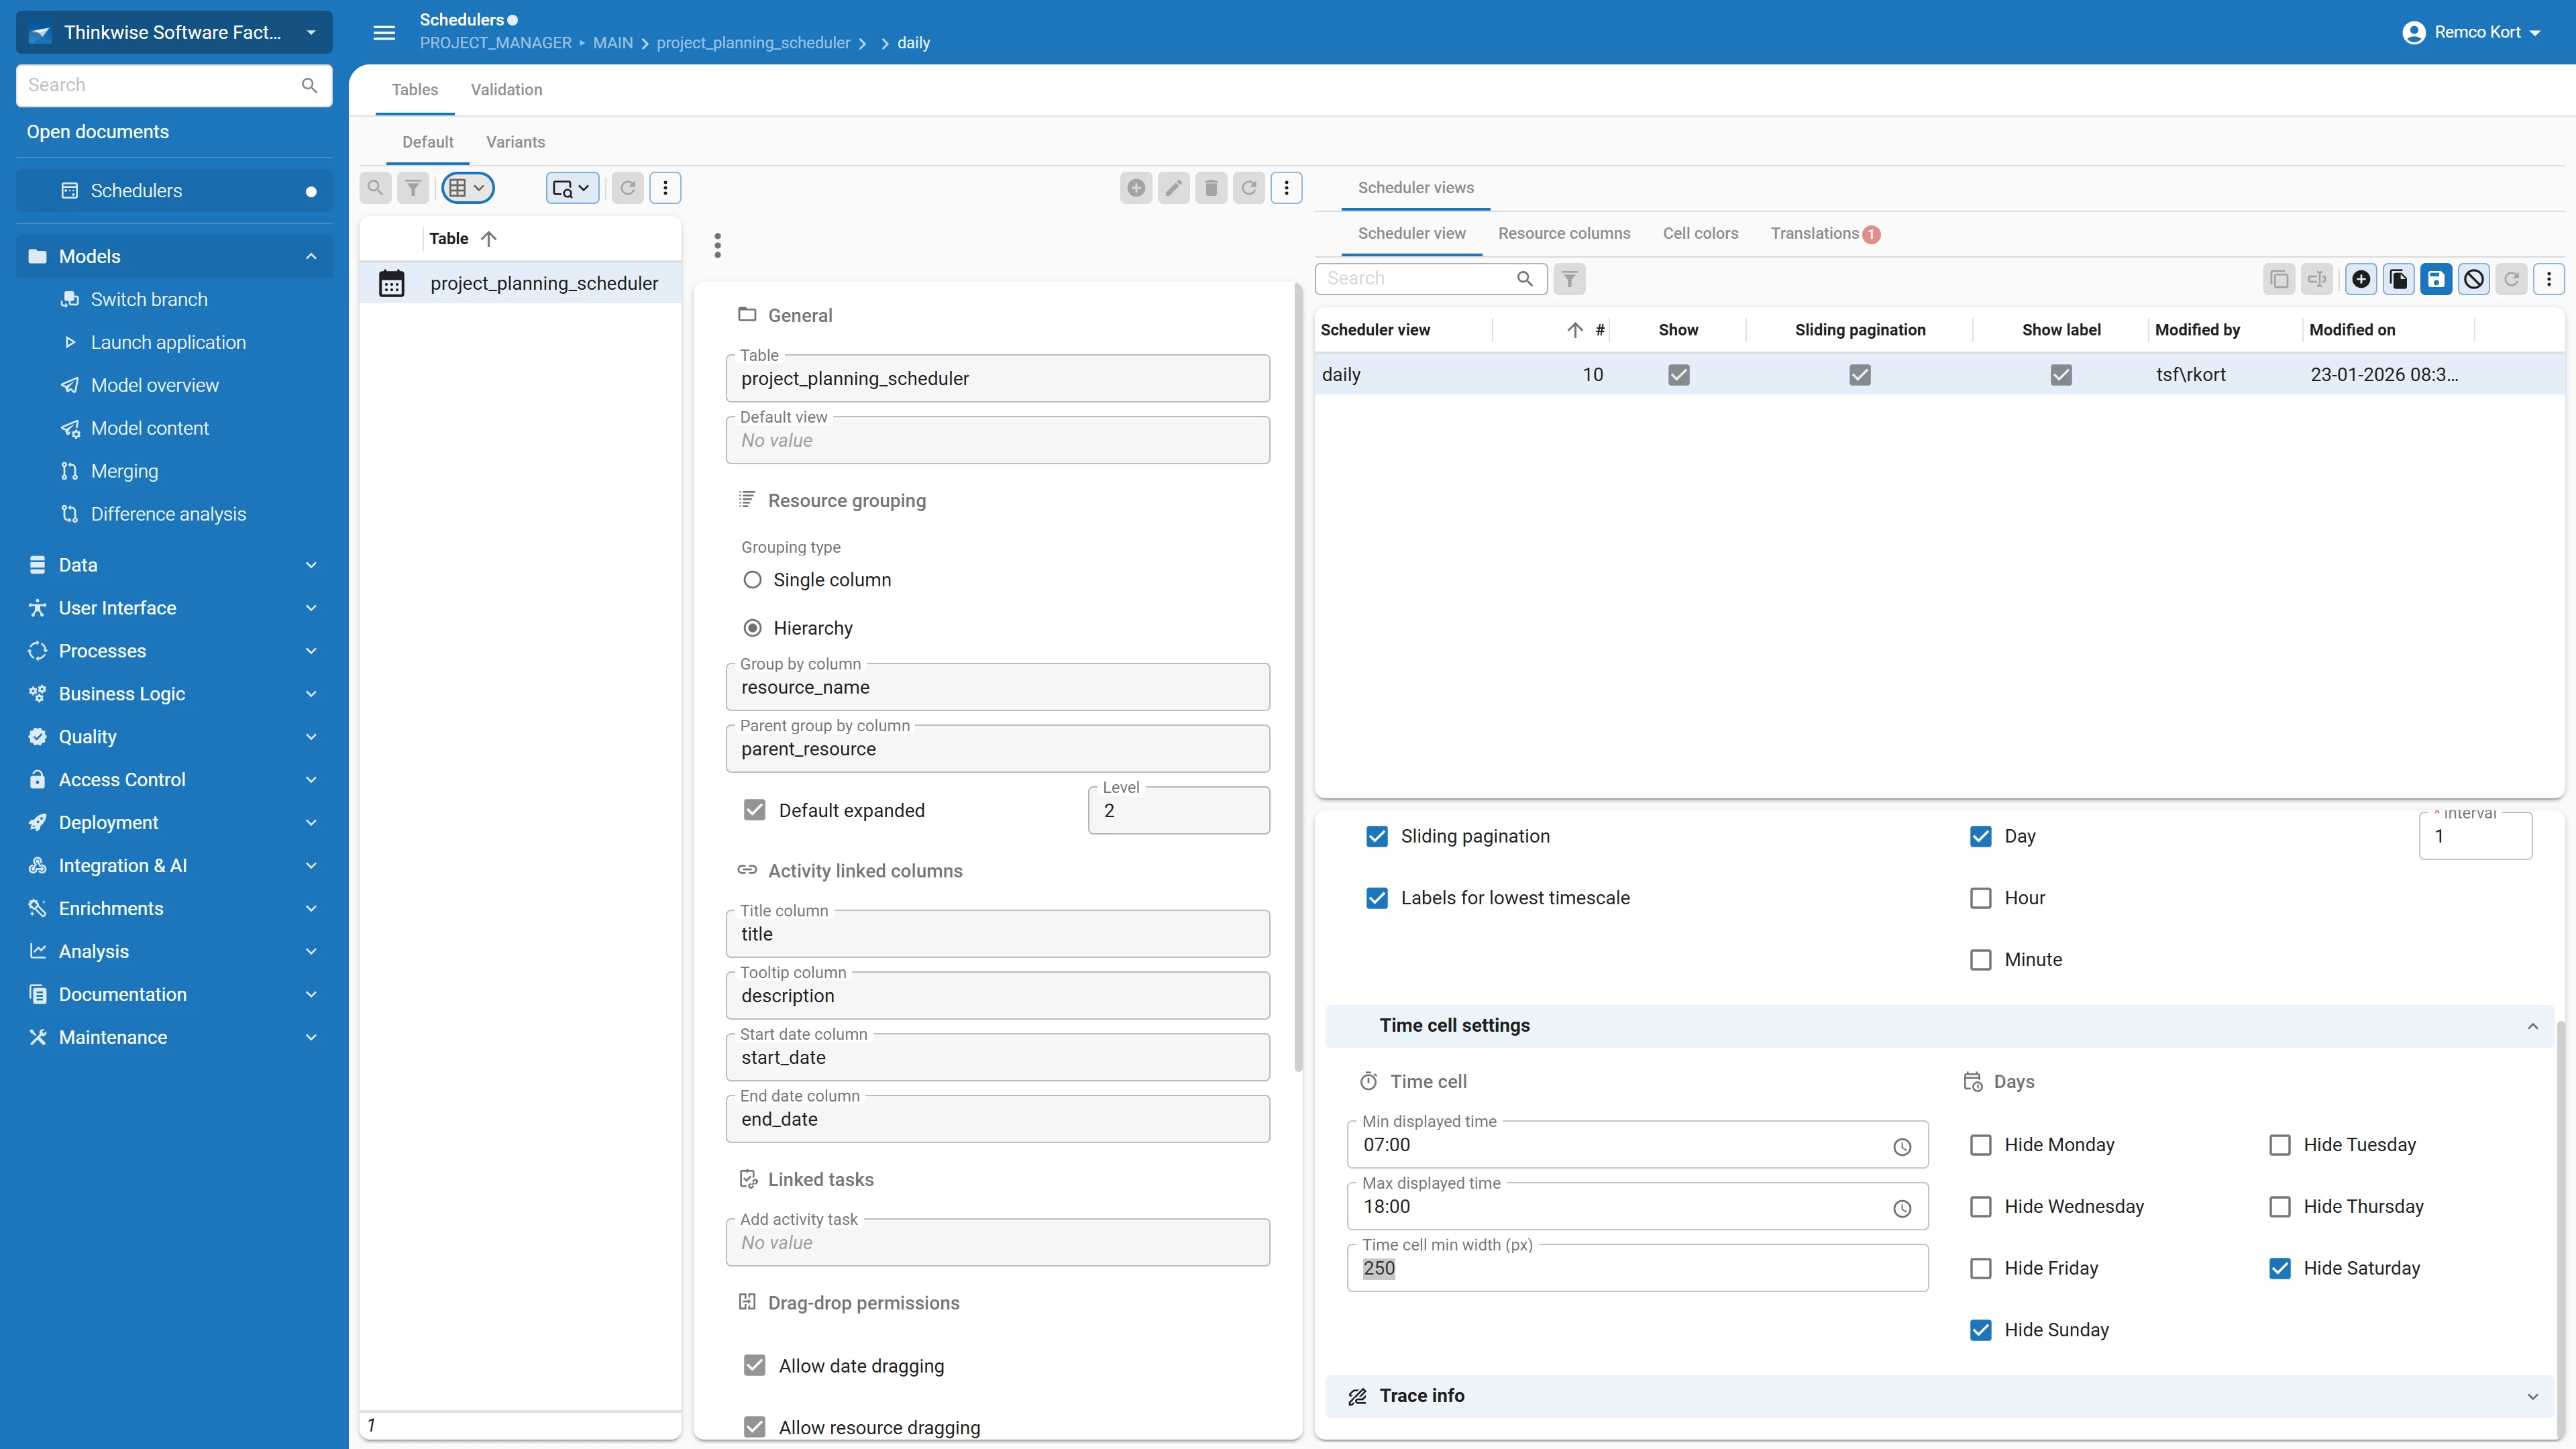
In the scheduler screen, set the Resource grouping type to hierarchy and select the ‘parent_resource’ as the ‘Parent group by column’.
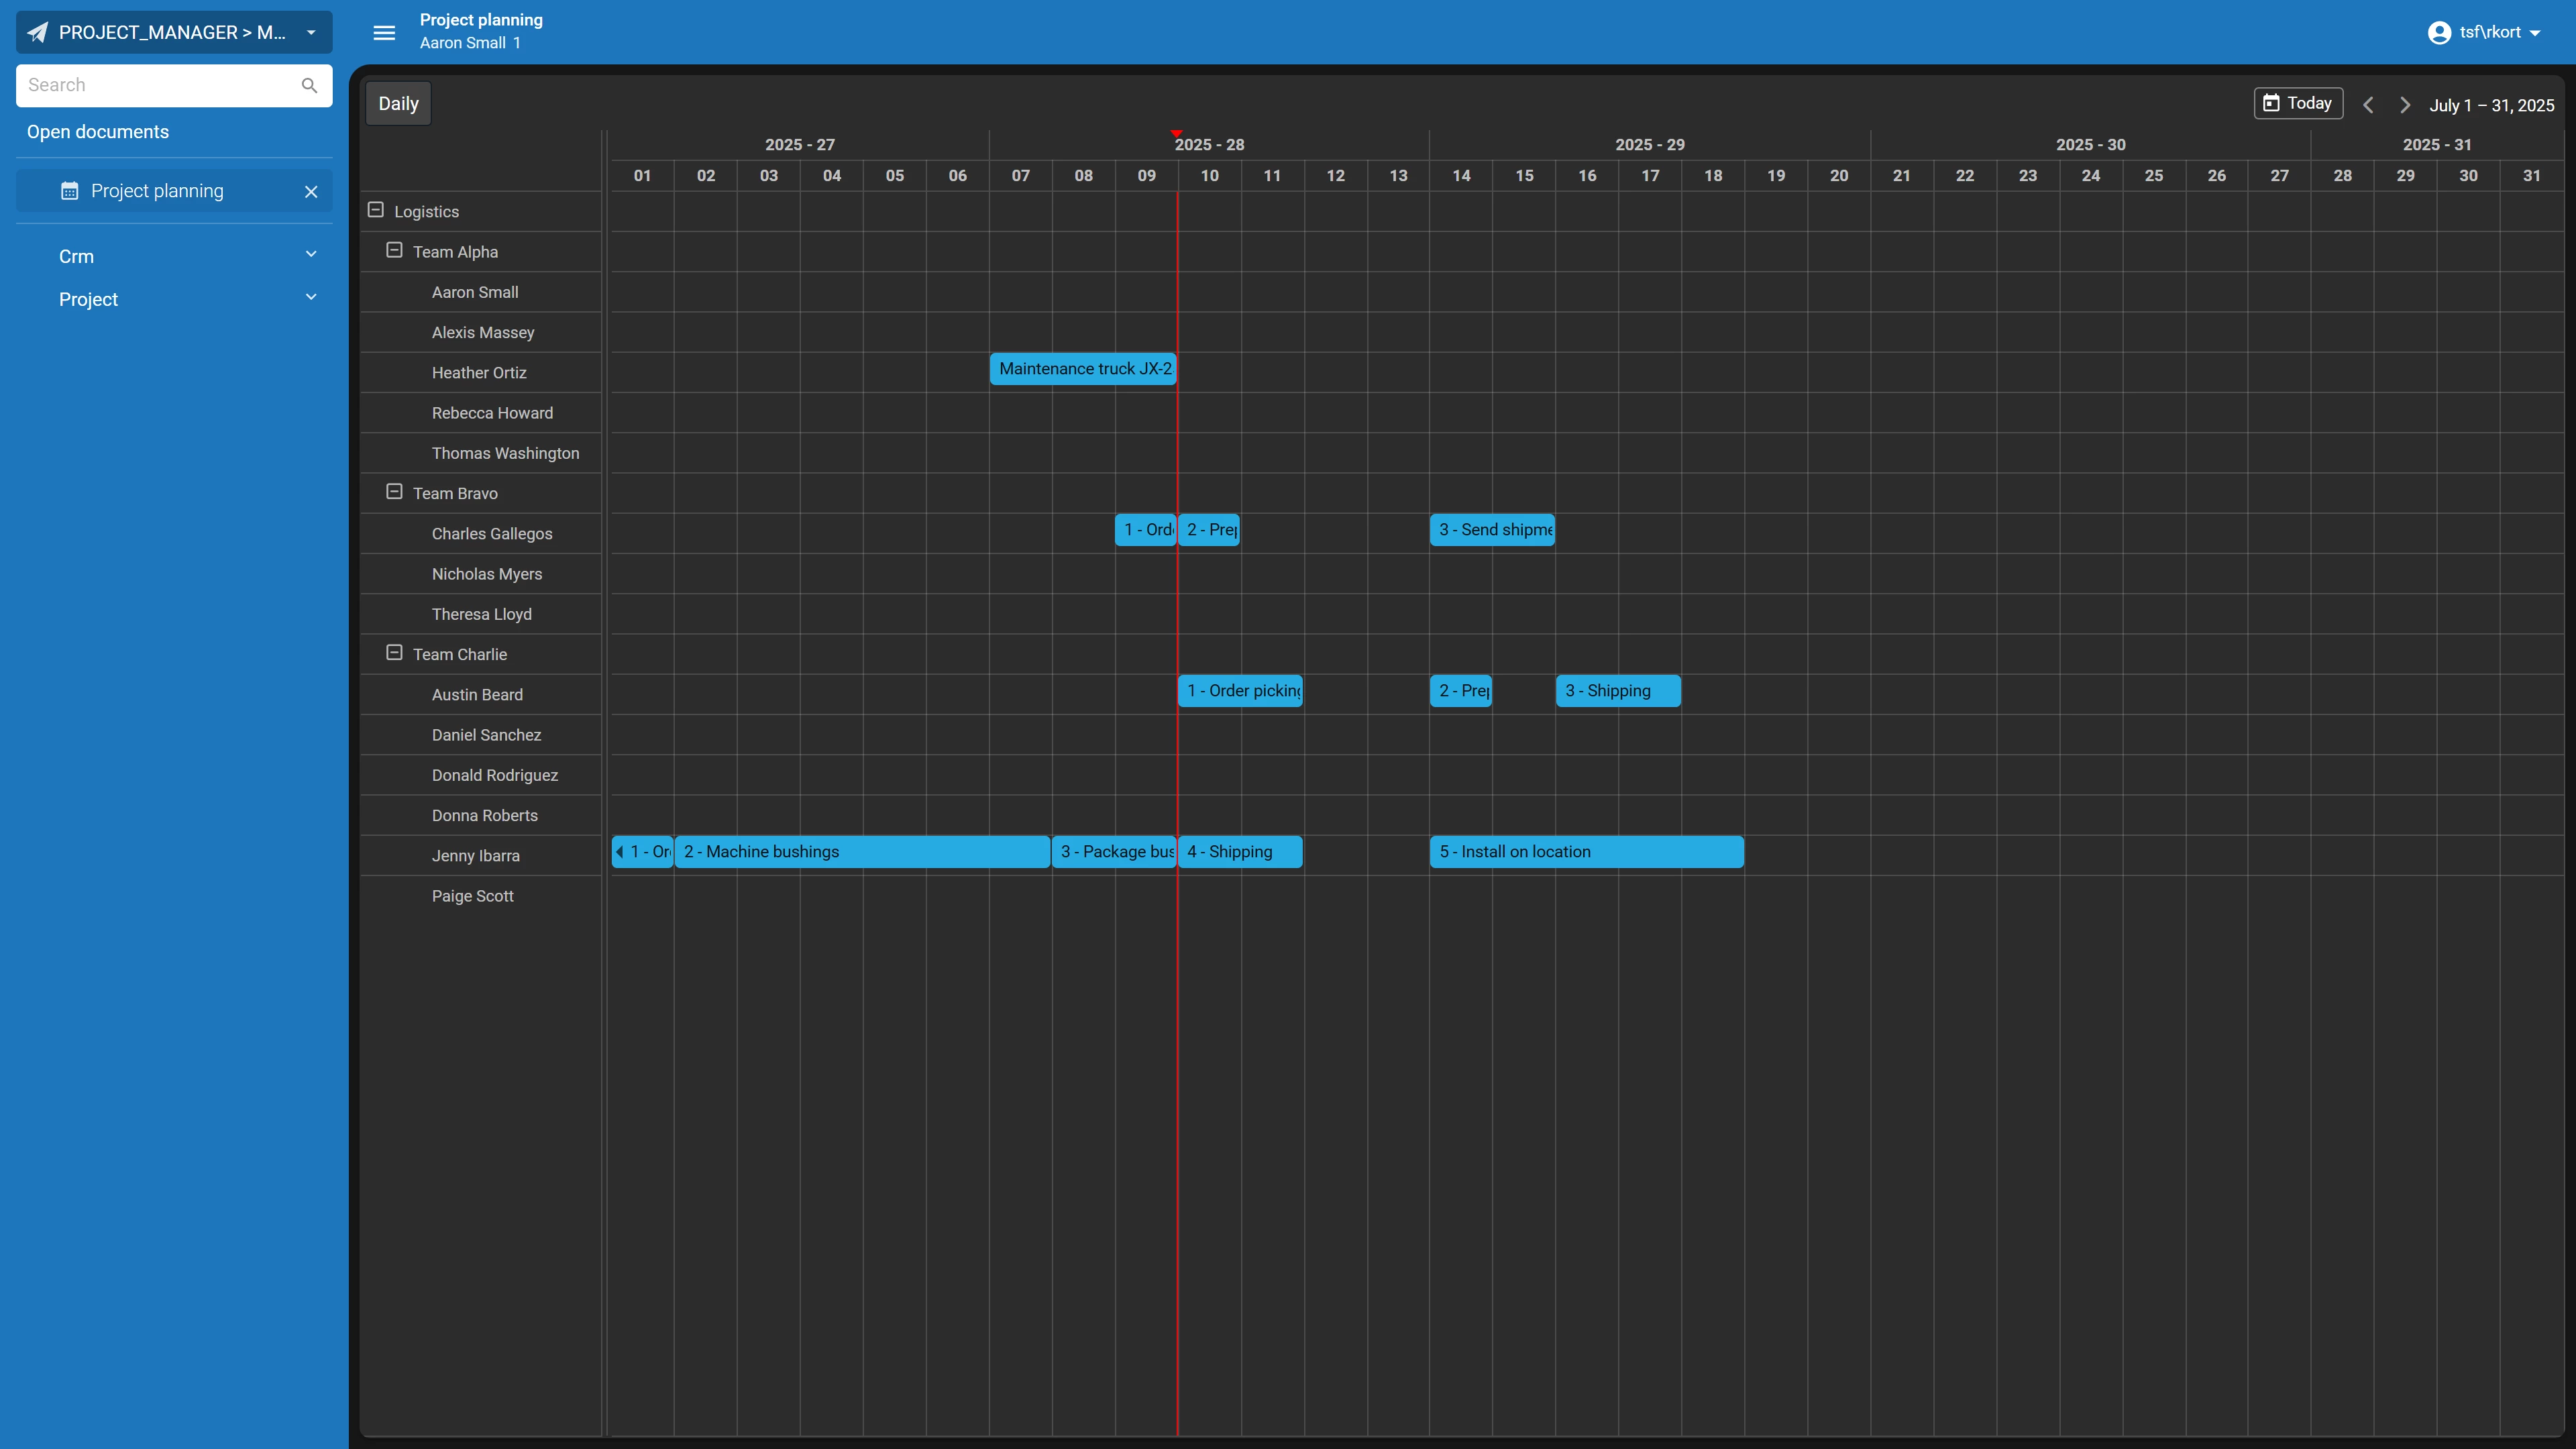
After refreshing the model, our scheduler now has the proper grouping:
Resource Columns
In version 2025.3 of the Thinkwise Platform, Resource Columns have been introduced. These columns appear alongside resources and provide a convenient way to display read-only information related to a resource.
To implement Resource Columns in your scheduler, begin by adding the desired columns to your scheduler view. Next, navigate to the scheduler configuration screen, select the scheduler view, and open the Resource Columns tab. Select the columns you want to include and enable them by checking the ‘included’ checkbox and entering the desired column width.
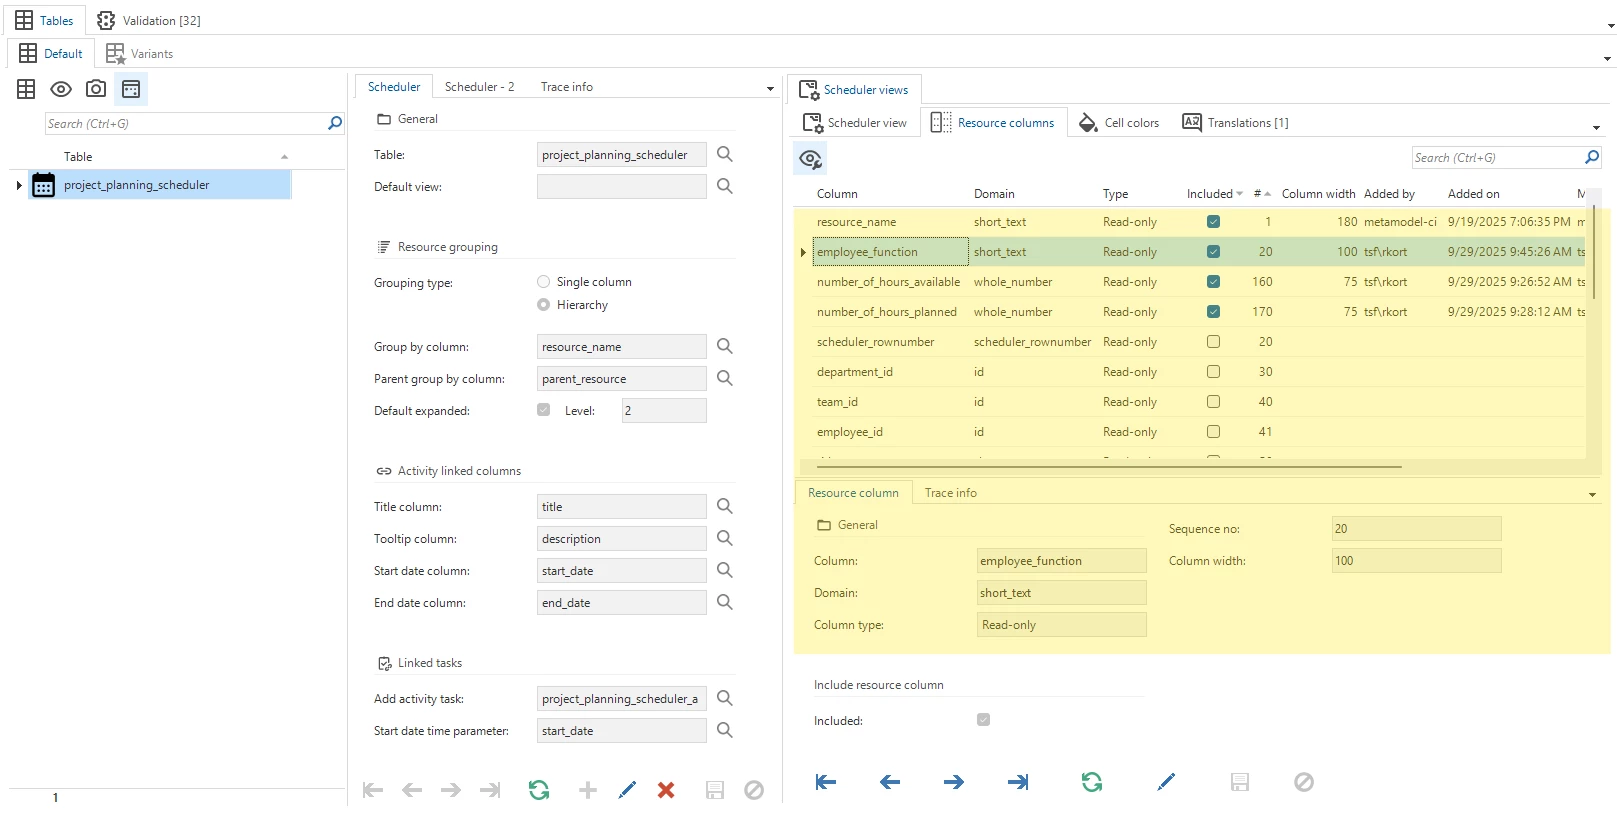
The platform automatically adds your 'Group by column' as a Resource Column by default. However, you have full flexibility over which columns to display. You can disable the Group by column and enable alternative columns instead, such as a lookup value. This approach supports clean data modelling practices by allowing you to work with identity values behind the scenes whilst displaying user-friendly, formatted lookup values that your end users will understand.
Hide hours / days
Version 2026.1 of the Thinkwise platform introduces enhanced control over scheduler views, allowing you to hide specific hours and days. You can now exclude particular days, such as weekend days Saturday and Sunday, preventing activities from being scheduled during these periods.
Additionally, the minimum and maximum displayed time settings enable you to define custom time ranges, such as displaying only standard working hours. Please note that only a single continuous time range is supported, meaning this feature cannot accommodate gaps like lunch breaks within the displayed period.
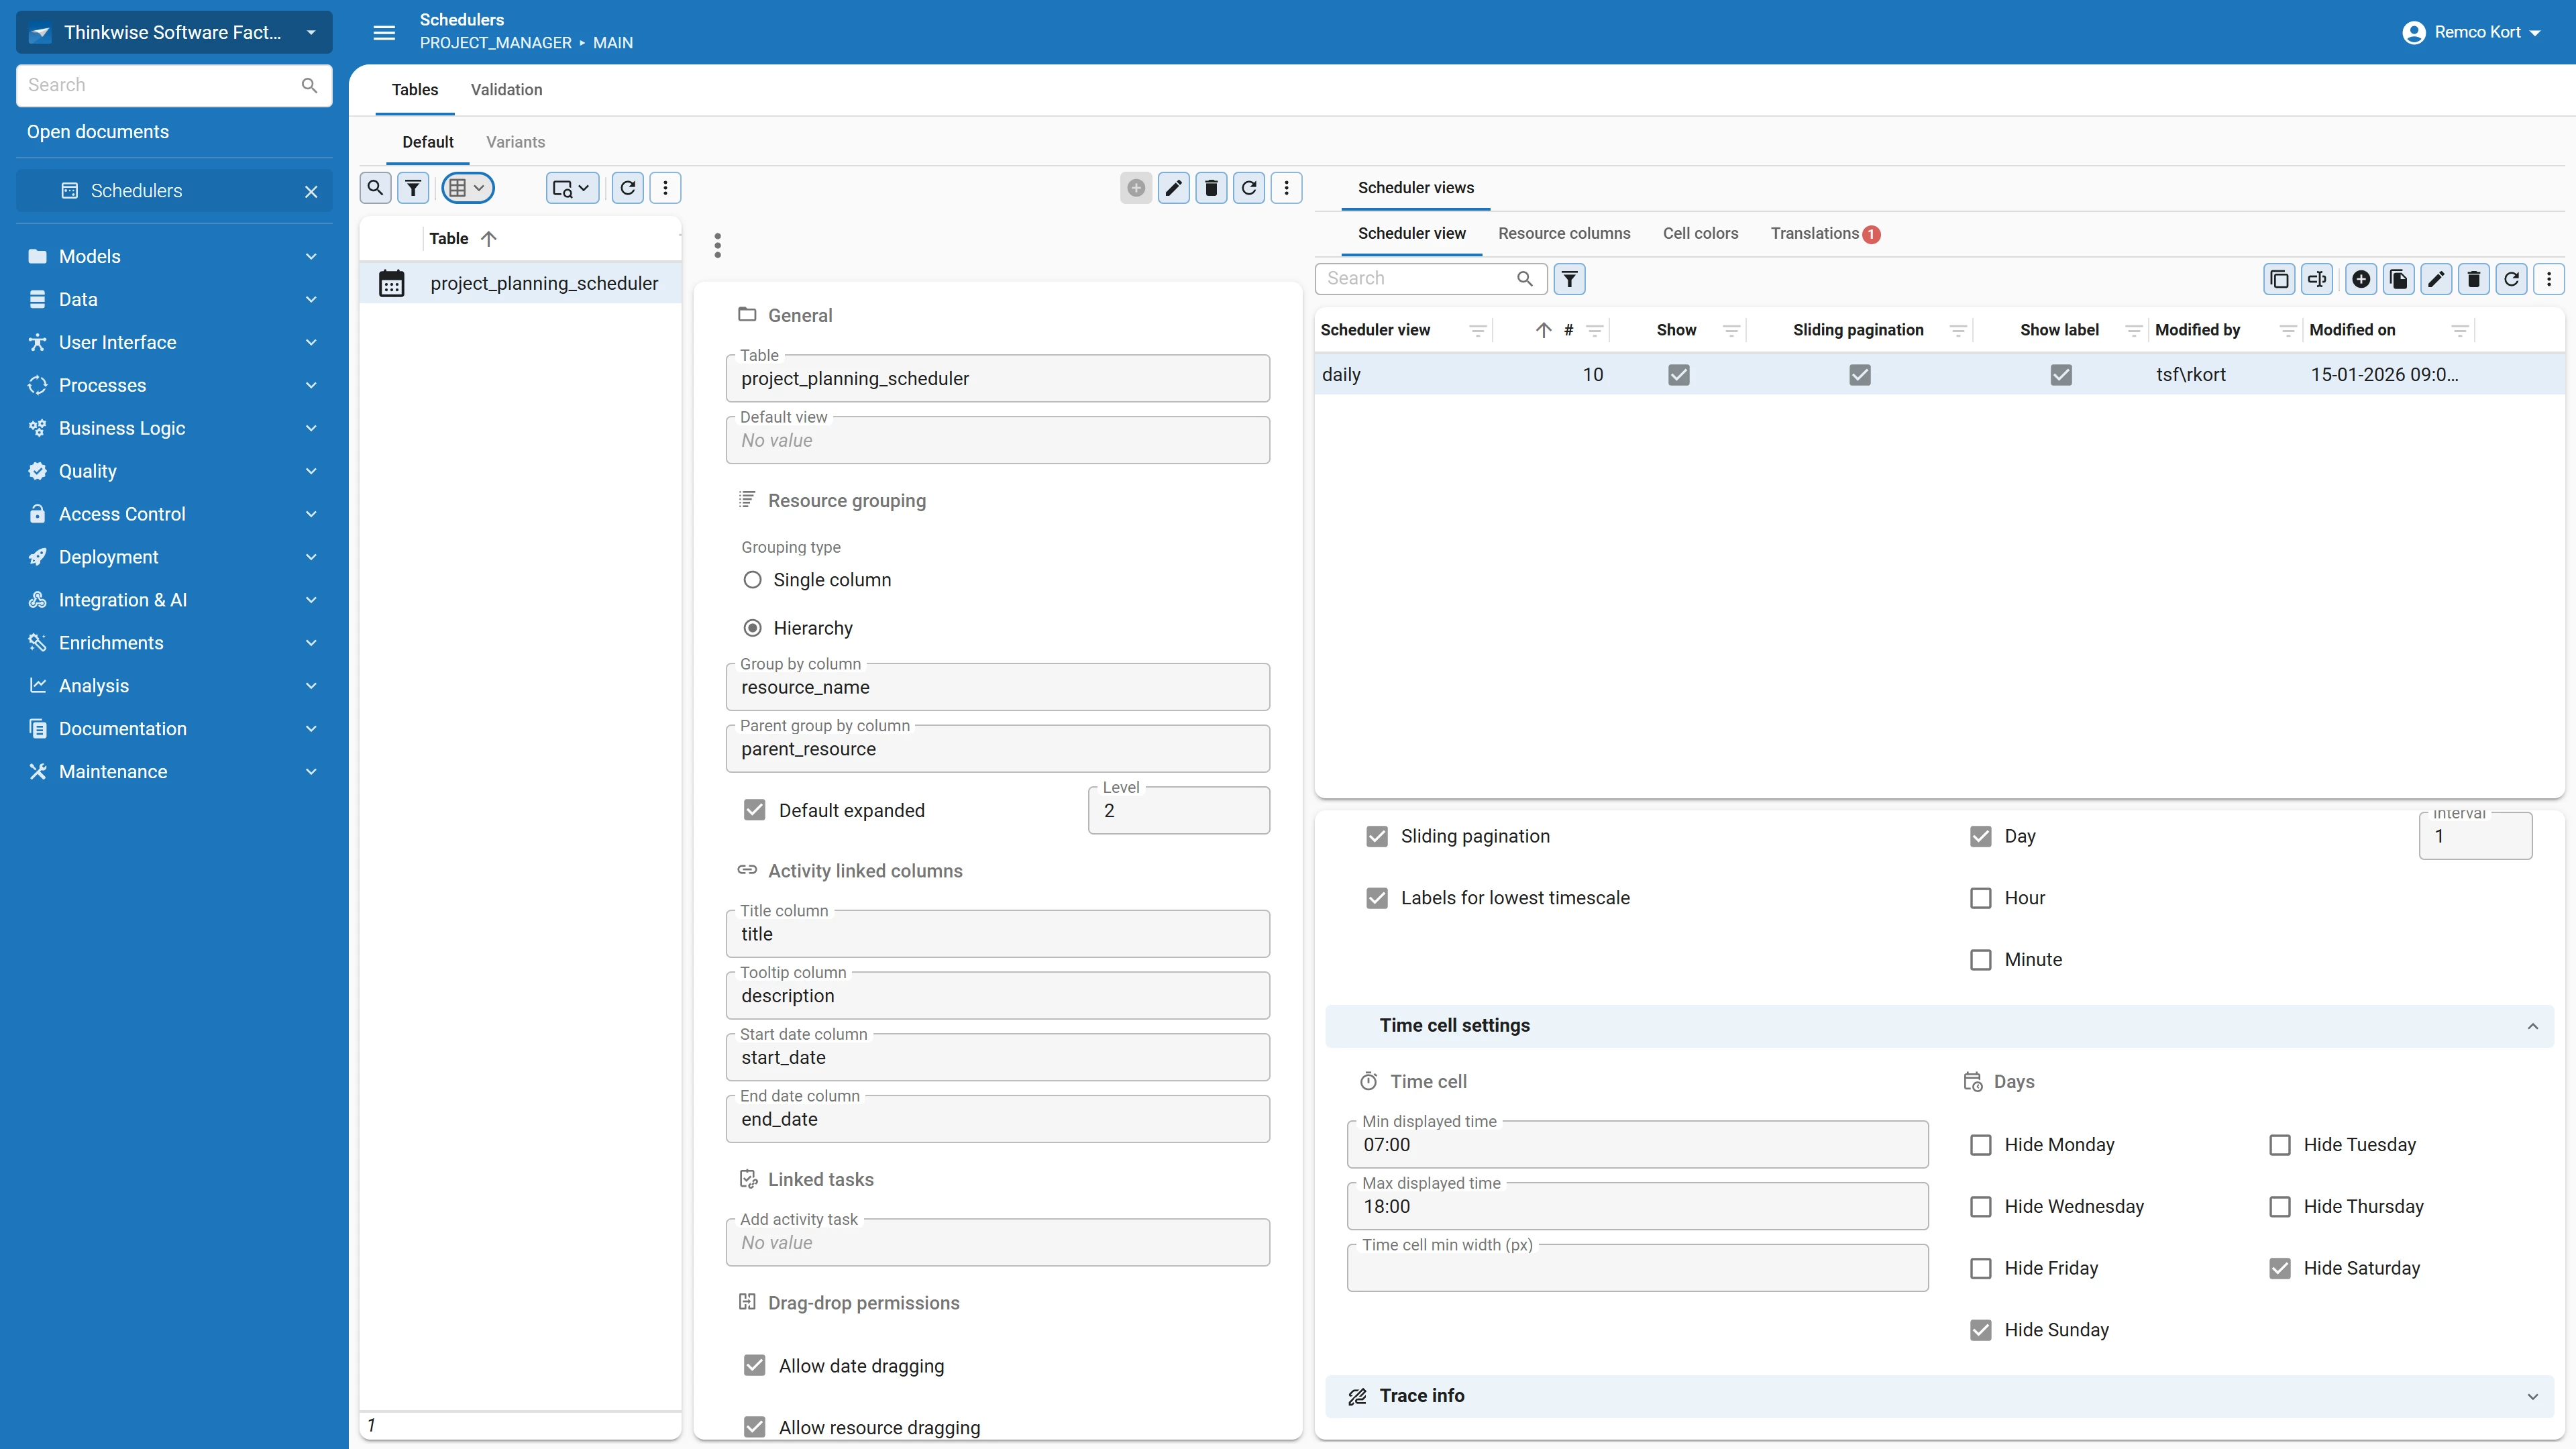
Time cell width
Version 2026.1 of the Thinkwise platform introduces customizable time cell width settings for scheduler views. This feature allows you to adjust time cell width according to your specific requirements. Wider cells accommodate longer activity titles and improve text readability, while narrower cells enable you to display a greater number of time cells simultaneously within your view.
Display day names
You can now display the day name along with the number in the Scheduler when using a Day timescale. To do this, go to the menu User interface > Schedulers > tab Scheduler views > group Days and select Number + name of day as Day label format.
For Thinkwise Platform 2026.1.15 and lower, set the extended property SchedulerDayScaleShowDayName to True to show the day name in the Scheduler.

Filtering & Search
Because the Scheduler in the Universal UI is fully integrated into the Thinkwise Platform, all native filtering and search capabilities are available to you when using the Scheduler. The same tools you use on any other subject work here too: the search bar, prefilters, and the (advanced) filter pop-up.
Performance matters here, loading large volumes of data has a direct impact on how the component performs. Keep the dataset as lean as possible. Ask yourself: does this Scheduler really need to show activities from two years ago, or bookings three quarters out? In most cases, the answer is no. A well-configured prefilter that restricts data to a relevant time window, such as the current or upcoming week, keeps the Scheduler responsive.
A practical approach is to set a sensible prefilter as the default. Users who need to look further back or forward can always adjust or clear the filter themselves.
Read the second part of this series, all about interacting with the scheduler, here: